
Open the Calendar
- Log in to your Buildern account.
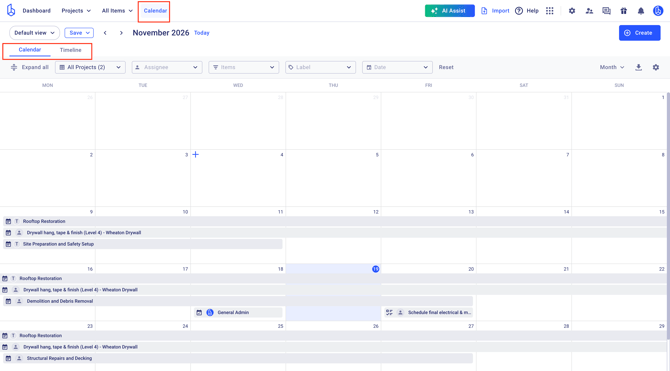
- Click Calendar in the top menu.
The page has two tabs: Calendar (a classic month, week, day or year grid) and Timeline (bars across days, in rows).
ℹ️ Note – You only see item types you have permission to view. For example, if your role can't view RFIs, RFIs won't appear.
Choose what to show: the toolbar
Use the toolbar filters to narrow down the calendar:
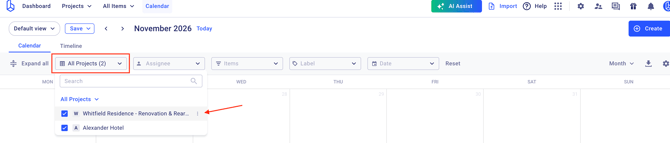
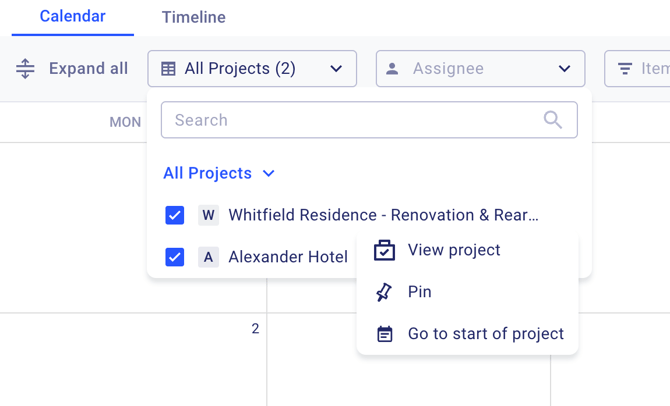
- Projects – select one or more projects. Hover a project to open its ⋯ menu and Go to start date, Pin or Change color.
- Assignee – team members, Subs/Vendors and clients.
- Items – Schedule, Selections and Allowances, To-Do, Daily Logs and RFI.
- Label – labels from Schedule, To-Dos, Daily Logs and RFIs.
- Date – a custom date range.
Click Reset to return to the saved view. Use the Month dropdown to switch between Day, Week, Month and Year, the arrows to move between periods, and Today to jump back to today.
💡 Tip – Click Expand all to show every item in a busy day. Each cell shows up to 10 items; click +N more to see the rest.
Use the Timeline tab
The Timeline shows each item as a bar across its dates, grouped in rows. Click Group by to choose:
- Assignee (default) – one row per person, bars in the project's color.
- Project – one row per project.
- Type – one row per item type.
- Label – one row per label, plus a No label row. An item with two labels appears in both rows.
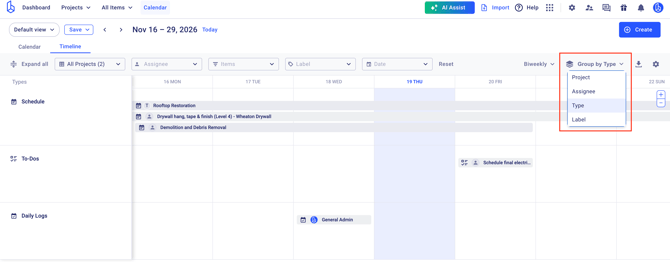
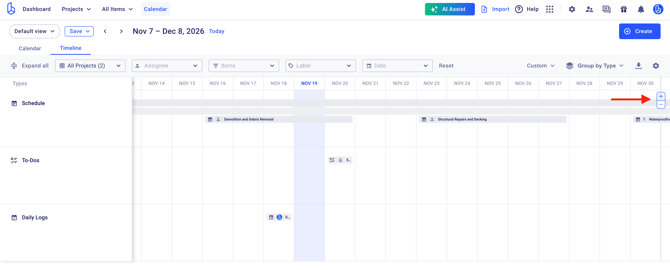
Use the + and − buttons on the right to zoom in or out and fit more days on screen.
Set the display order
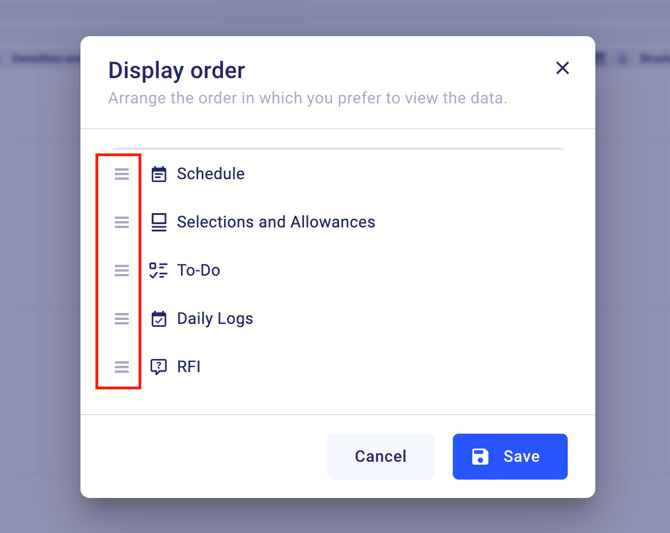
Choose which item types appear first in each day:
- Click the gear icon at the right end of the toolbar.
- Select Display order.
- Drag the types into the order you want.
- Click Save.
Types at the top always show first, so they're the last to be hidden under +N more.

Save your setup as a Calendar View
Calendar Views save your filters, grouping, display order and tab, so you can switch between setups instead of resetting filters each time.
- Set up the filters and settings you want.
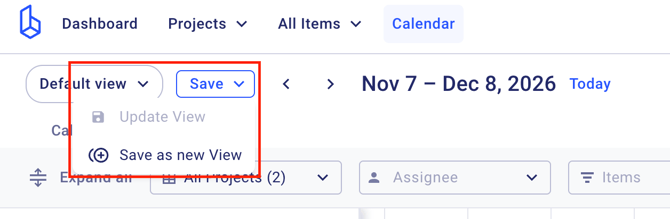
- Click Save, then choose Update view or Save as new.
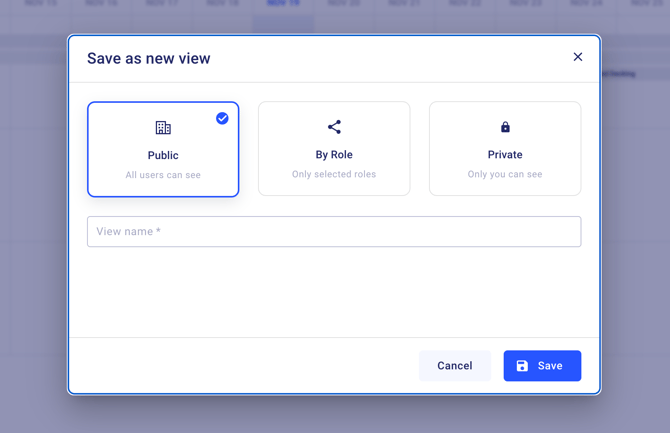
- For a new view, choose who can see it: Public, Accessible by role or Private.
Switch views from the view menu in the top-left corner (for example, Default view).
View item details
Click any item to open its details card. You'll see the title, status, project, dates, duration and assignees. From the card you can:
- Click the project name to open it.
- Use the ⋯ menu for quick actions.
- Click Open to go to the full item.
If a day has several items, you'll see a list first. Click an item to open its card, and click Back to return to the list.
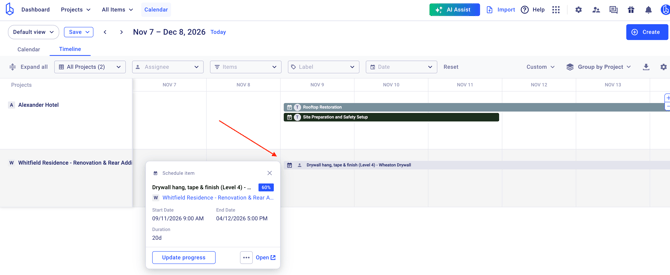
When you open the action menu for an item, you'll see several available actions:
- Edit – Modify the item.
- View – Open the item in view mode.
- Confirmation – Manage the item's confirmation.
- Add predecessor – Set a preceding task or item.
- Add child item – Create a child item under the selected one.
- Notify Assignees – Send notifications to the assigned users.
- Duplicate – Create a copy of the item.
- Complete – Mark the item as completed.
- Add internal notes – Add notes visible internally.
- Change color – Assign a distinguishing color to the item.
- Watchers – Manage users watching the item.
- Delete – Remove the item.
Please note that the available actions may vary depending on the item type and your Group by settings. Some actions might not be available for certain types of items.
Most importantly, you can assign distinguishing colors to different elements in your Timeline. Each transaction type, project, item, label, and assignee can have its own color, making it easier to visually distinguish between them and navigate your Timeline.
Create items from the Calendar
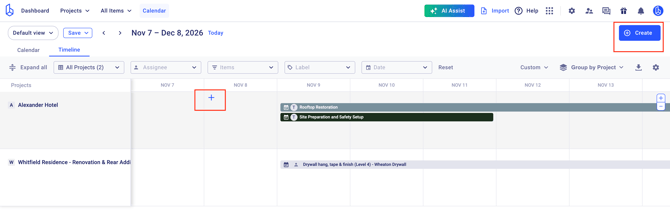
- Click + Create in the top-right corner and choose Schedule (Task or Milestone), Selections, To-Dos, Daily Logs or RFI. Then pick the project.
- Or hover a day and click +. The date is filled in for you. In a Timeline row grouped by Assignee, the person is filled in too. In a row grouped by Type, that type is used.
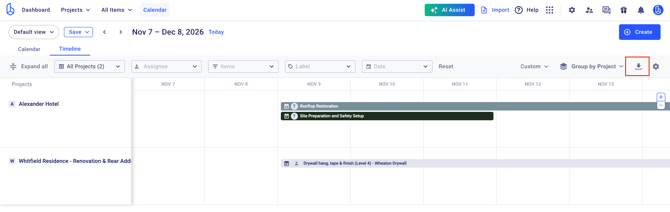
Download the Calendar as PDF
Click the download icon in the toolbar to save the current calendar as a PDF.
Add the Calendar to a dashboard
You can add a Calendar widget to the company dashboard or to a project's Overview. Choose a Calendar View in the widget settings, then adjust it. Changes in the widget don't change the view itself.
📖 Learn more about Widgets explained
Happy Building!