In simple terms, working with a fixed price completion percentage means invoicing upon category completion or per cost code.
💡Watch our detailed video guide for a deeper explanation of invoicing with fixed price completion percentage ⬇️
So, here’s how to invoice with the completion percentage in Buildern.
Step 1. Set the Fixed Price Completion Percentage Invoicing as Your Default Type
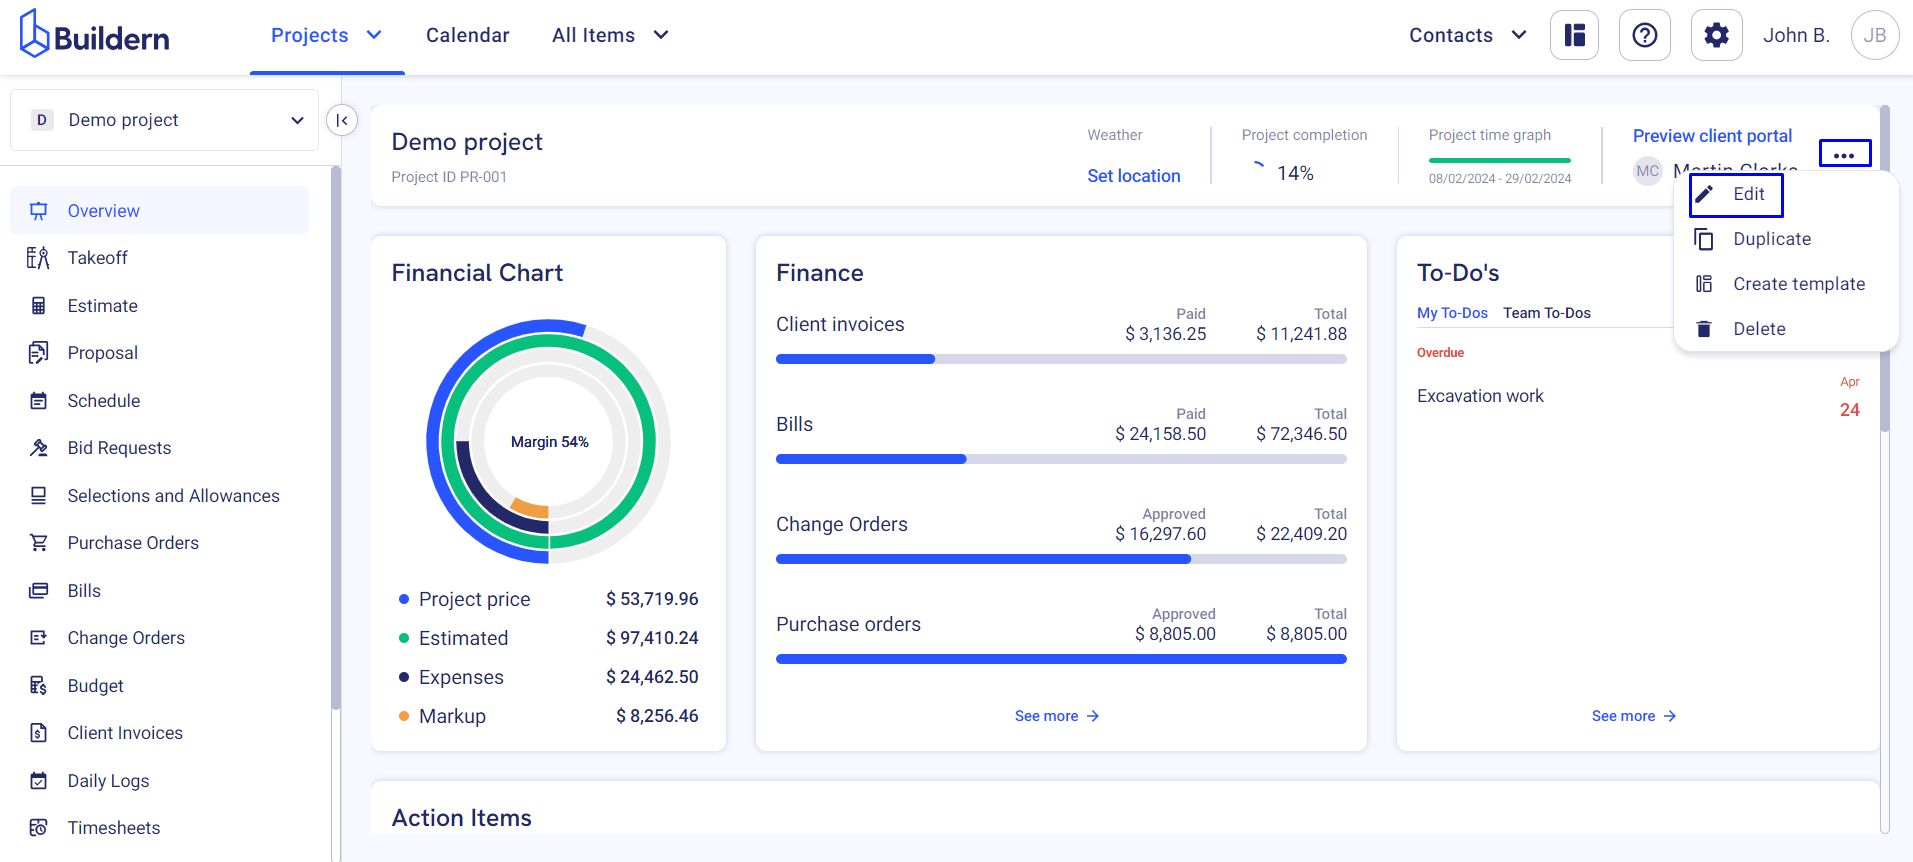
Go to your project’s settings. From the project’s Overview click on the three dots on the right (next to the client's portal) and click Edit.
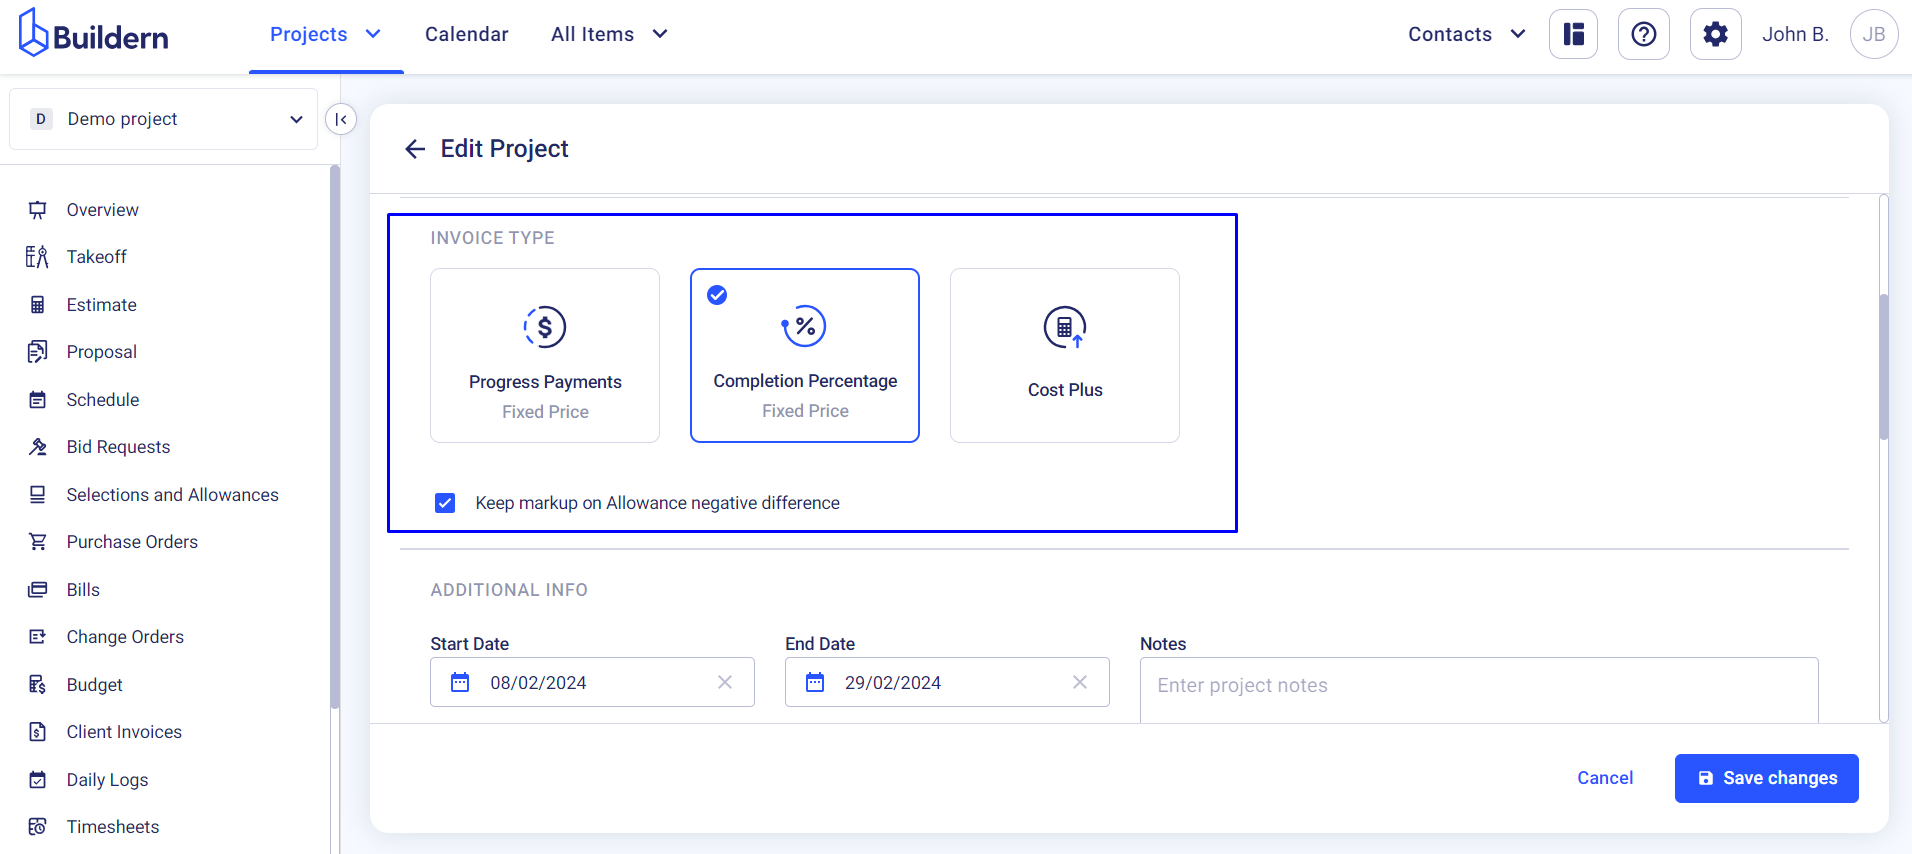
From the options available choose Completion Percentage and Save the changes.
Step 2. Create an Invoice for Your Completion Percentage
Go to your project’s Client Invoices module.
Click the Create button to begin.

Start with customizing your invoice, by adding such details as:
-
The name
-
Invoice ID (if you don’t assign a unique ID, Buildern will auto-assign it)
-
Invoice date
-
Due date
-
Introduction text (optional)

You cannot switch back and forth between the two options as that will lead to miscalculations.
So, choose your preferred method before creating the first invoice. In this case, as several dozens if not hundreds of cost codes are used through construction projects, invoicing per category becomes more efficient.
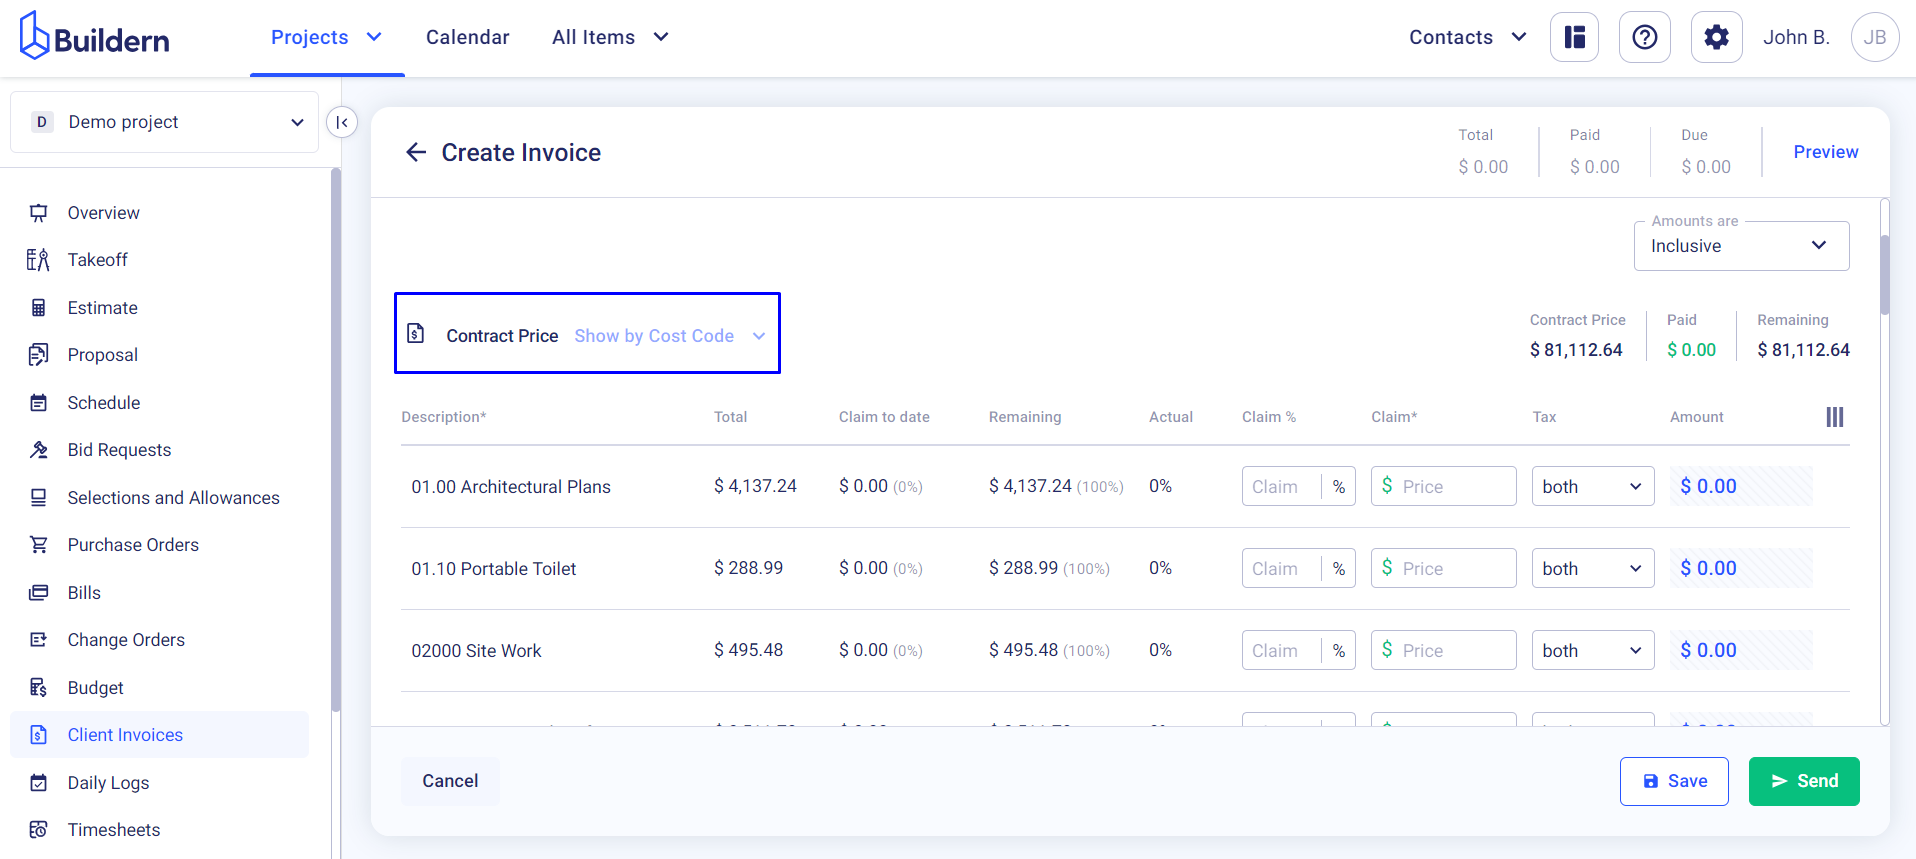
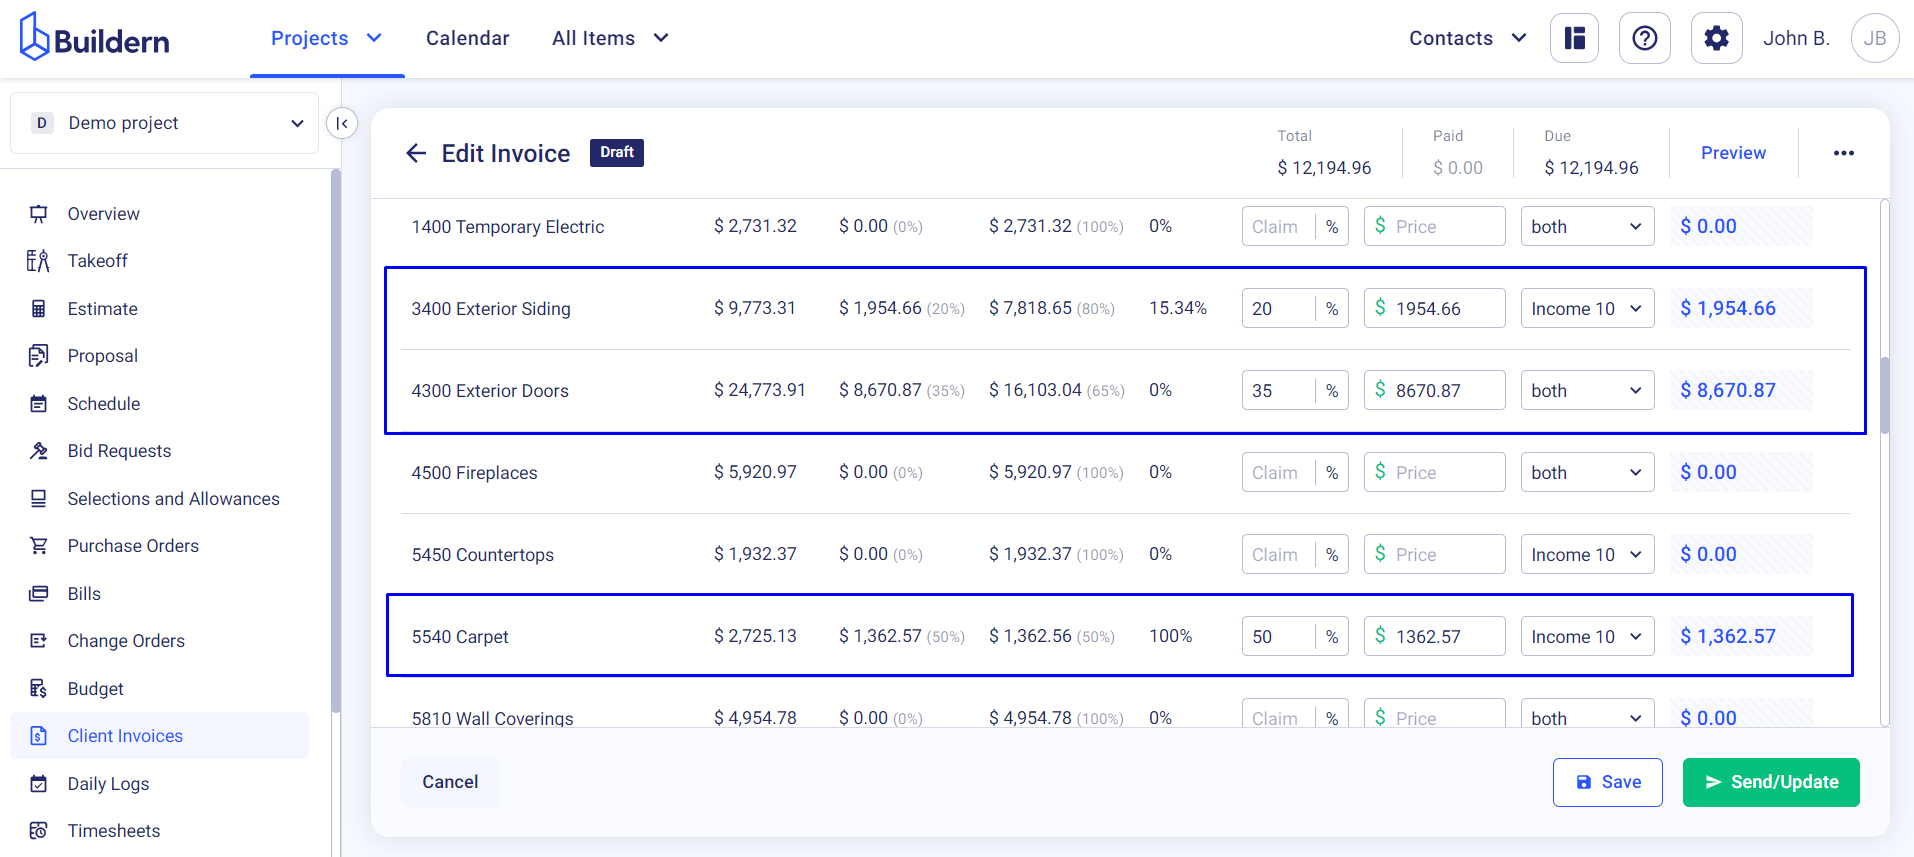
Step 3. Define Invoicing Amounts
As long as you work with the completion percentage type, you will see all your cost categories displayed under the Contract Price section.
And here’s a brief description of the columns and data you will see here:
-
Description - the cost code and its name
-
Total - the total estimated amount
-
Claim to date - the amount you’ve already claimed, i.e. invoiced for the item
-
Remaining - the balance that still needs to be invoiced
-
Actual - budget for the cost vs the amount you’ve built to date
💡For instance, if you’ve estimated that the category would cost you $1,500 and you’ve spent and paid your sub/vendors $500, the actual will be 33.3% complete based on your budget numbers.
-
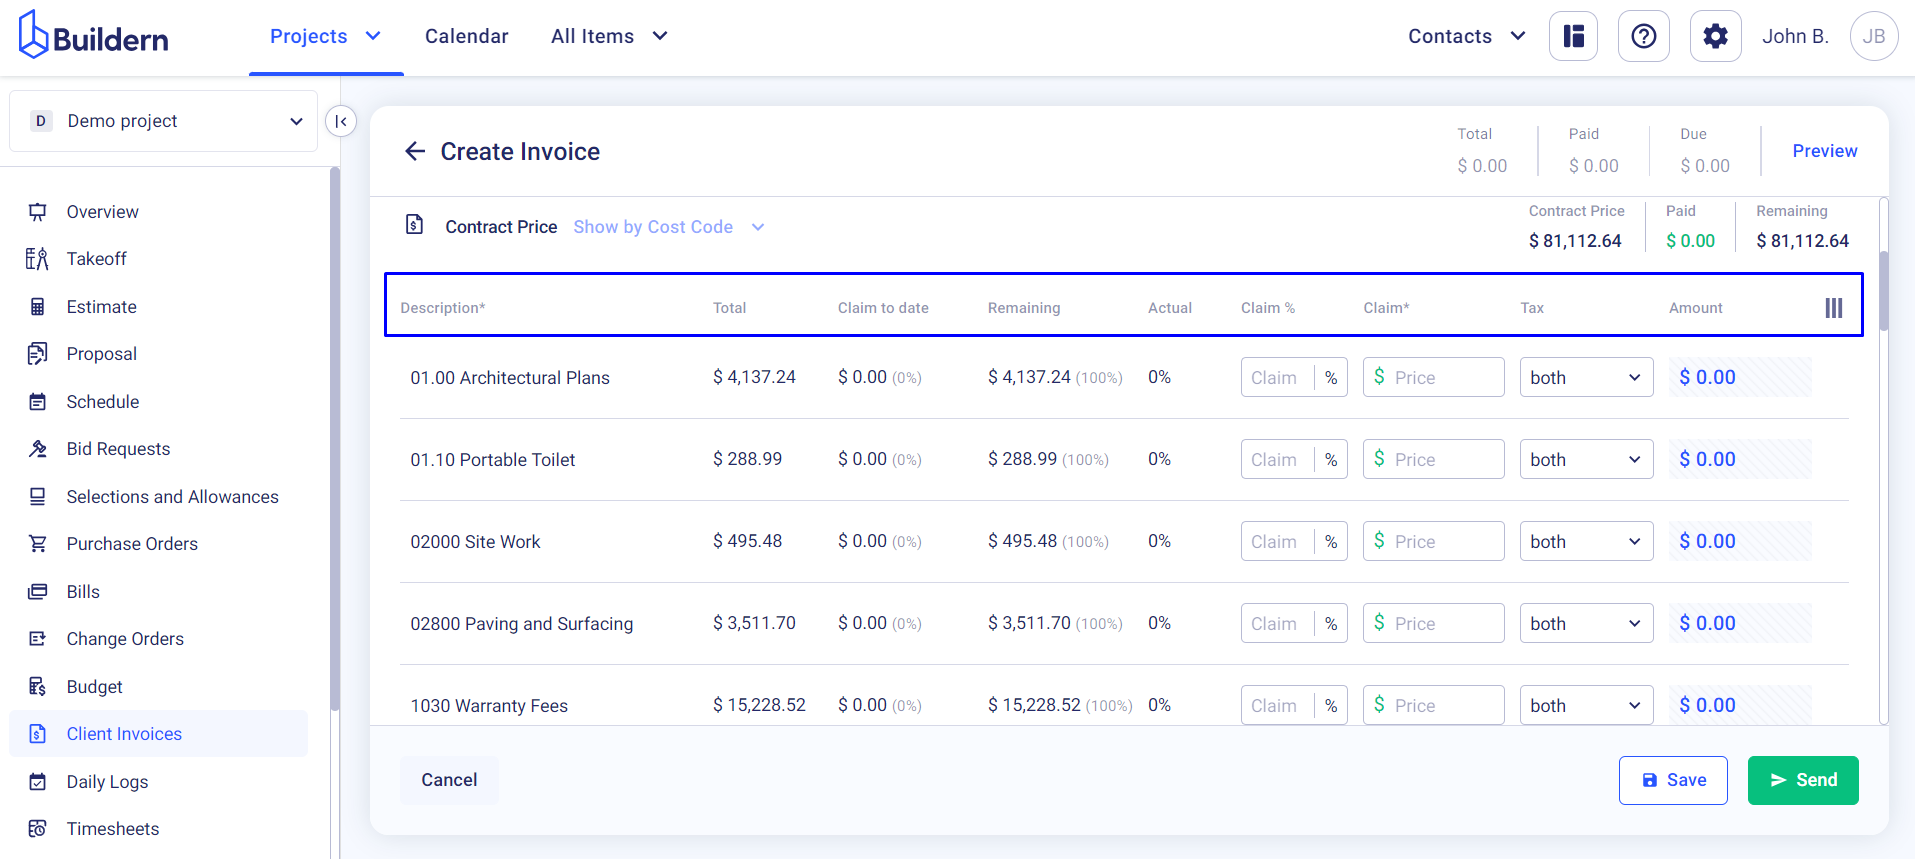
Claim % - the percentage of the total cost category you wish to invoice for at this stage. This can be different from the actual percentage
-
Claim - the amount that is automatically calculated based on the percentage you provide. This can be done vise versa, meaning if you add the claim amount, Buildern will calculate the claim percentage automatically
-
Tax - if you have your taxes enabled through the settings, it will be calculated automatically based on the rate you provide (if you don’t have taxes, this column will be hidden from you)
-
Amount - the final total invoiced amount
Once you figure out the above, you can start putting the amounts into the Claim % column that you want to invoice for this particular invoice. Here’s our example with the highlighted cost categories that we’ve included in this invoice:
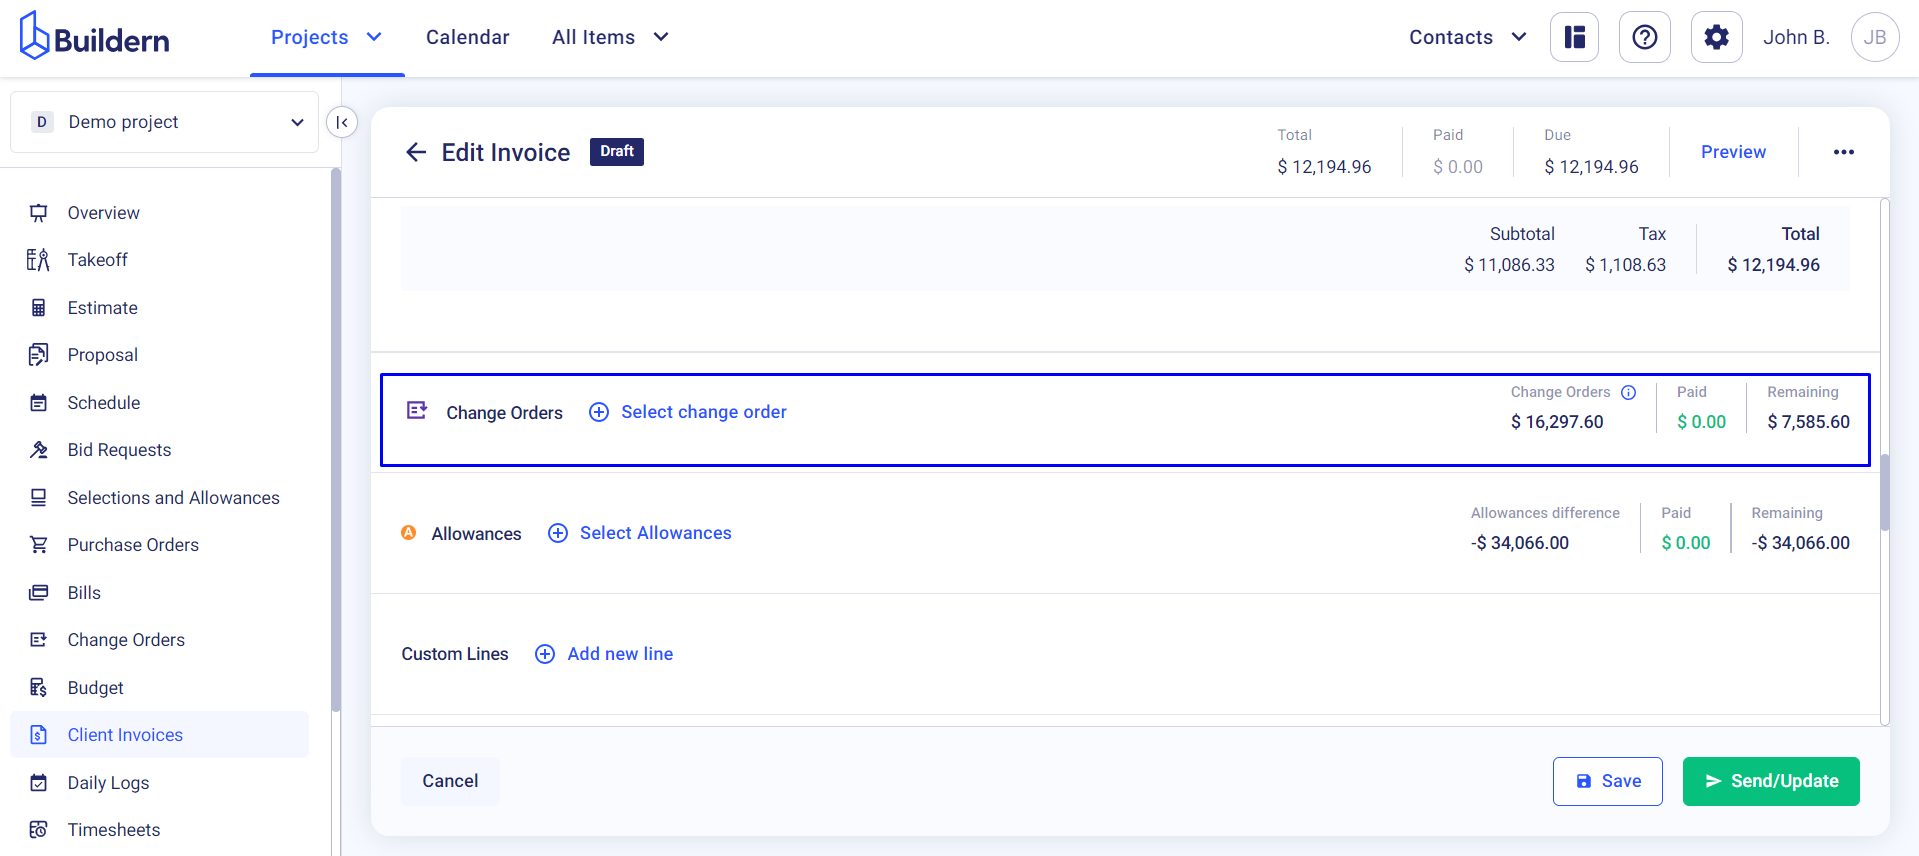
Step 4. Selecting Change Orders (Optional)
Once you are done with the contract price, you can also add change orders to your invoice.
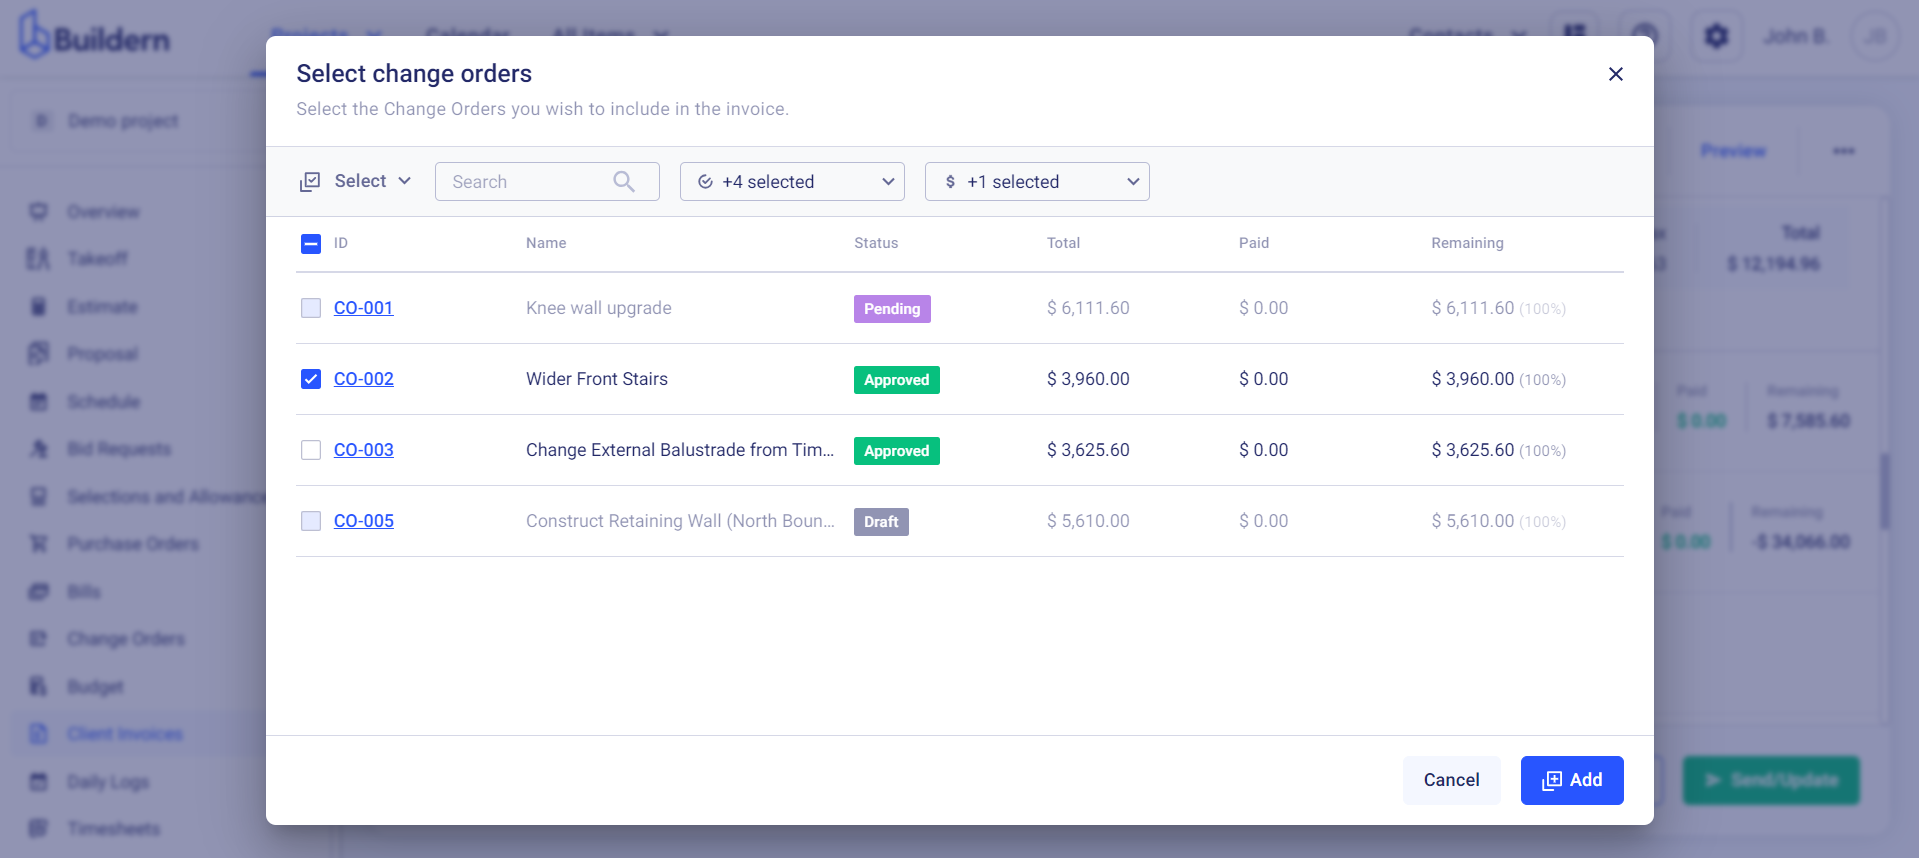
Filter your change orders/variations according to status and select those that apply to this invoice.
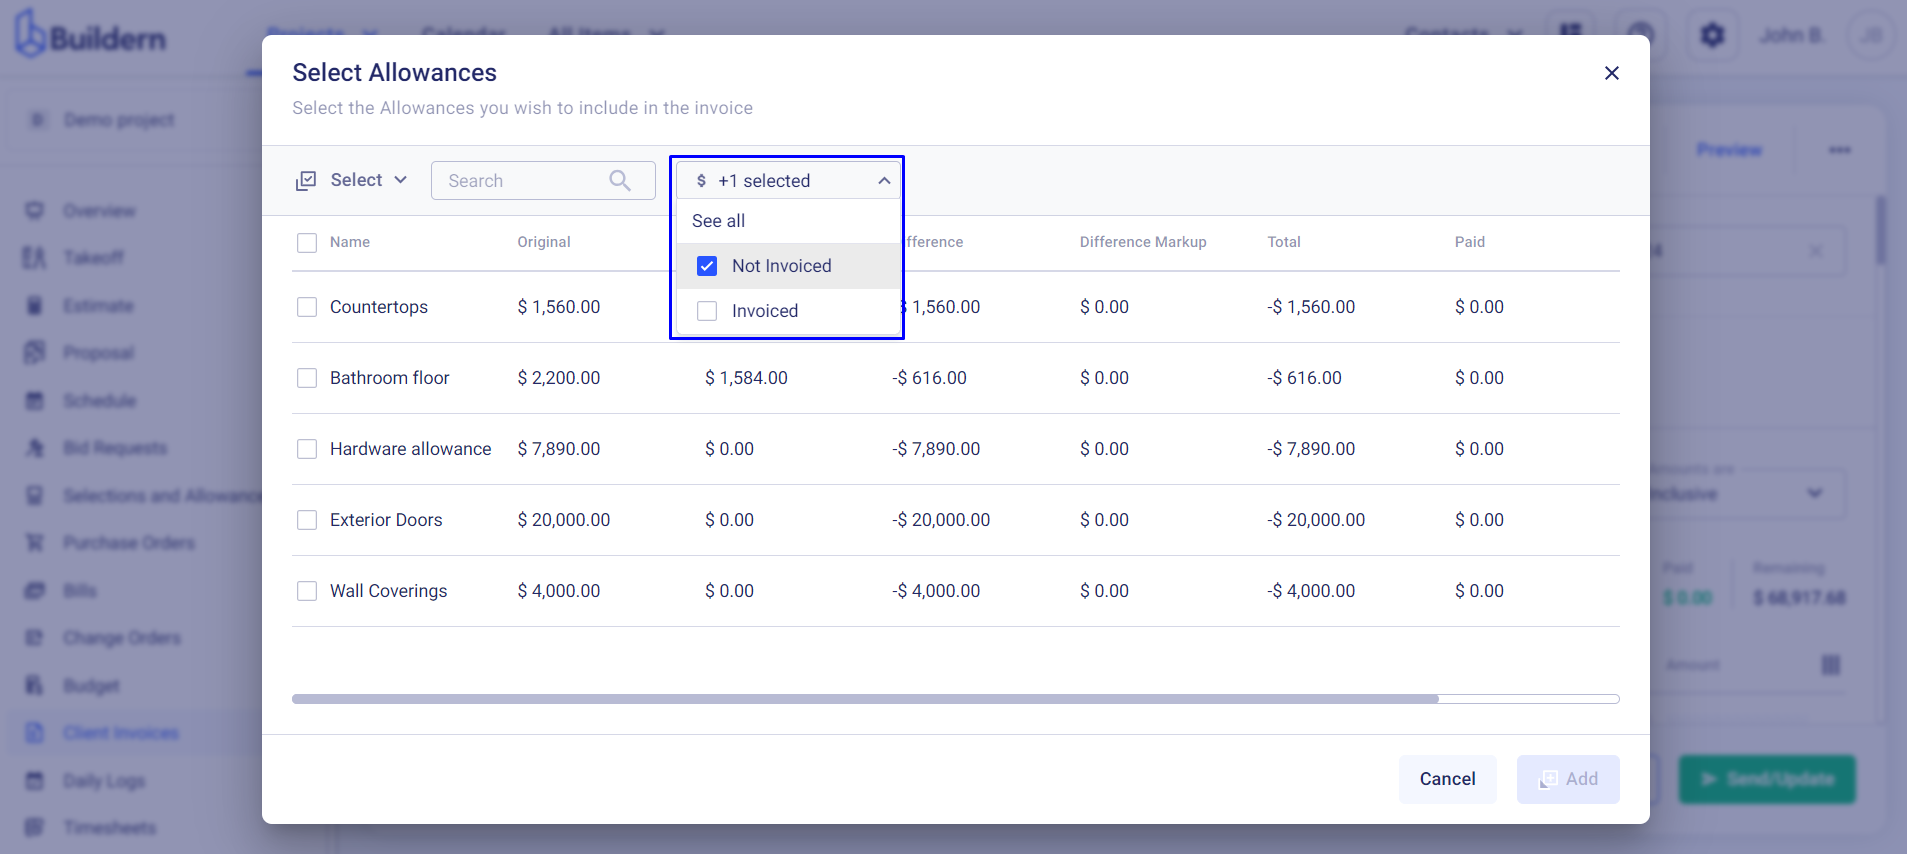
Step 5. Selecting Allowances (Optional)
You can also add allowances to your invoice by selecting the items from the allowances tab.
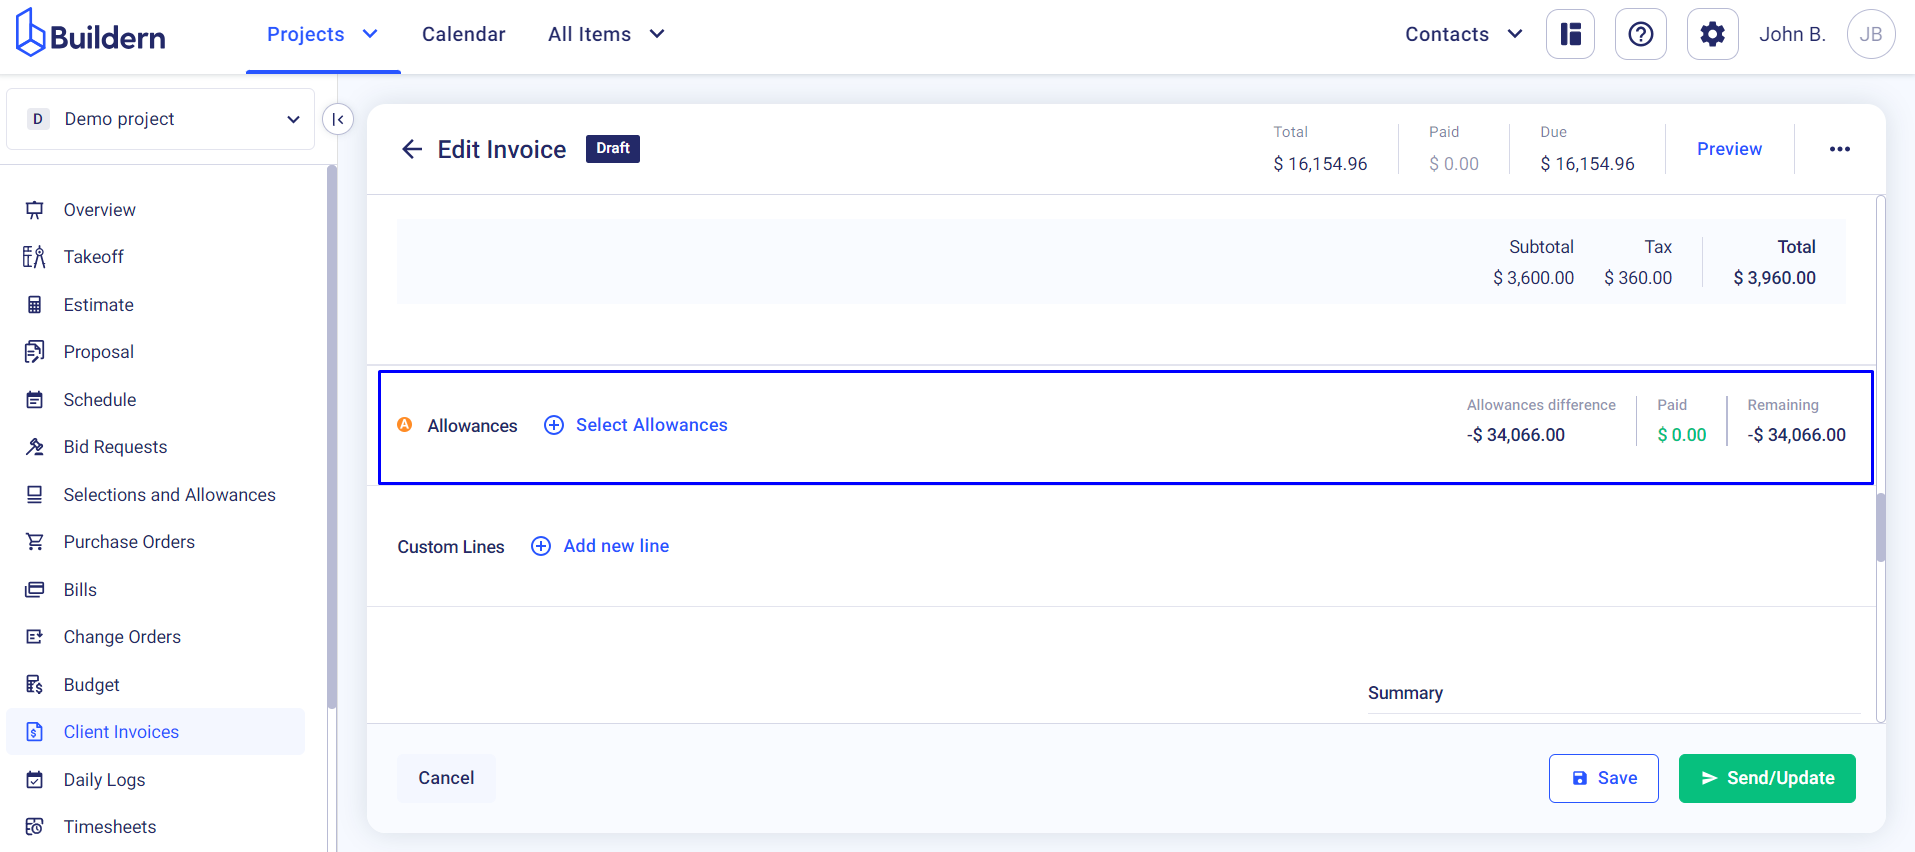
Again, filter allowance based on the Invoiced and Not invoiced statuses and choose those that need to be issued with this invoice.
Step 6. Adding Custom Lines (Optional)
Now, Buildern allows you to go the extra mile with your invoice, allowing you to add custom lines by clicking the Add New Line button at the bottom of the page.
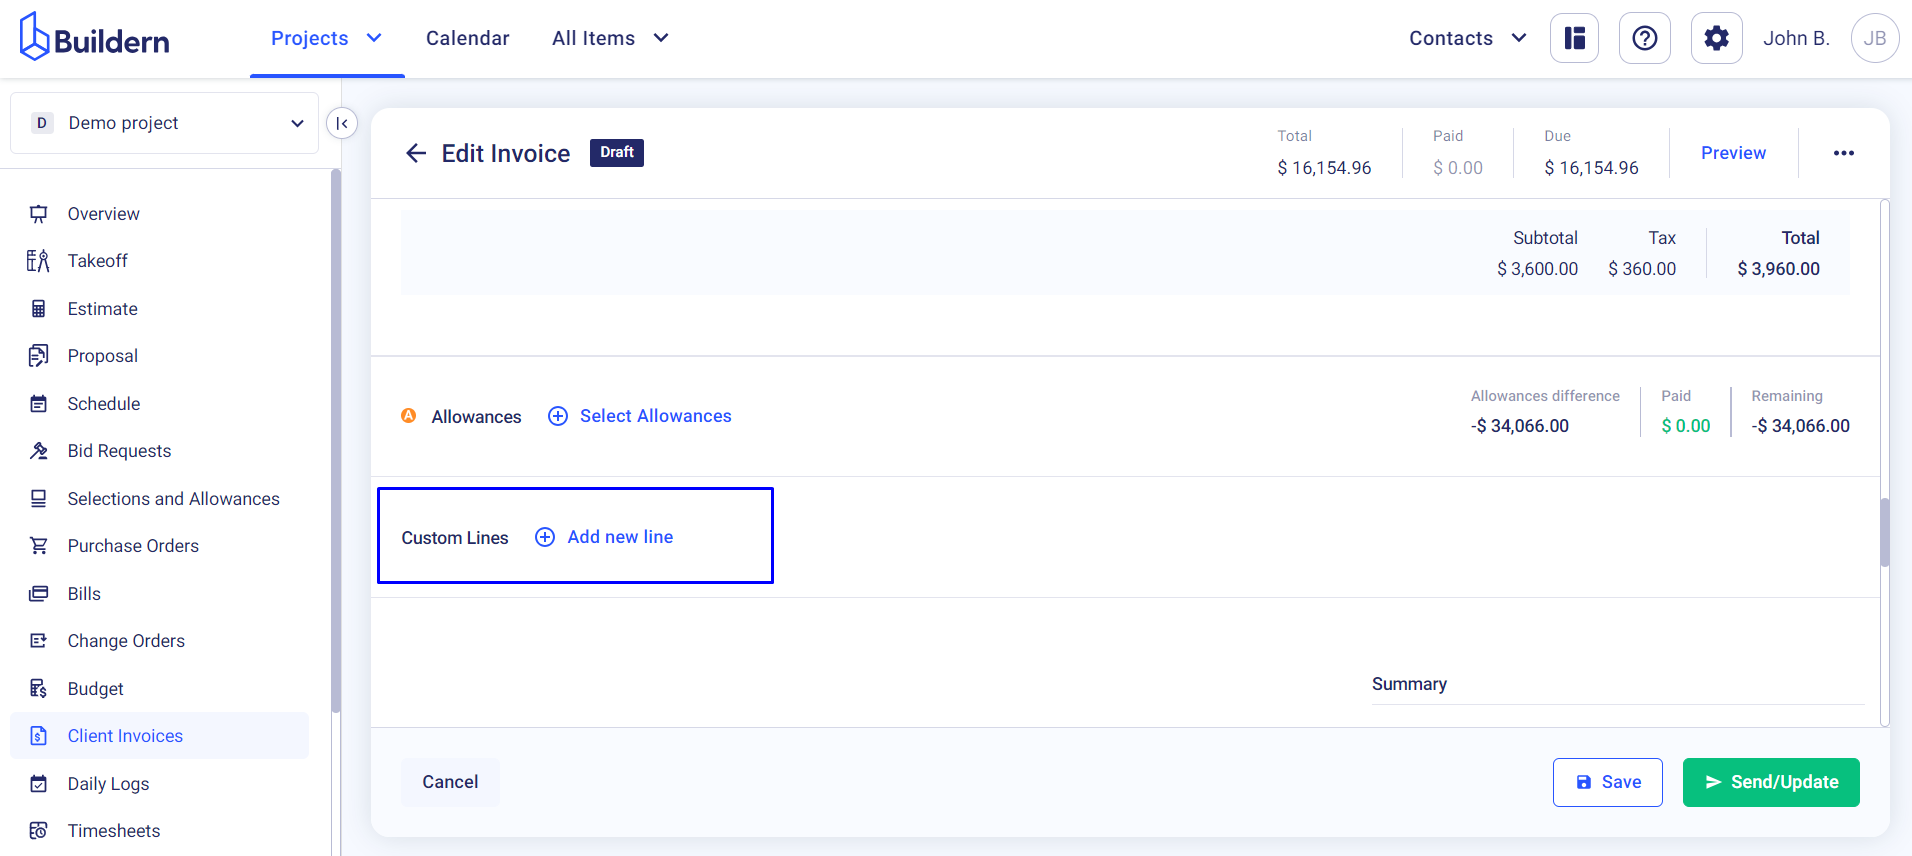
This can be used for any additional fees or services not covered in your contract price, change orders, or allowances.
For instance, if you complete a project where special environmental waste removal services were required, which were not initially included in the contract, they can add this as a custom line to the invoice. It can also be a negative amount for cases when you want to offer a discount to your client or provide compensation for any inconvenience.
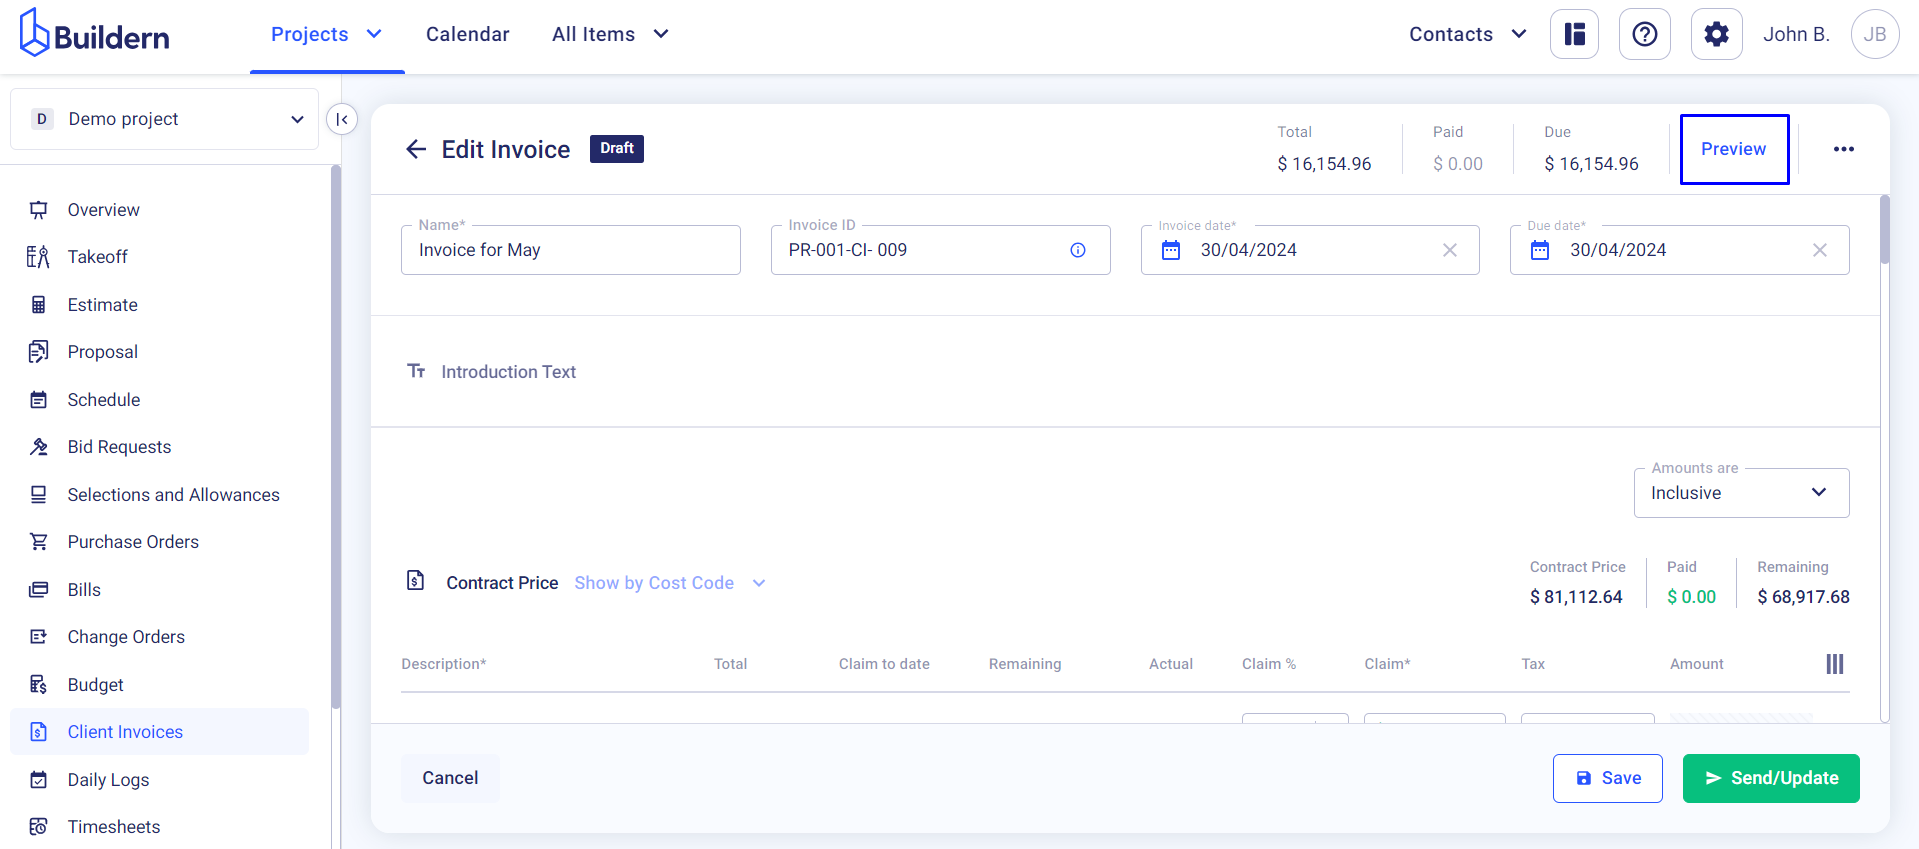
Step 7. Preview and Send the Invoice
Now that you have finalized all the item lines, you can preview the invoice before sending it to your client.
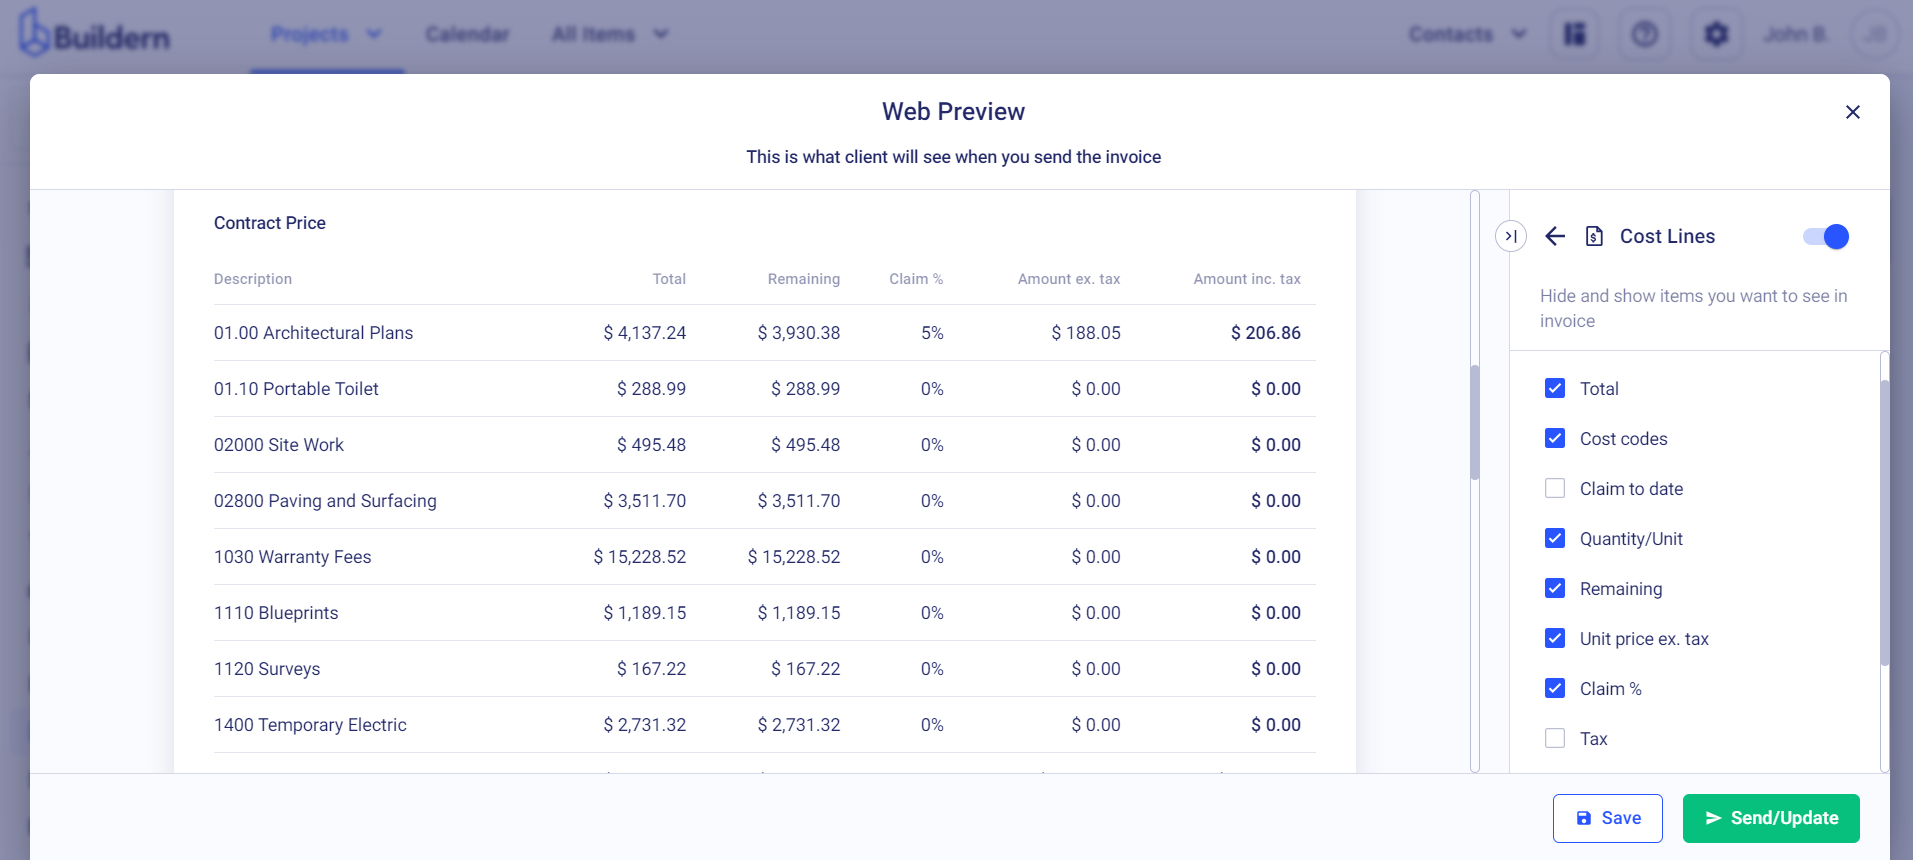
Click the Preview button in the upper right corner to see it and also customize the final layout.
Here you will see your invoice layout settings with tools to organize the data you want to share with your clients. If you want to show or hide any fields from your invoice, you can make the corresponding changes here.
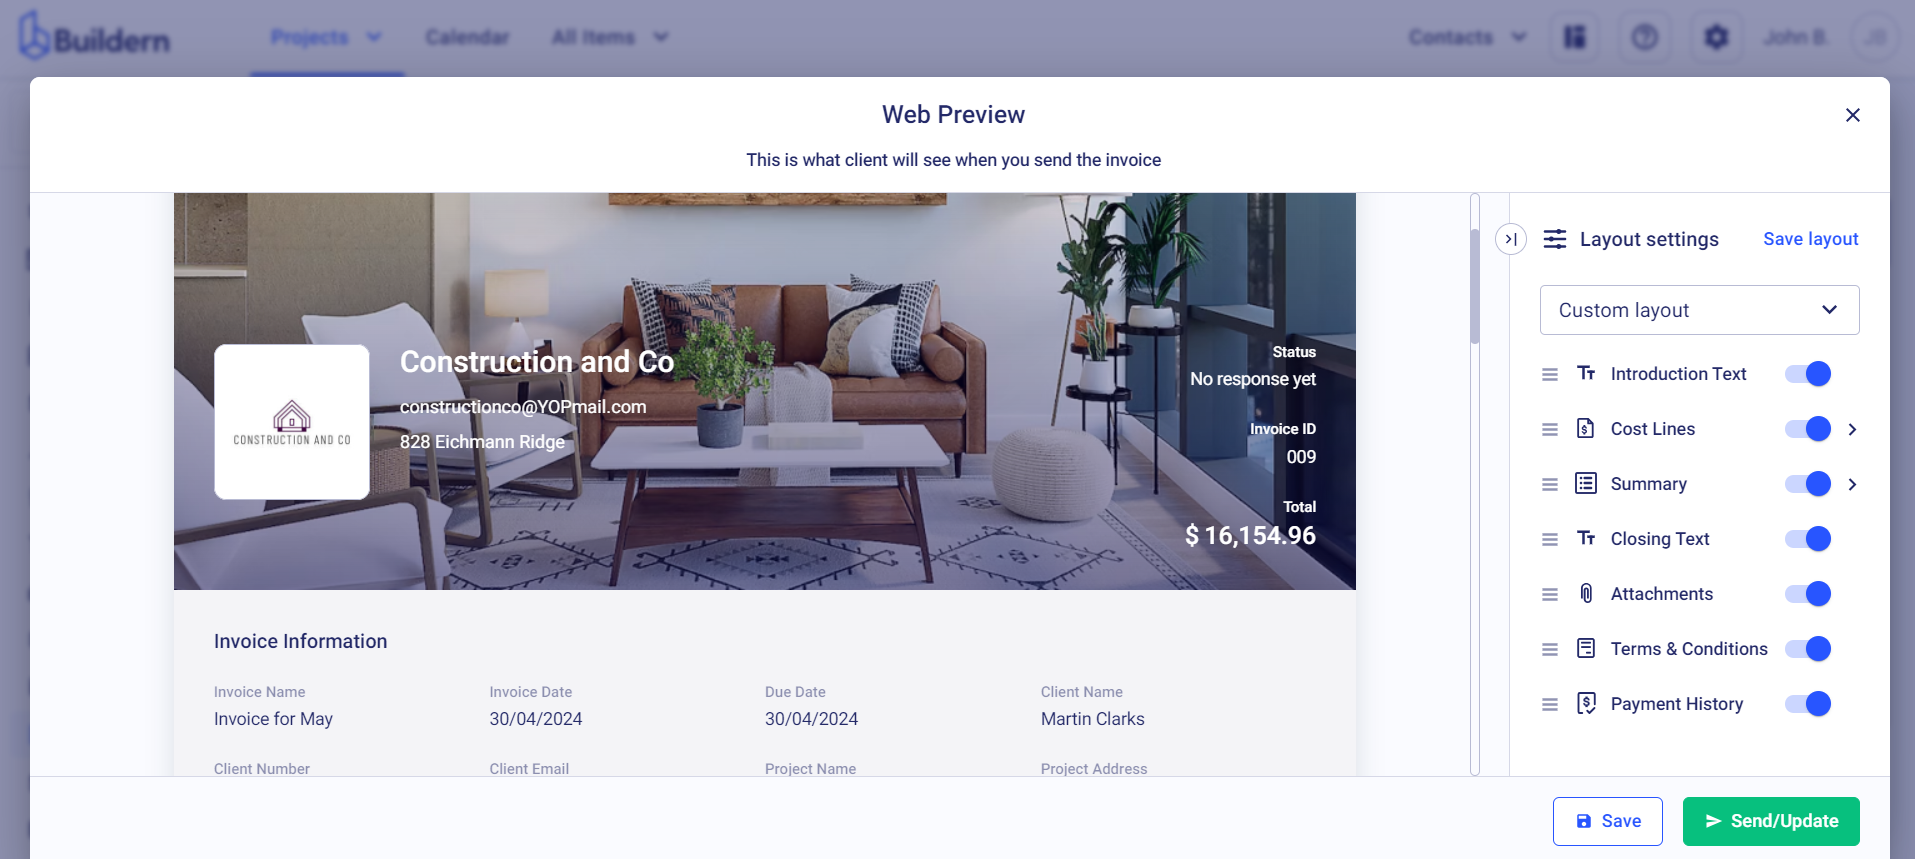
Particularly, you can configure the columns shown for the cost lines. For instance, you can hide the claim to date, tax, or any other columns if that information is unimportant to your client.
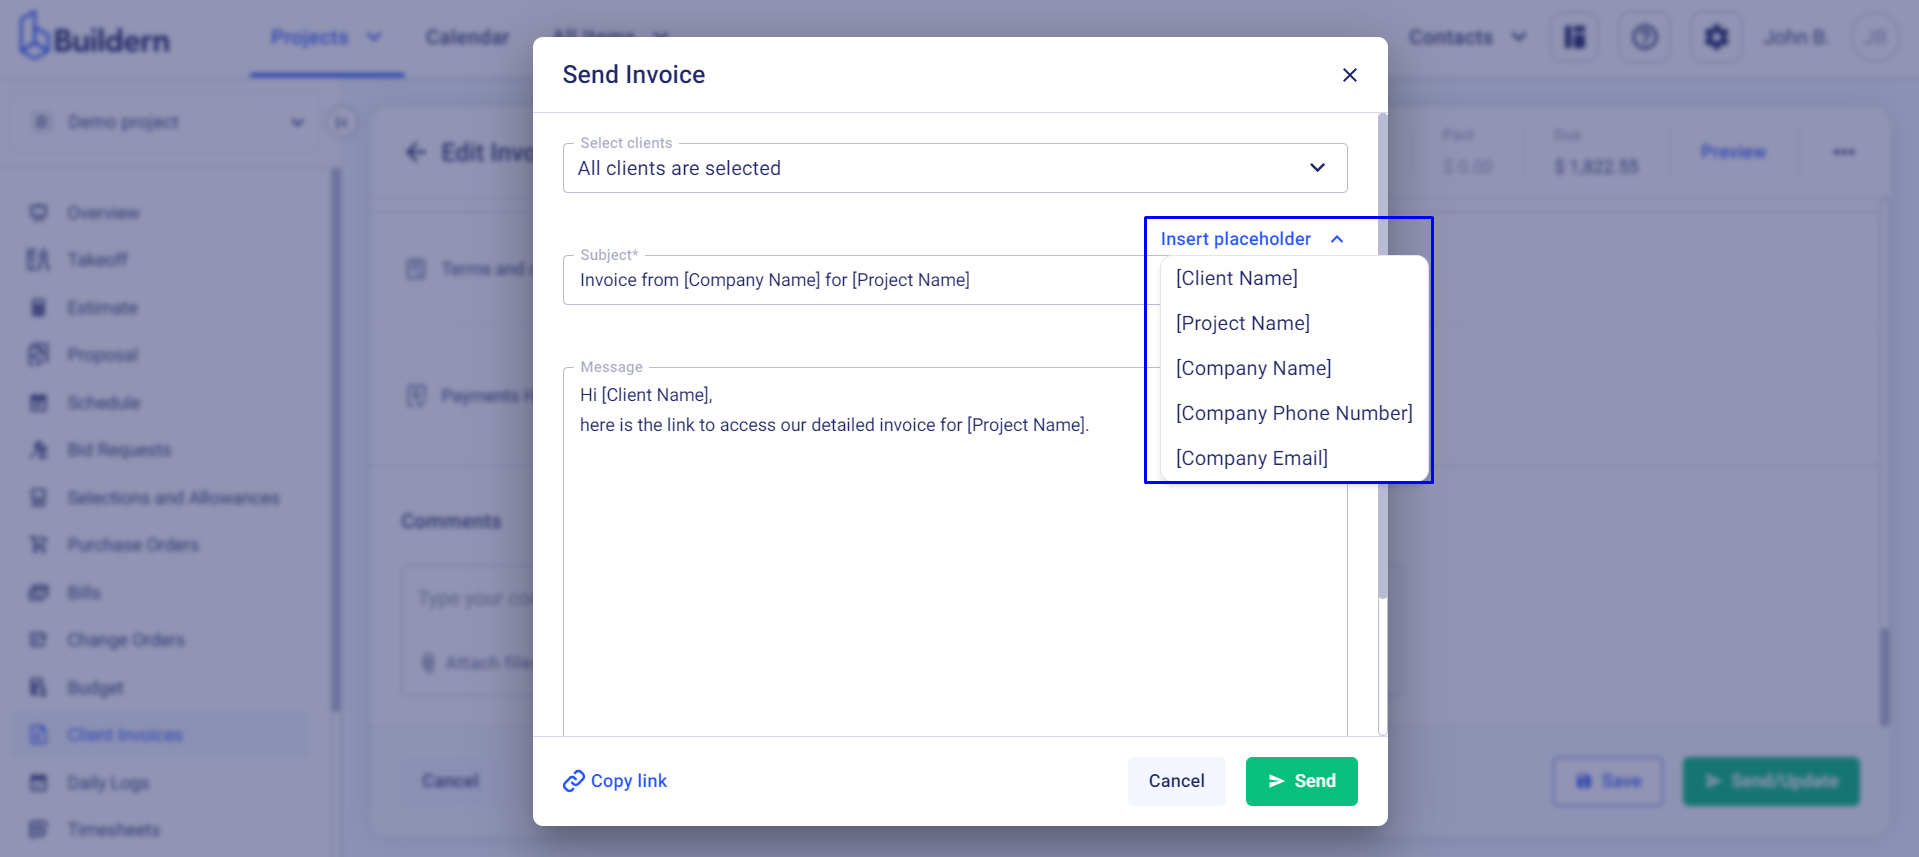
Let’s now send this invoice to your client. In the "Send" tab, you can enter your client's email address and customize the subject line and the message with pre-made placeholders.
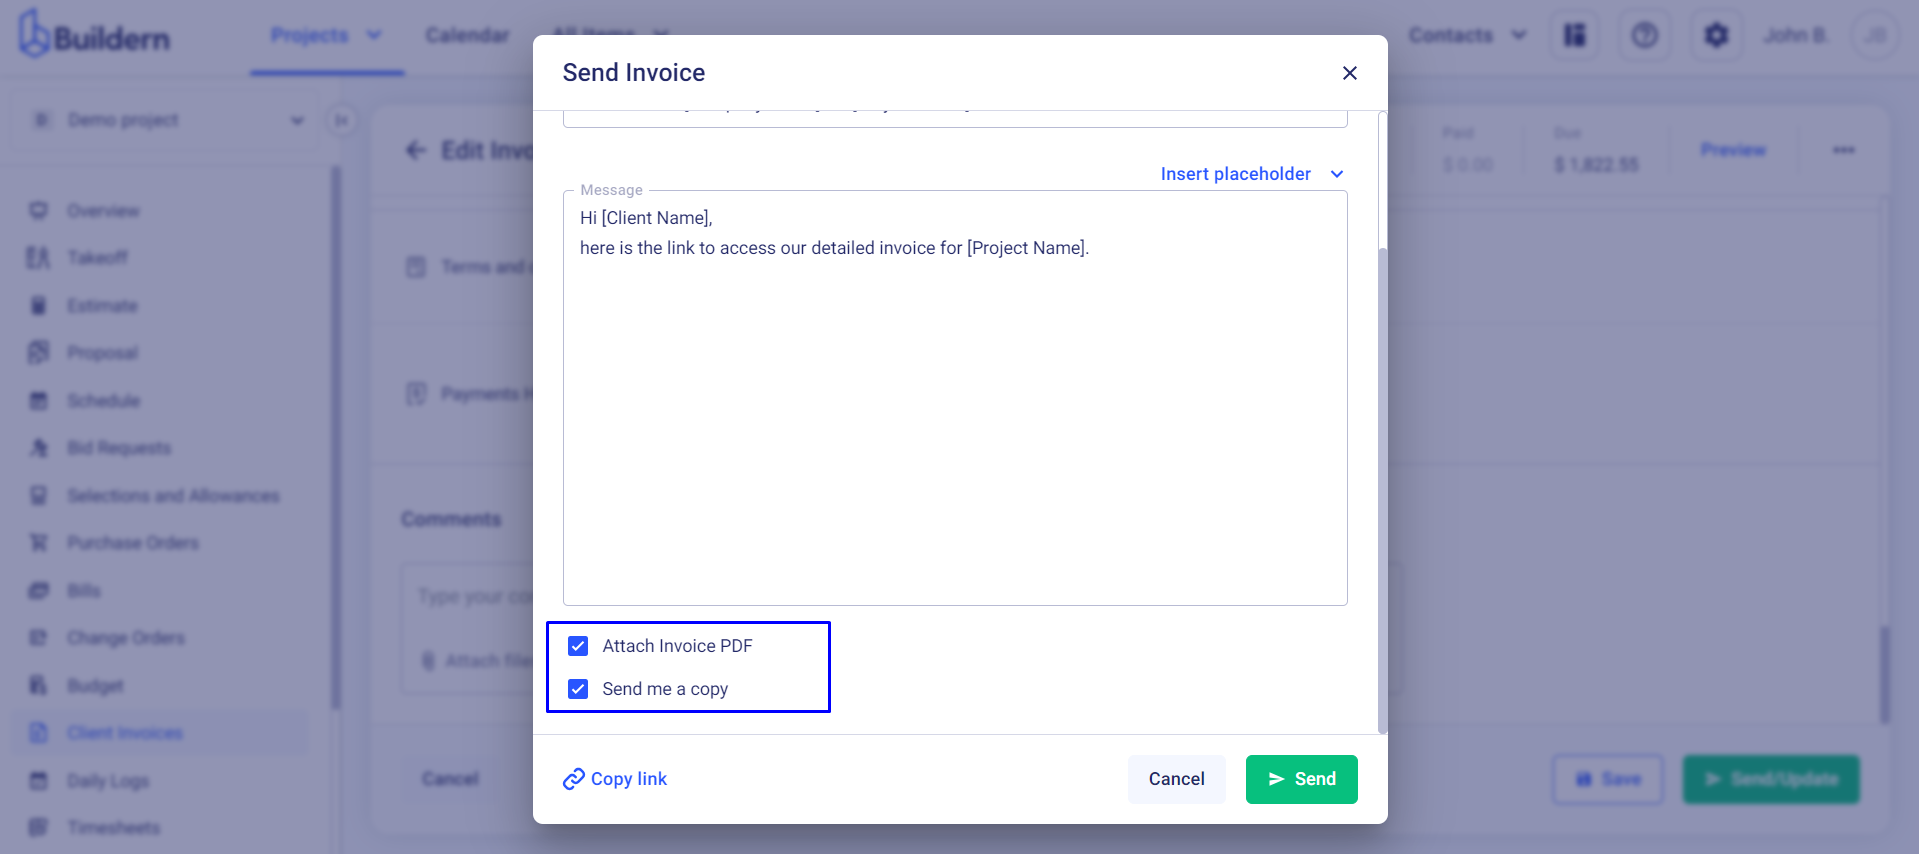
Moreover, Buildern allows you to attach a PDF version of your invoice to the email and also send a copy to yourself to ensure everything is correct before the client receives it.
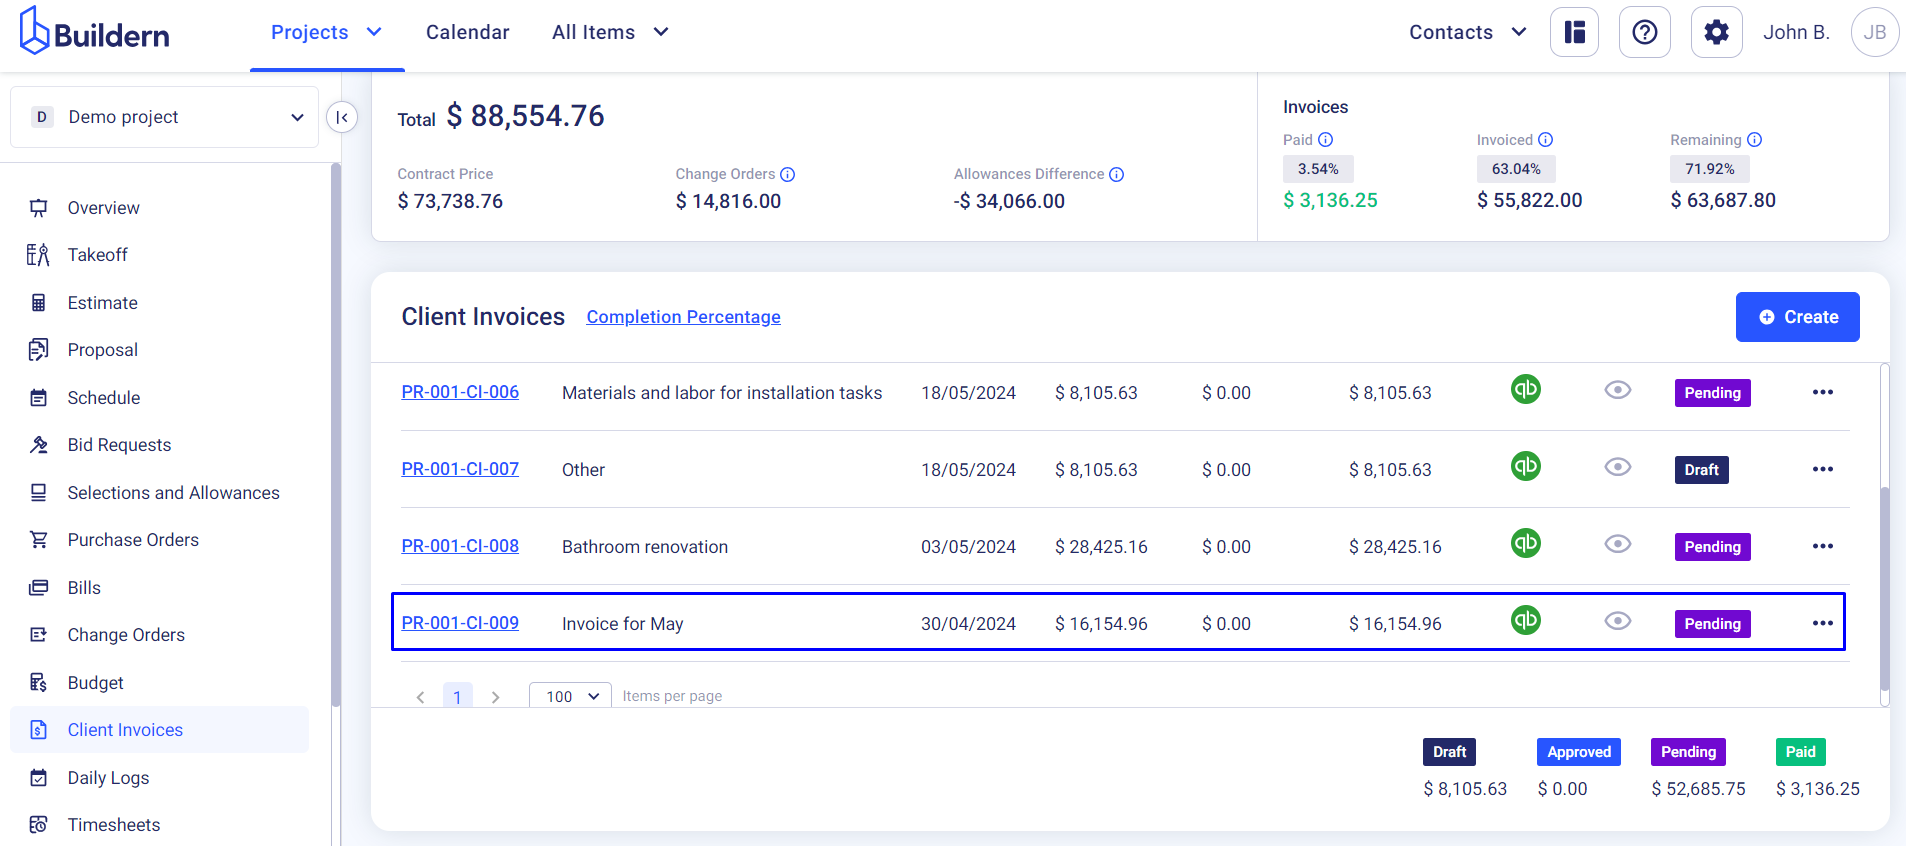
Once you send the invoice, it will appear among your other invoices with the Pending status.
💡Recommended Reading
How to Forward Your Subcontractor and Vendors Emailed Invoices to Buildern to Create Bill