💡First of all, let’s understand the idea behind the feature.
Buildern assigns a unique email address to each company. This enables you to either forward the emailed bills from the subcontractors to Buildern or let them send the bills directly to your Buildern account. Thus, the feature significantly simplifies the billing process and enhances the overall efficiency.
The software automatically creates draft bills upon receiving the email, populating some details based on the information provided in the email. If subcontractors and vendors attach files such as invoices or receipts, everything will be added as an attachment to the created bill in Buildern.
This ensures that all relevant documentation is readily available for review.
Once the bills are received, you can review and verify the details before approving them.
To get started, follow the “All Items > Bills” path from your Buildern dashboard.
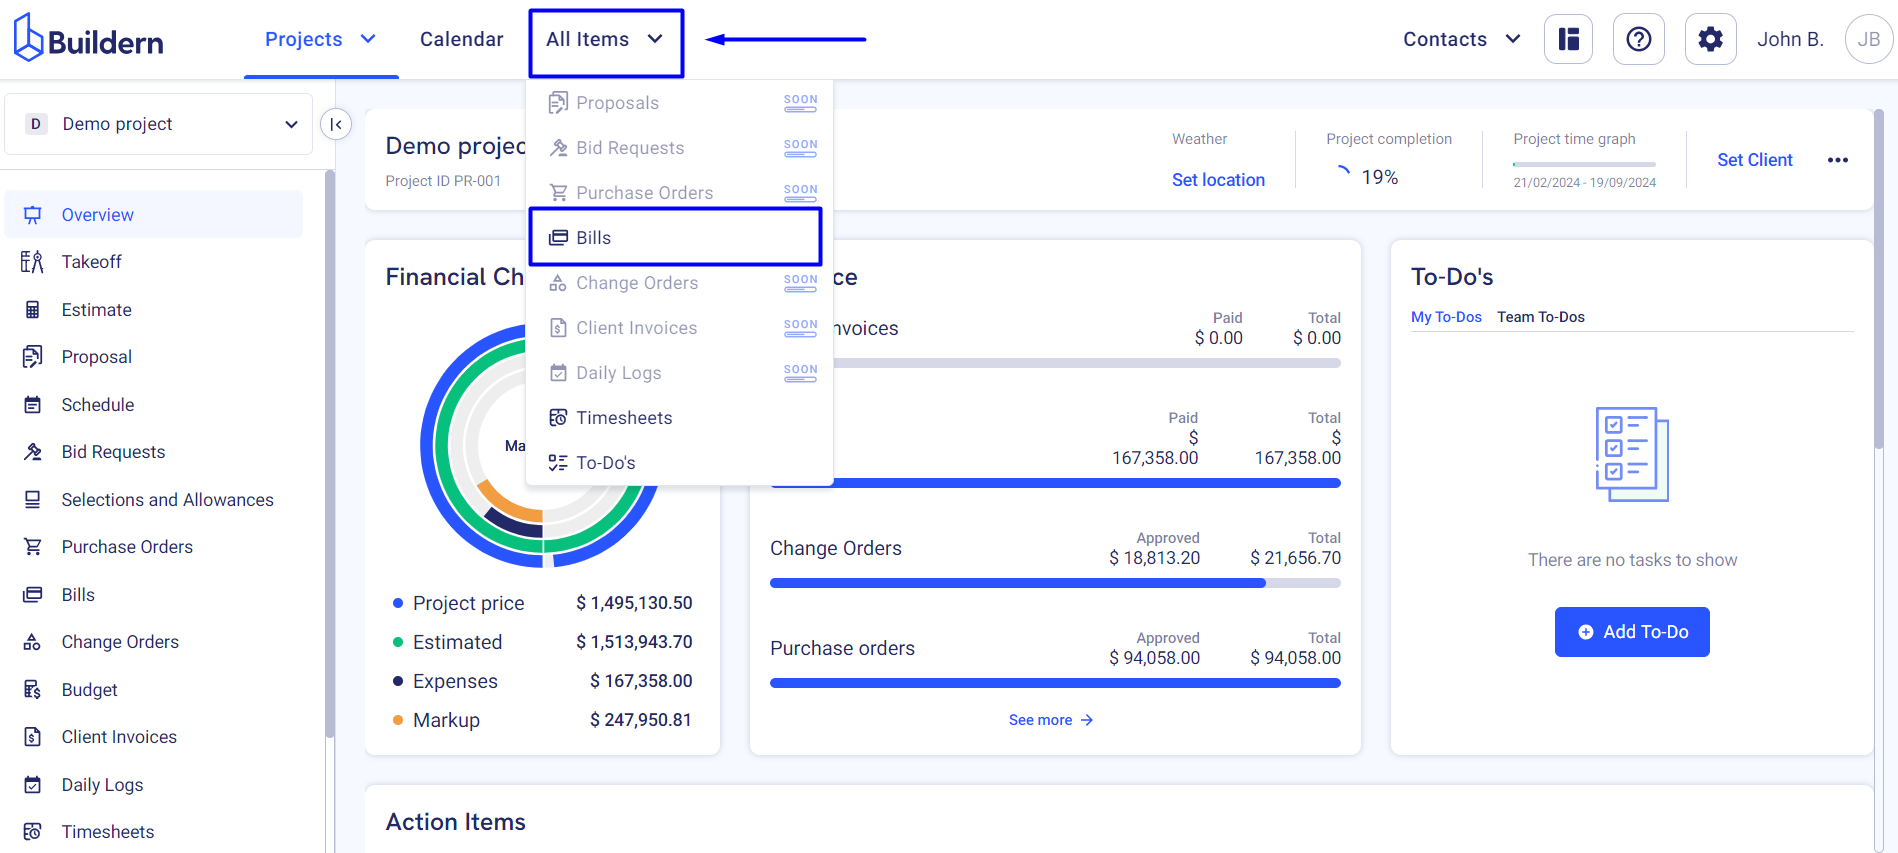
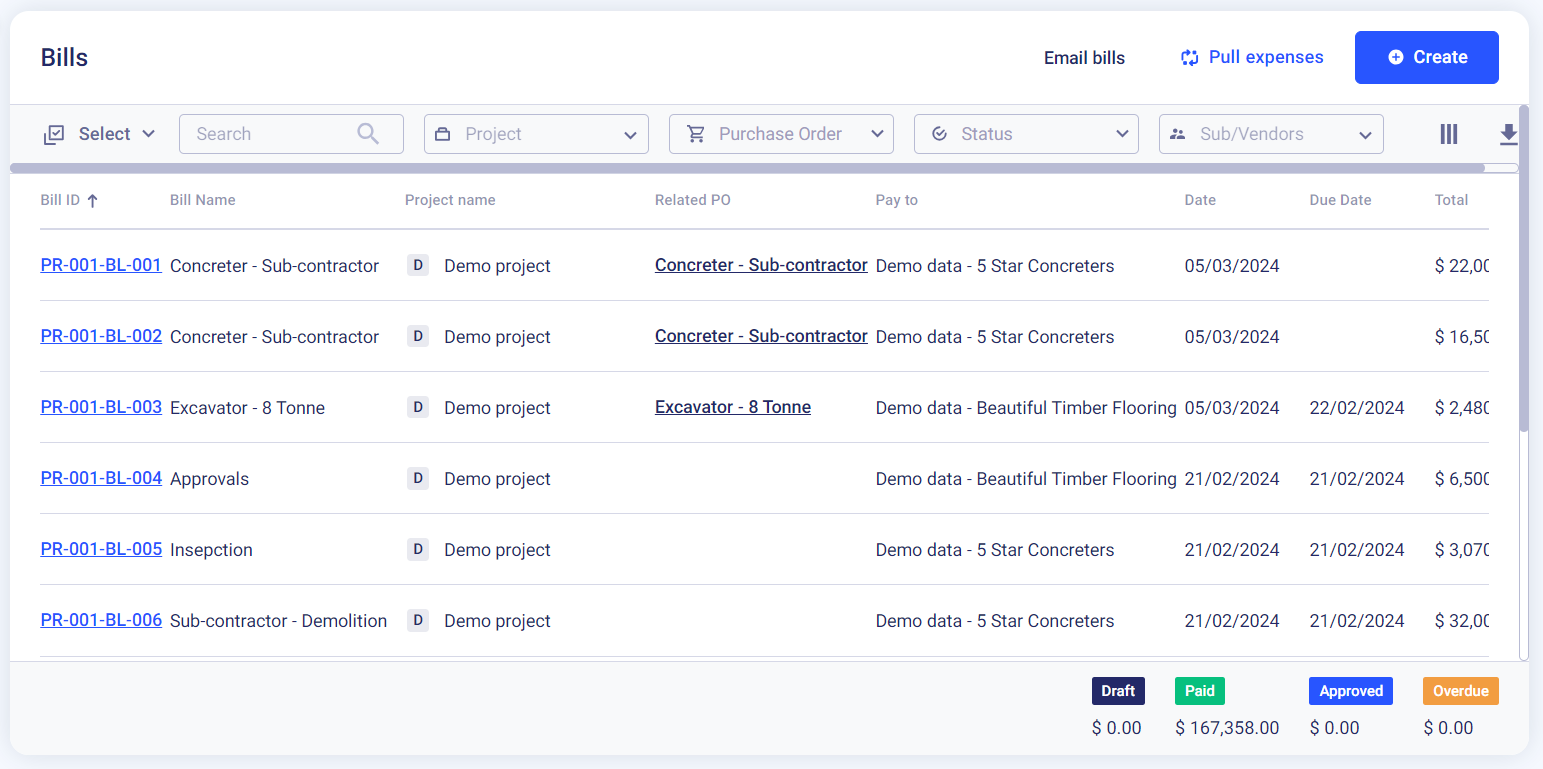
This is where you will find all your bills, regardless of project.
Click the “Email bills” button to see your unique email address.
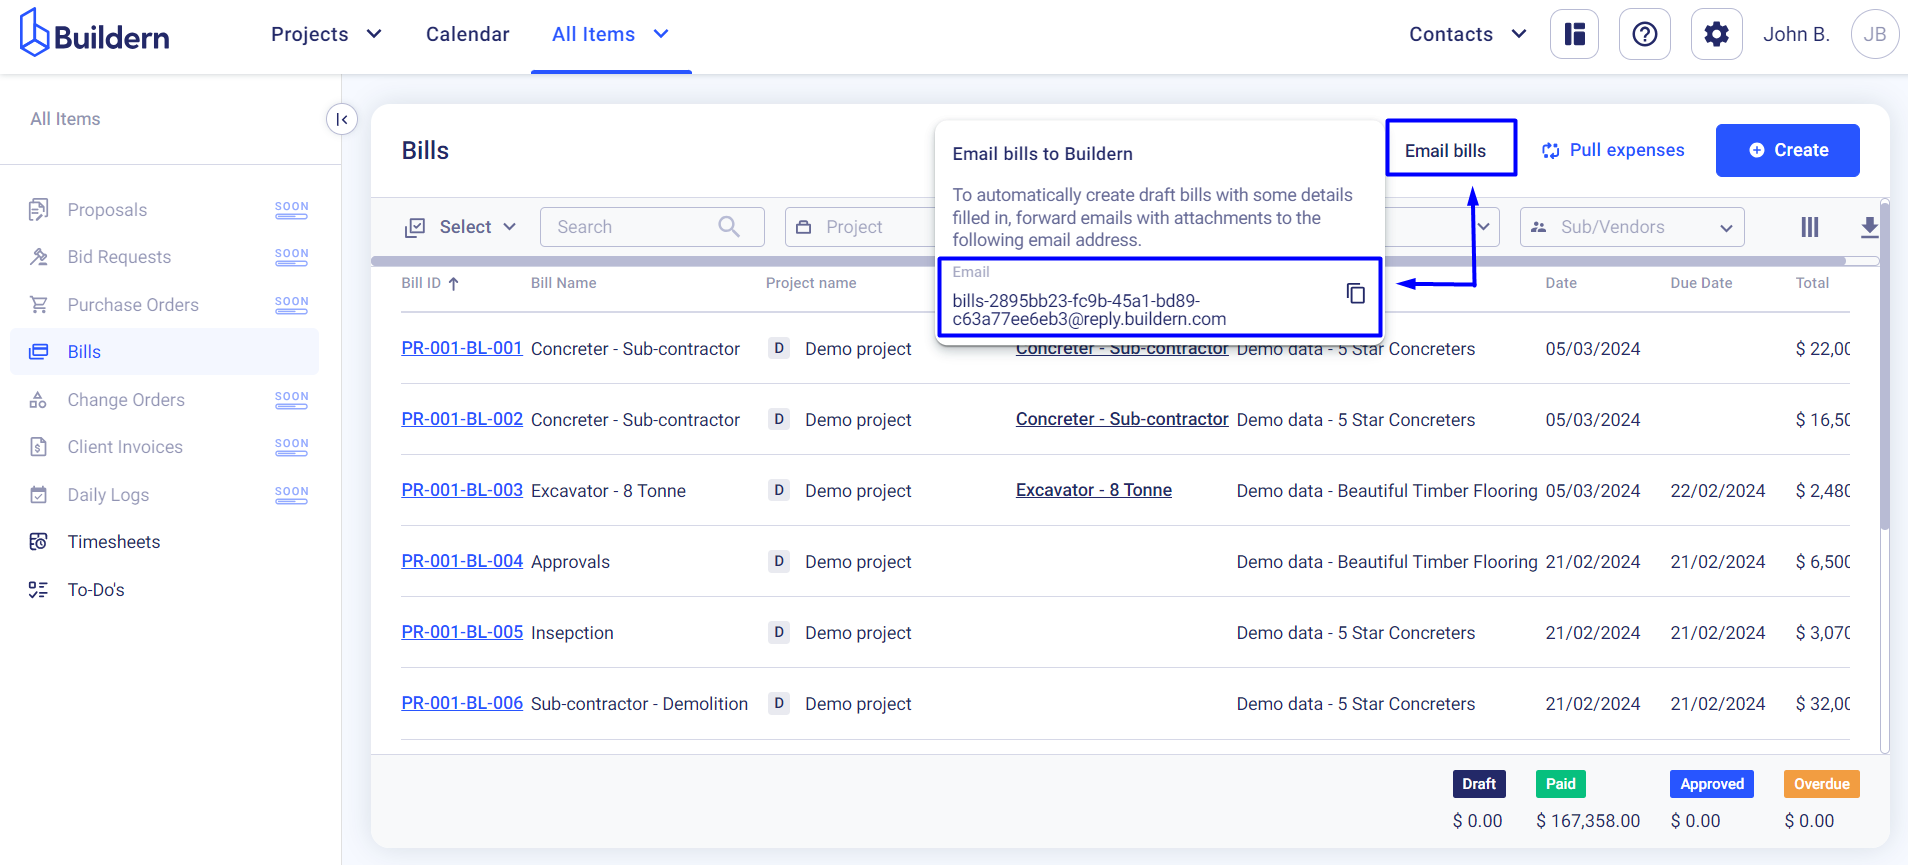
Now, you are welcome to share this email address with your sub/vendors. Whenever they send you a bill by email, find it received among your other bills.
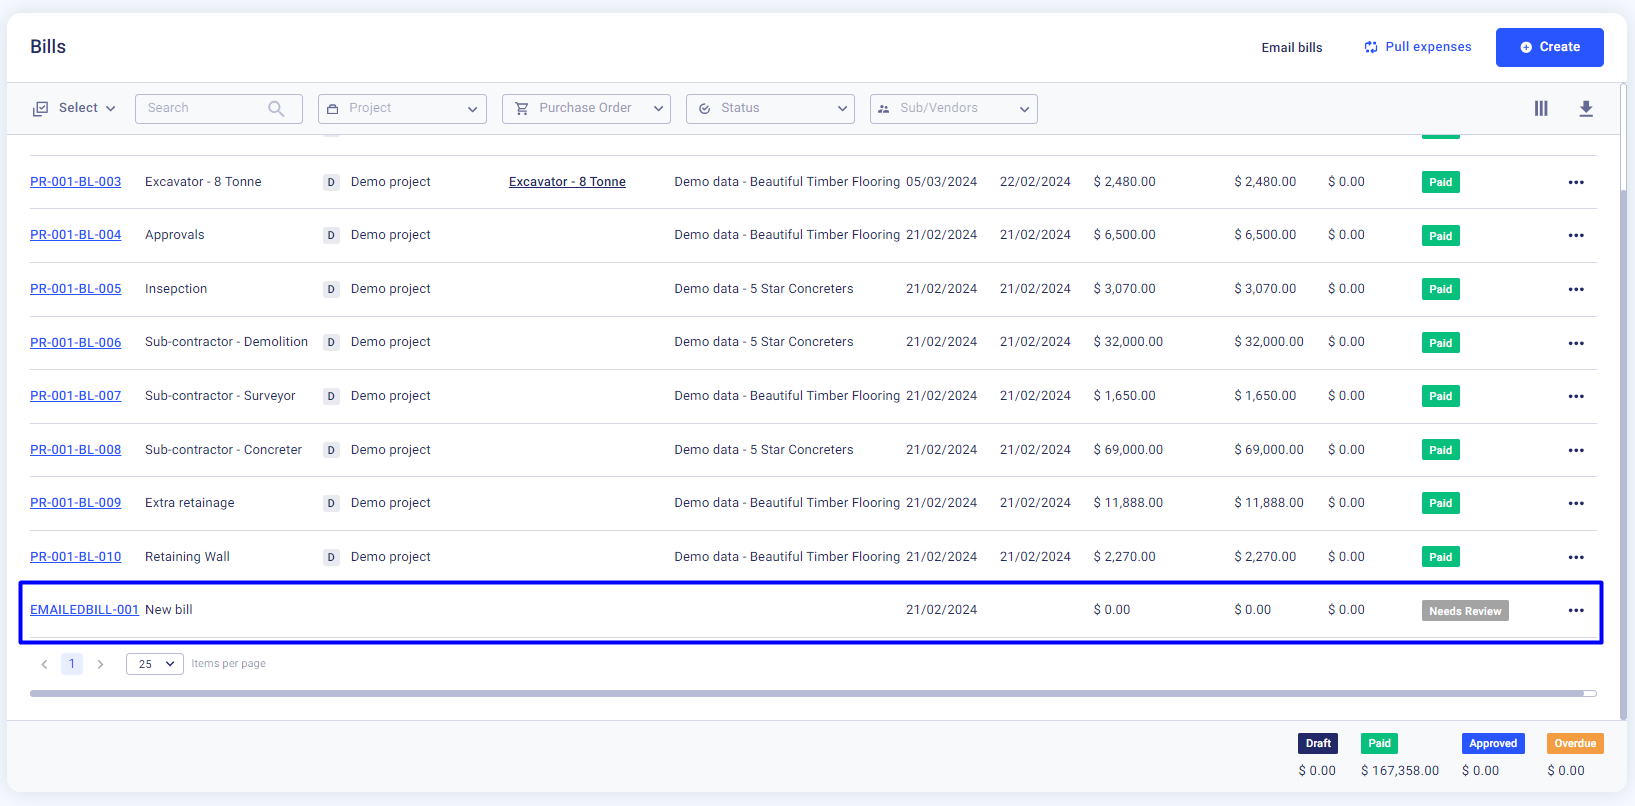
Here’s how it will look.
You may find the forwarded bills by filtering the data according to the status. Simply filter the bills by choosing the “Needs review” status from the drop-down menu.
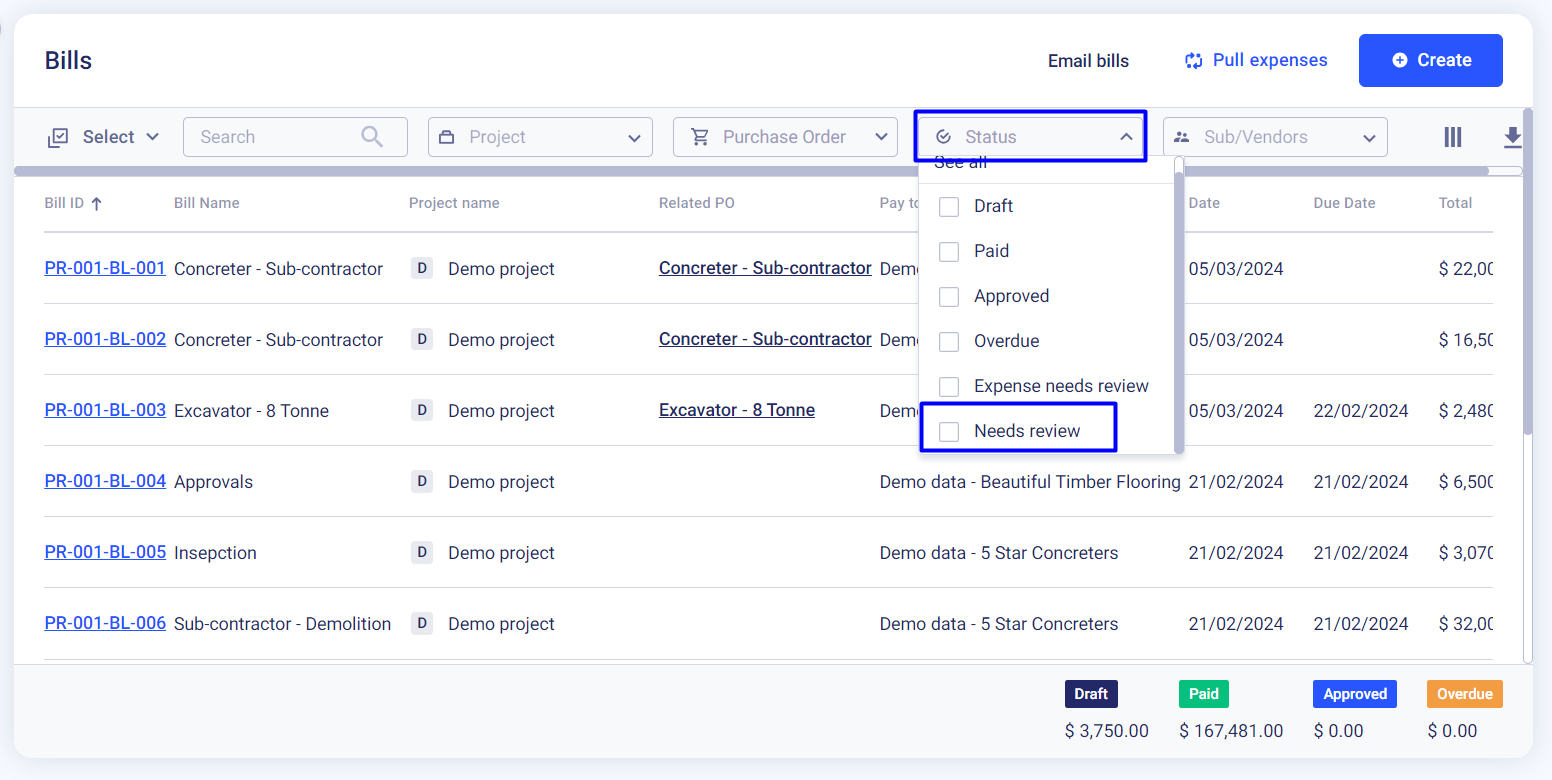
The new bill will come with the name “EMAILEDBILL” and will have the “Needs Review” status.
Now, your job is to review the bill, fill in all the required information, and update its status.
Click the three dots at the end of the bill line to review it.
Here’s what you can do here:
-
Assign a new name (Required)
-
Choose the project for this bill (Required)
-
Customize the bill ID or let Buildern assign it automatically (Optional)
-
Choose a related PO if there are any (Optional)
-
Choose the sub/vendor whom you should pay with this bill (Required)
-
Enter bill reference (Optional)
-
Define the start and end dates (Required)
-
Set a reminder (Optional)
-
Add the cost lines (Required)
-
Send to Xero or QuickBooks (Optional)
-
Review the attachments
-
Record the payment history (Optional)
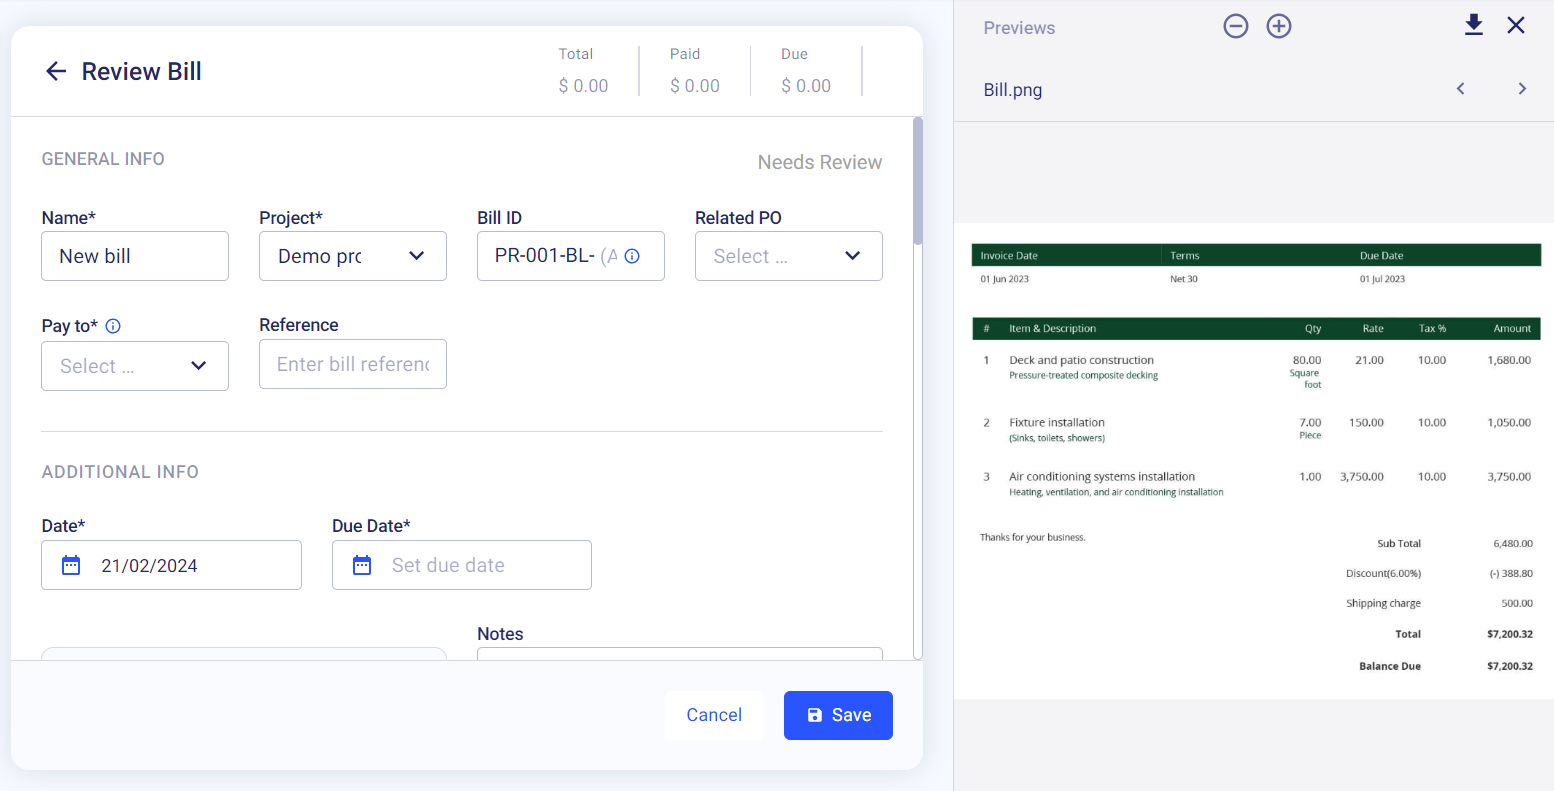
Save the changes once complete.
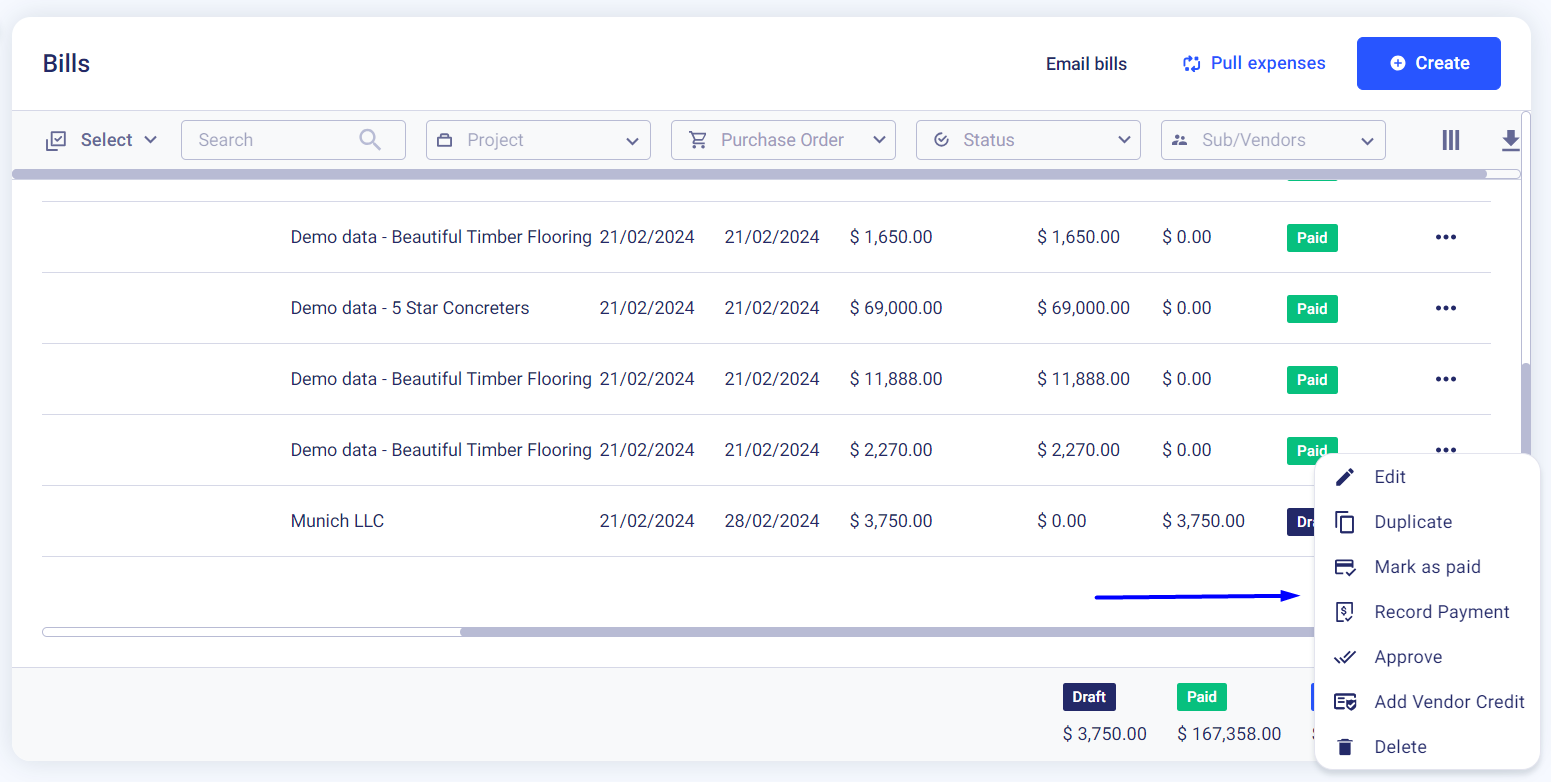
Now, if you go back to the bills dashboard, you will see the updated version of the bill saved as a draft. You can further customize the status and make any additional changes if needed.
💡Recommended Reading