One of the first things clients and sub/vendors notice when they receive an email from your company is the cover photo. This image is displayed in documents web views (proposals, change orders/variations, invoices to clients, bid requests, and purchase orders for sub/vendors) and the client or sub/vendor portals, making it an essential part of your company's visual identity.
For instance, here’s how the cover looks in your clients’ portals.
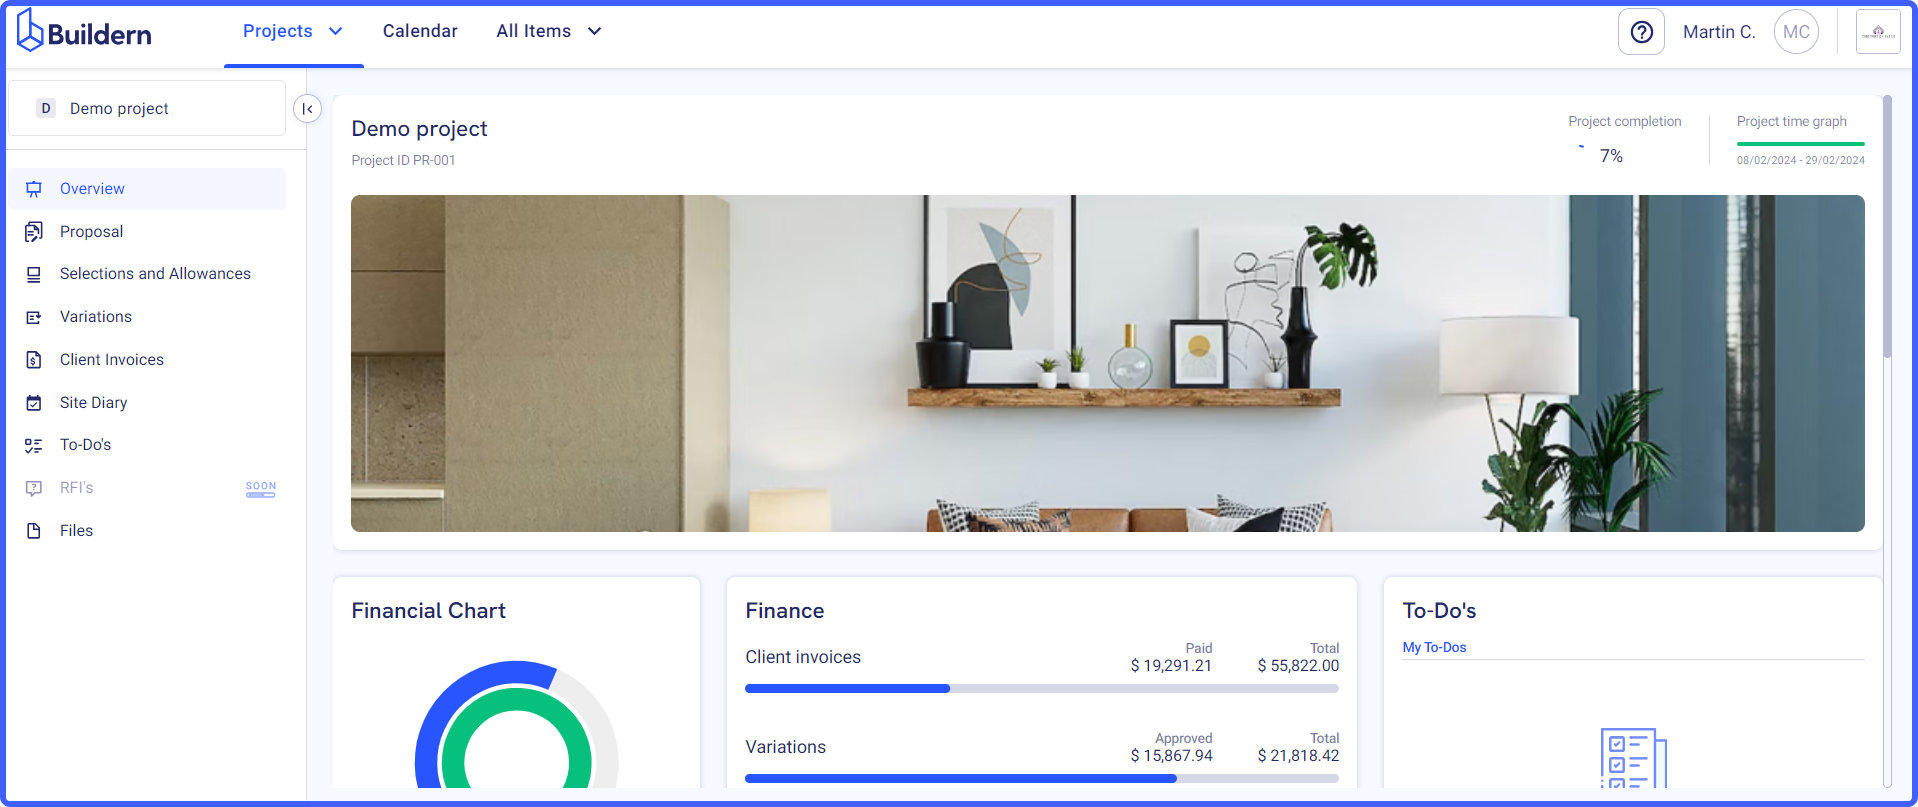
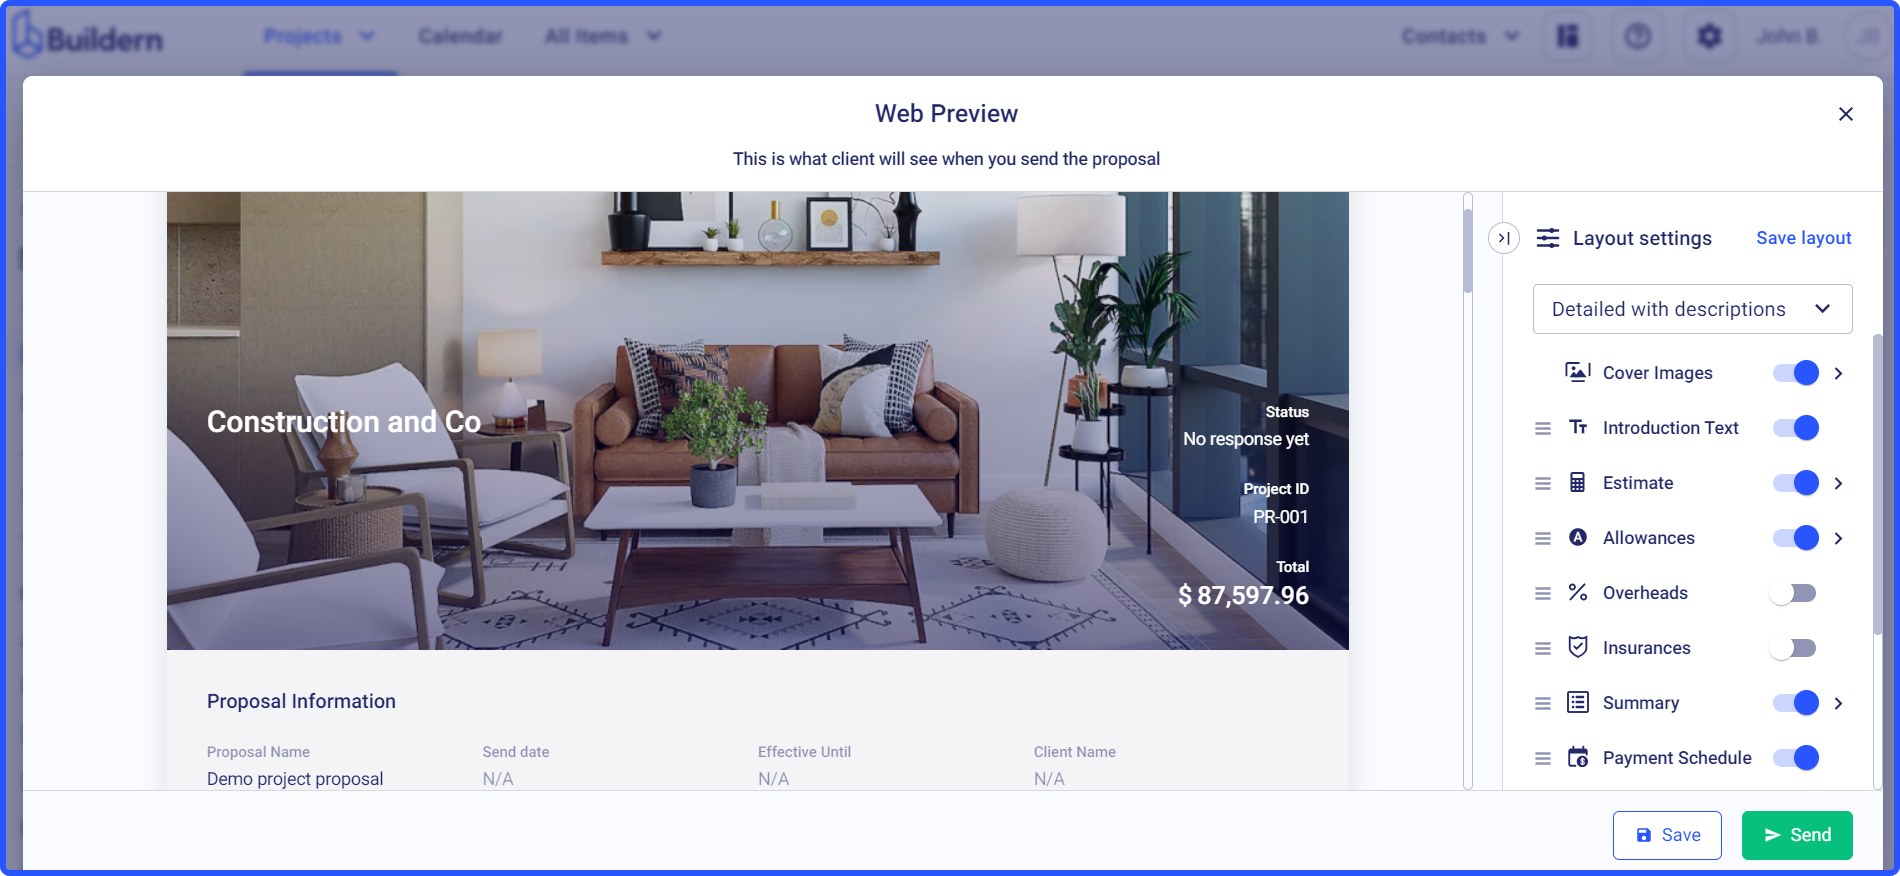
Here’s an example of a cover photo displayed in the proposal created and sent to your client via Buildern:
To ensure your cover photo aligns with your branding, you have several options:
-
Upload your own custom background
-
Select a color that complements your brand
-
Use one of the system backgrounds
Note that the maximum file size for the cover photo is 50 MB, and the allowed formats are .jpg and .png.
💡There are a couple of important things to remember about the cover photos in Buildern:
-
You can set or update the cover image from the company settings and this will update it for all future projects.
-
You can set or update the cover image from each project’s settings and this will update it only for that particular project.
We will further go through each process.
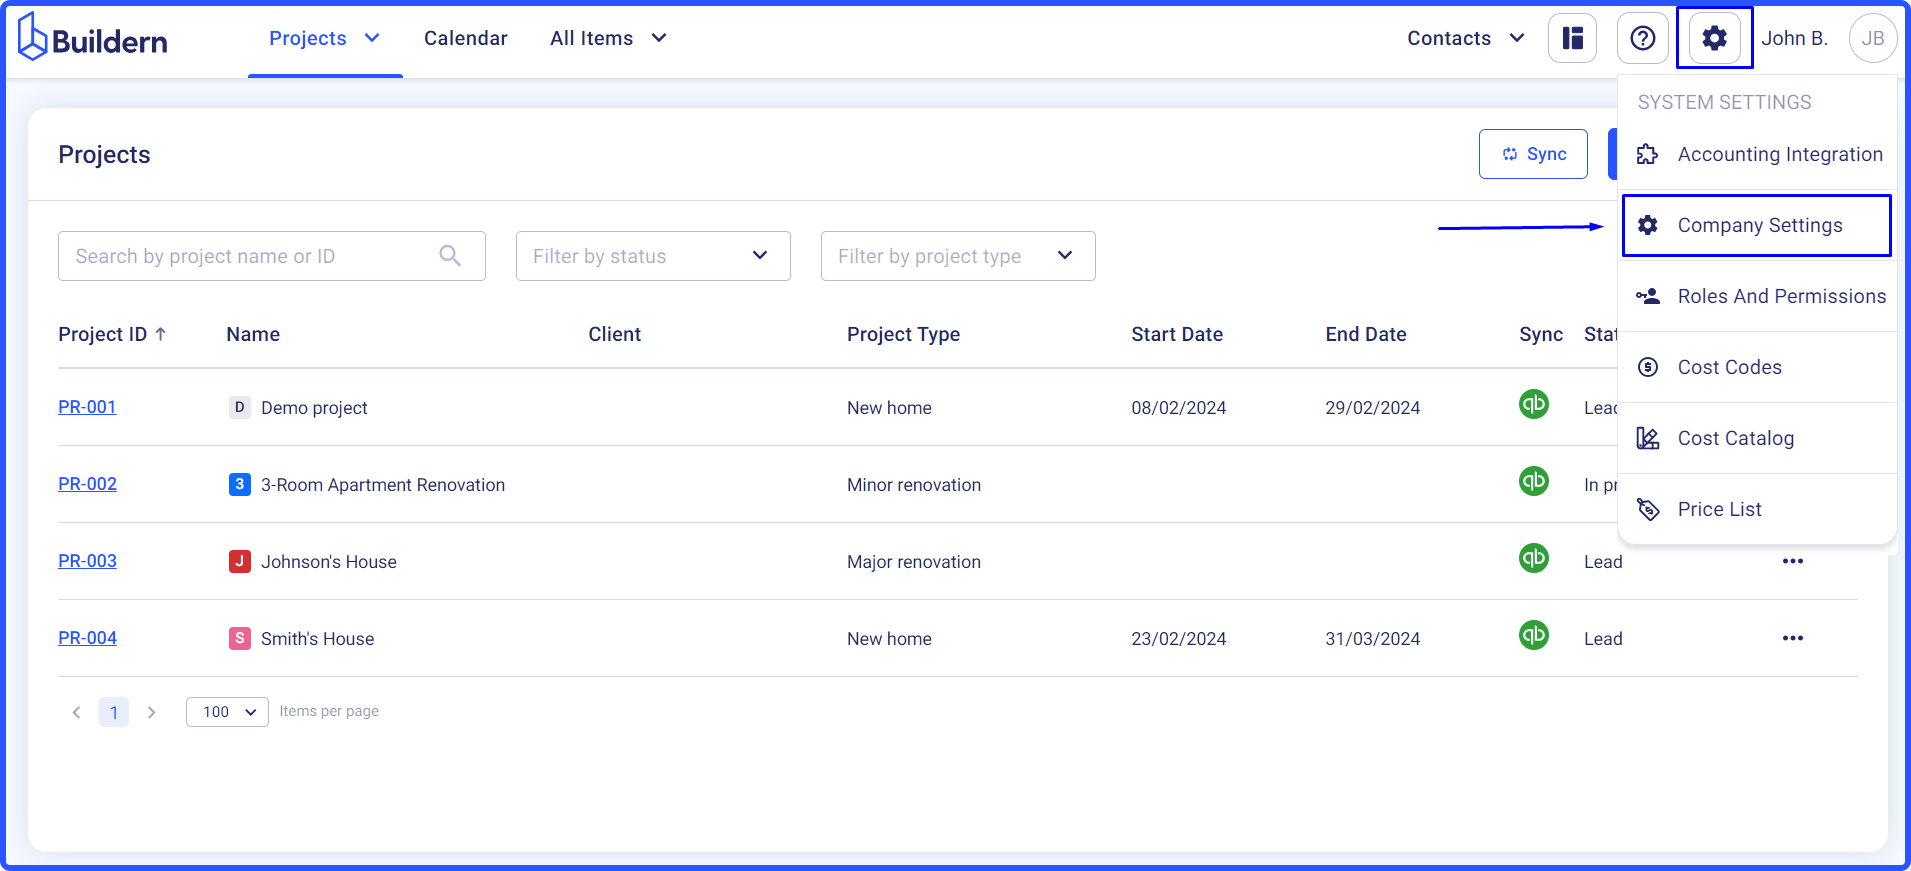
Change Your Company Cover Photo from the Company Settings
Step 1: Log in to your Buildern account and go to the settings
💡Click here to access your company settings.
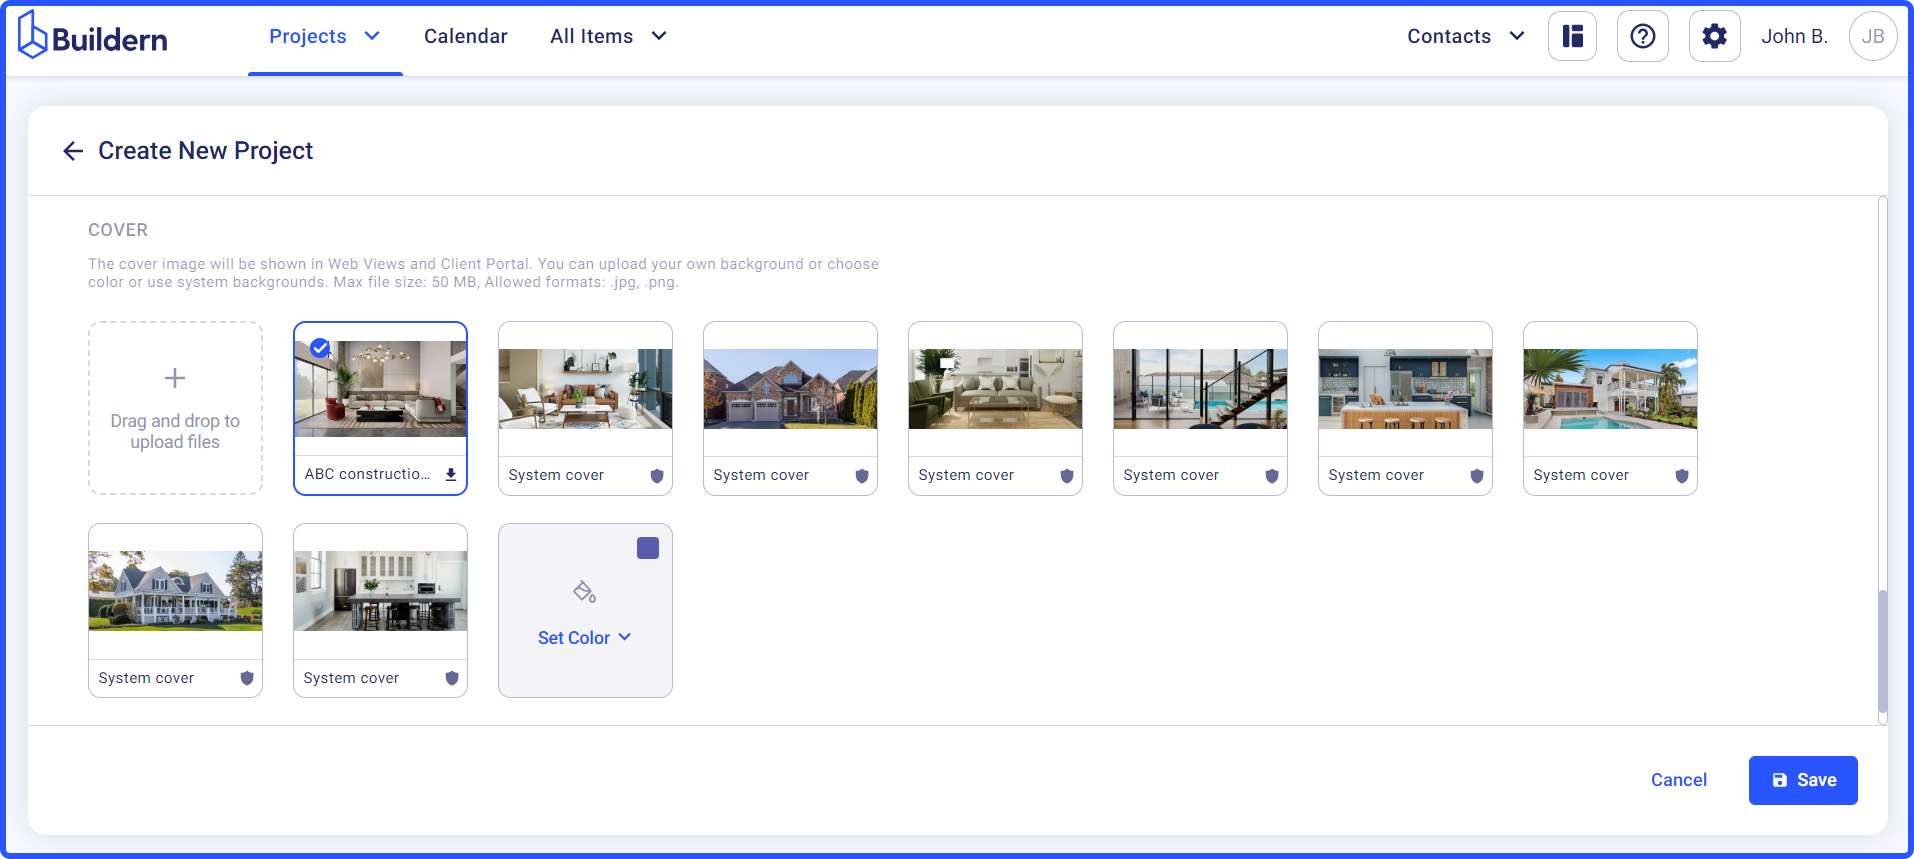
Scroll a bit down until you find the Cover section.
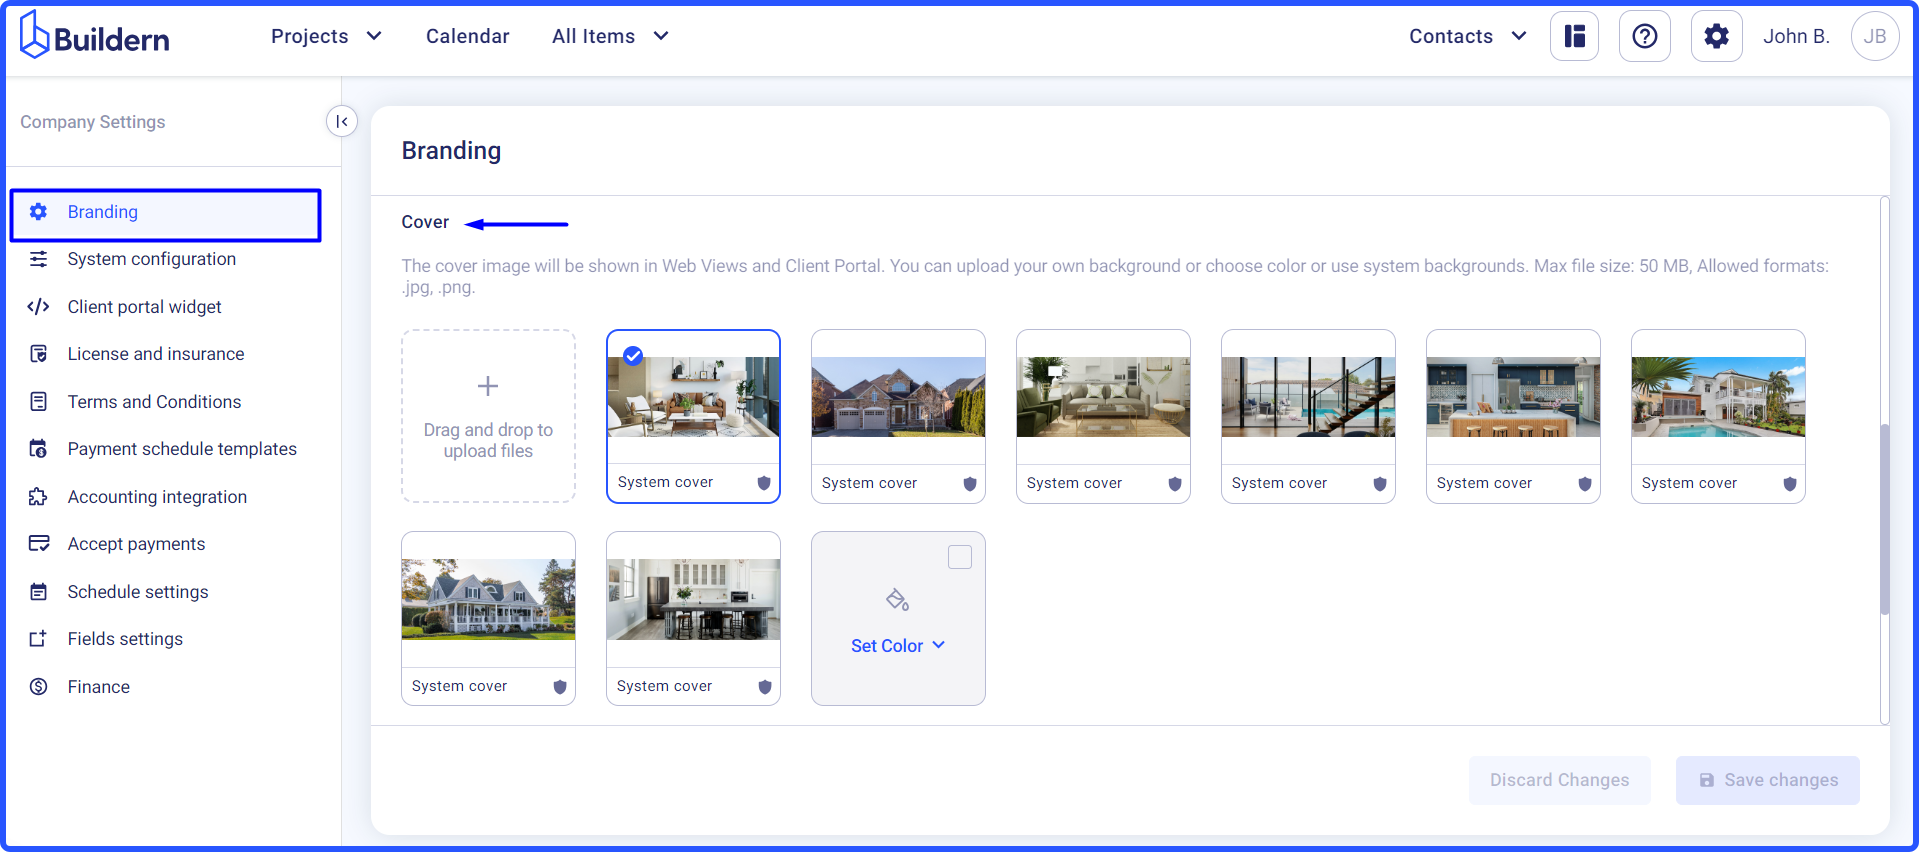
Step 2: Set the company cover photo
Suppose you want to upload your own cover photo
Drag and drop your image to the dedicated window.

Once done, save the changes. Your cover photo will be visible in all new projects you create after this modification.
Let’s check how your future clients will see the new cover photo.
Here’s our new image in the project settings:
Here’s it in client’s proposal web view:

Change Your Company Cover Photo from the Project Settings
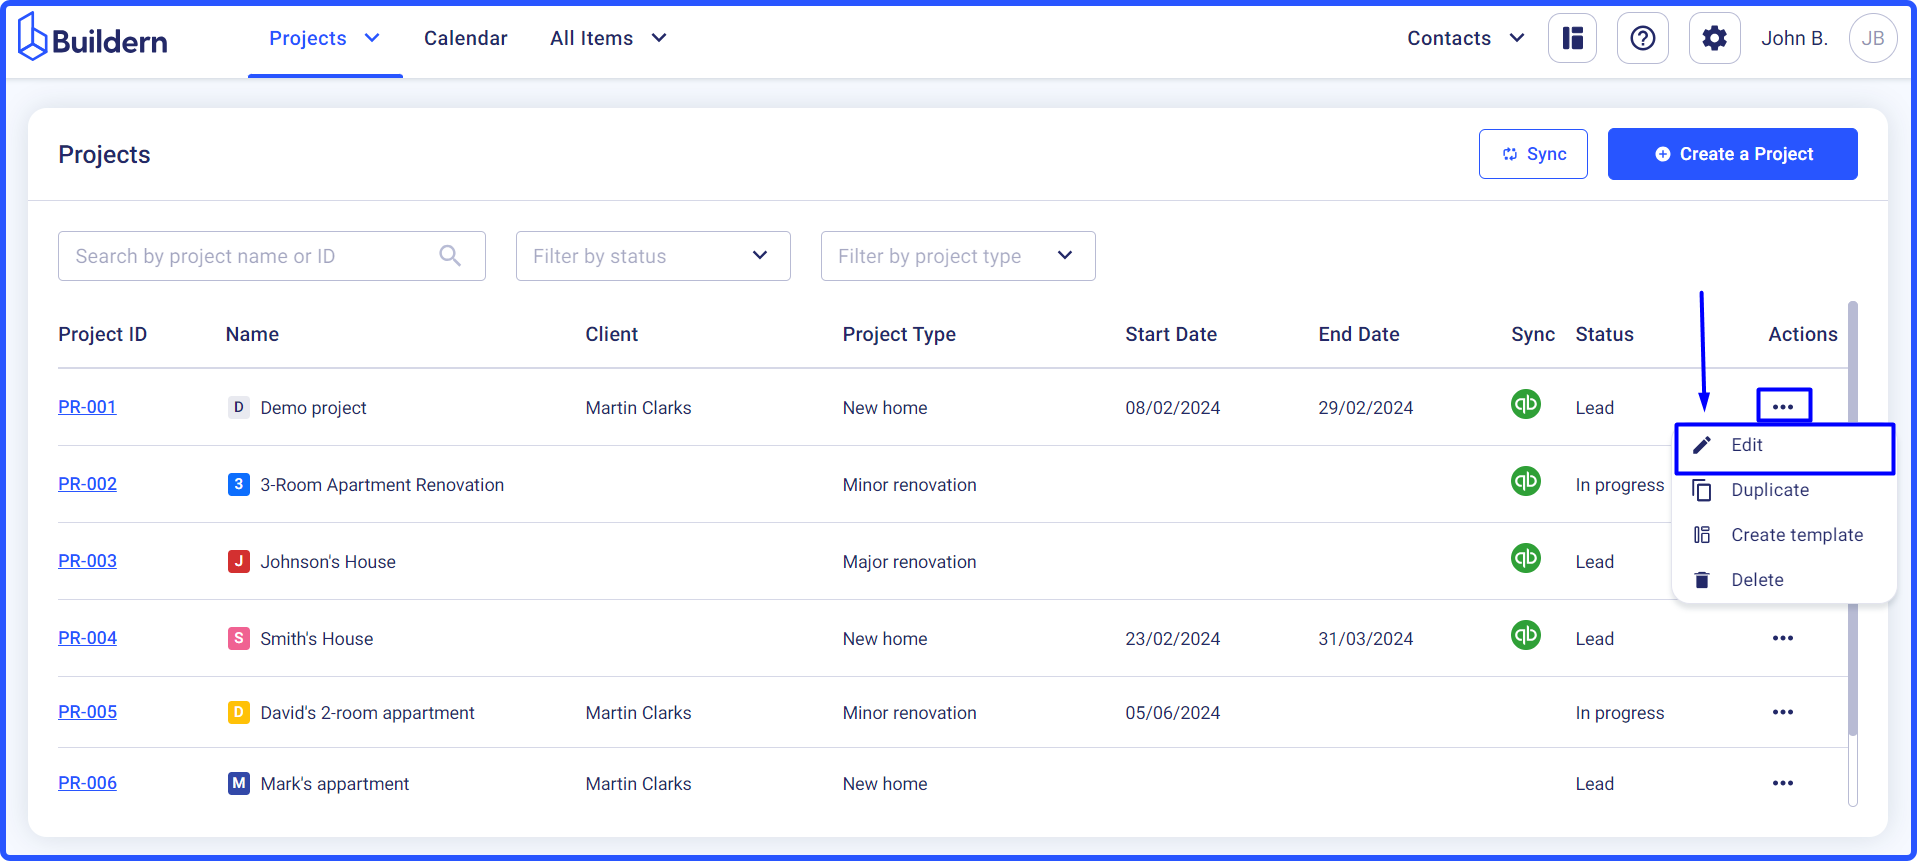
If you want to update your company cover photo for the already existing project, you can do that from the project-level settings.
Step 1: Log in to your Buildern account and go to the Project Settings
💡Click here to access all your projects.
Choose the project where you want to update the cover photo, then click the three dots > Edit.
Step 2: Set the company cover photo
Scroll a bit to find the Cover section and choose the image or color you want to set for this particular project. You can also upload your preferred image here.
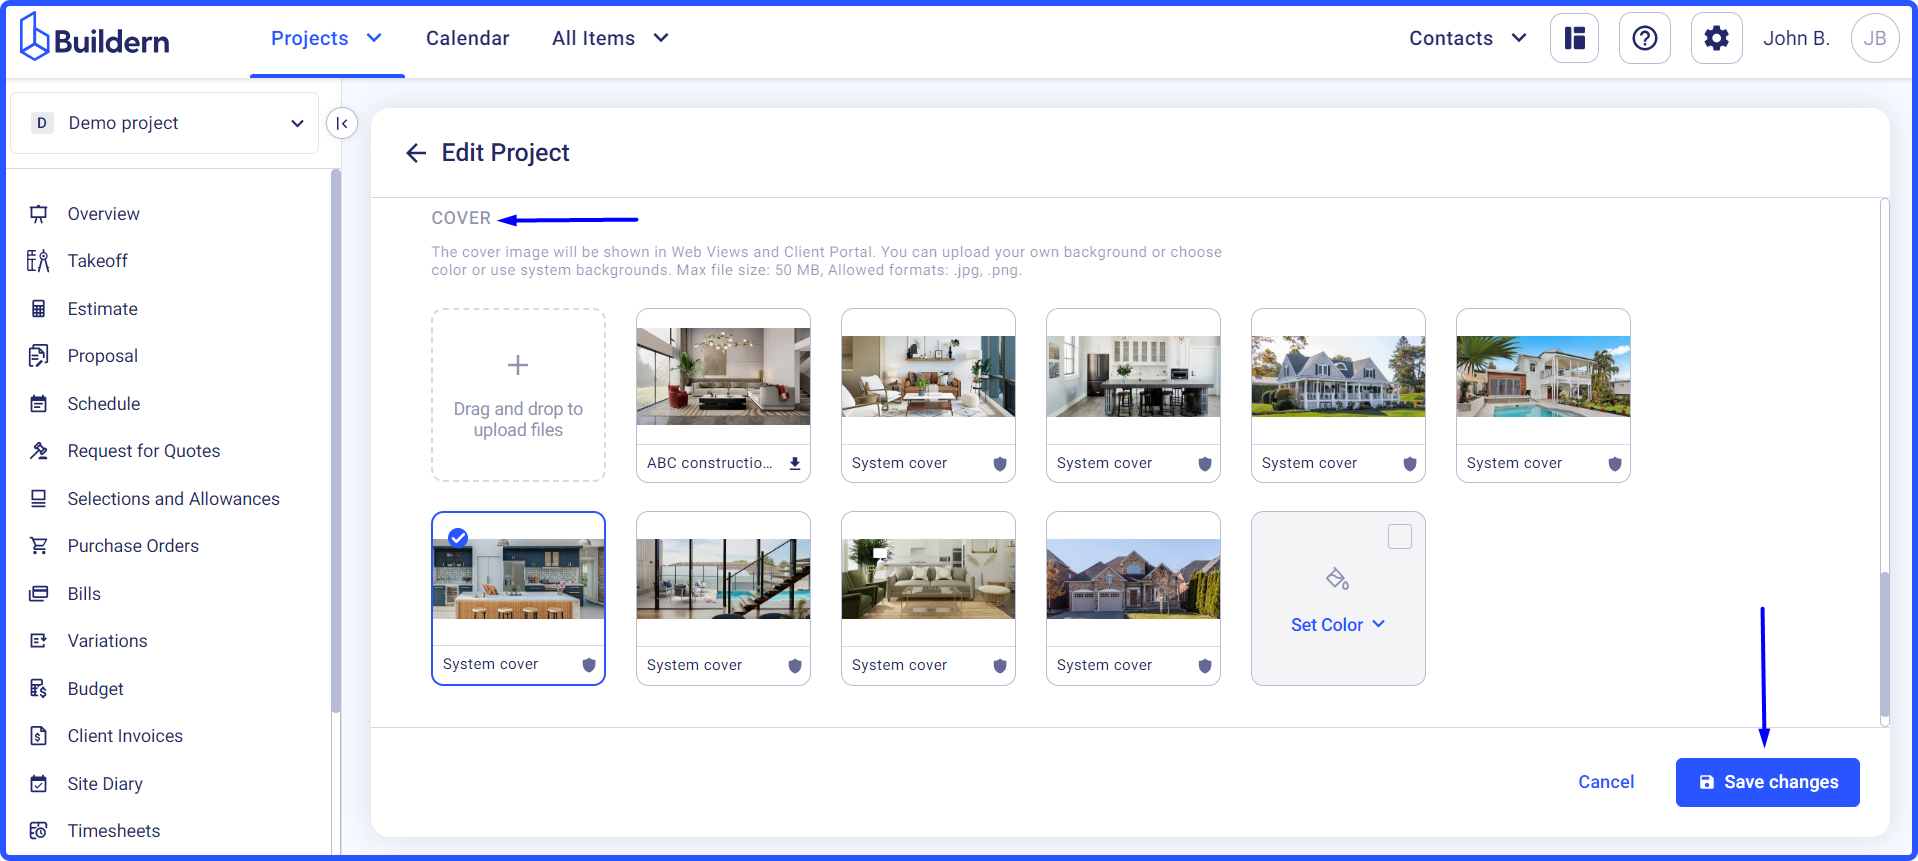
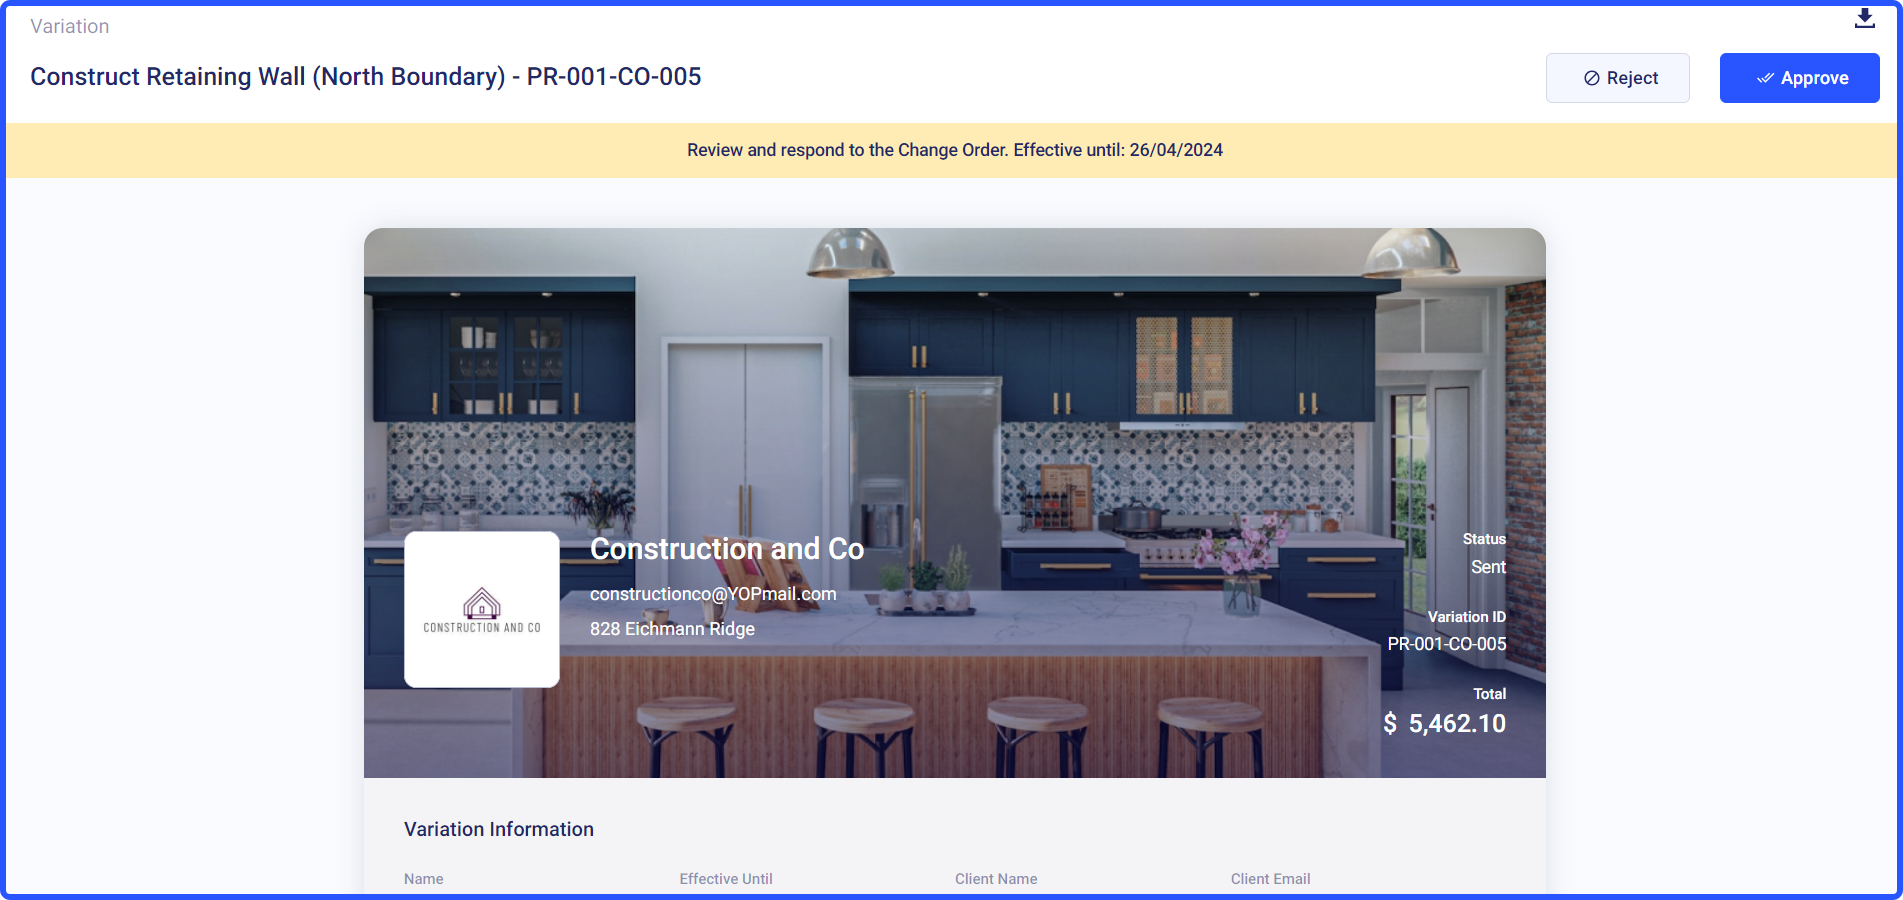
Save the changes, and let's see how your new cover photo looks in your change orders/variations created and sent via Buildern.
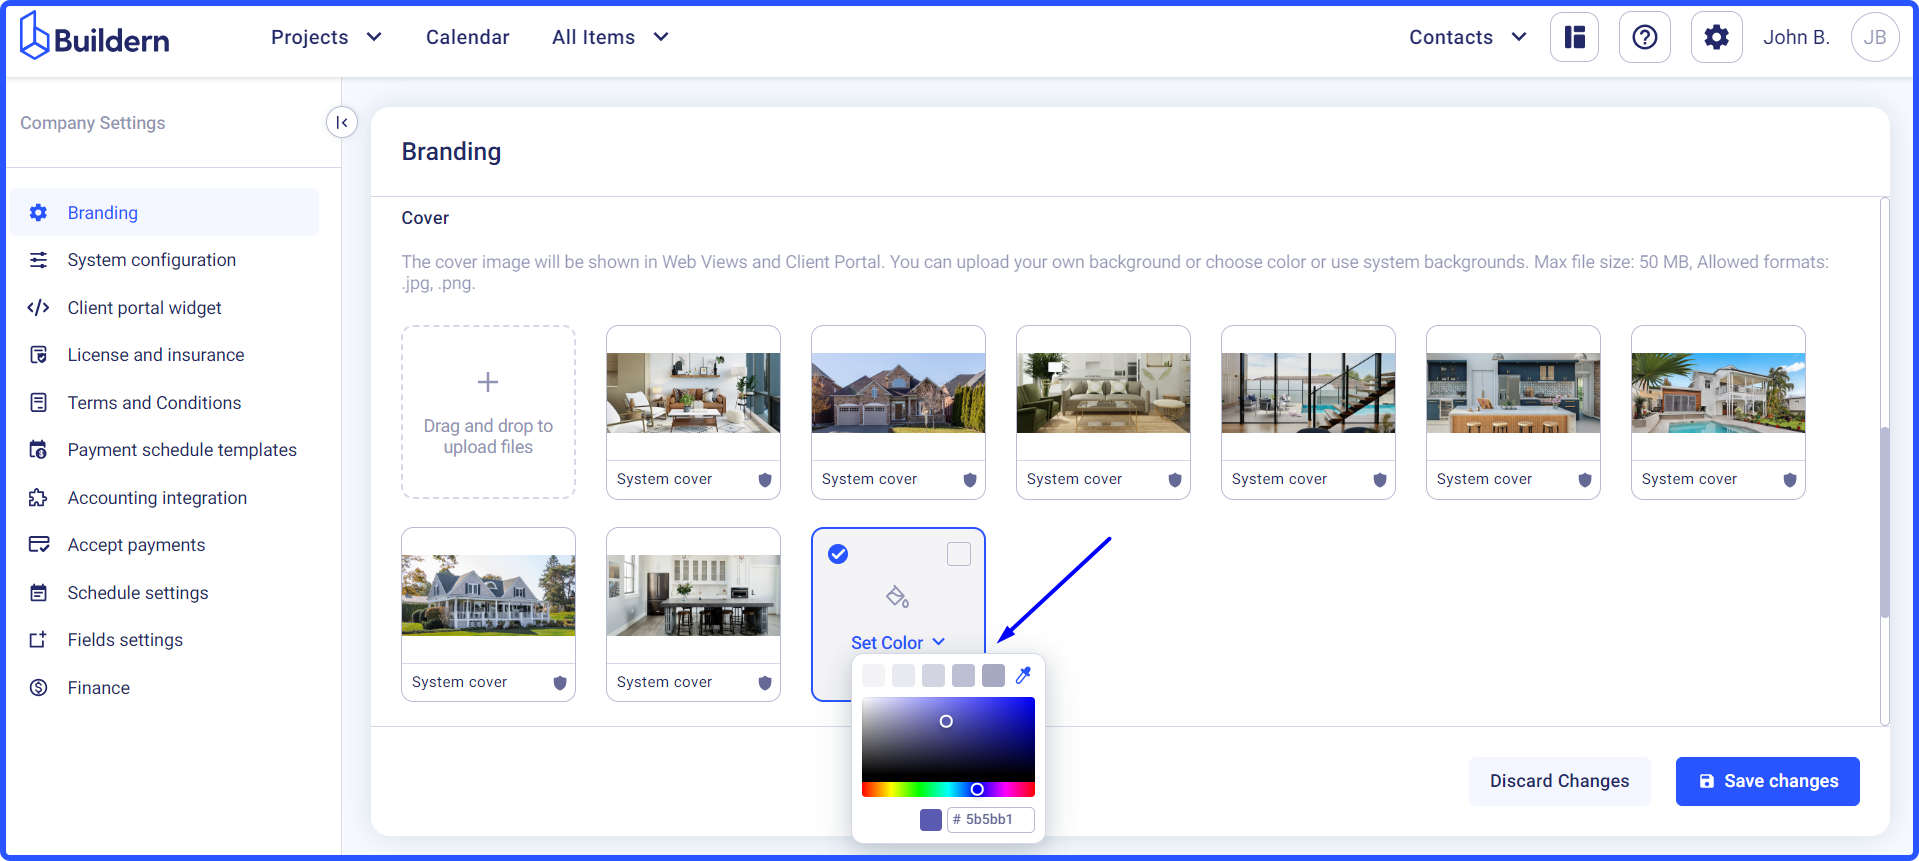
Set a Solid Color Instead of a Cover Photo
The logic is the same. You can set a solid color as your company’s cover photo and it will be applied to all the projects created in the future.
Choose the shade or type in your preferred color code and save the changes.
Here’s how your clients see this kind of cover photos:

By following these steps, you can easily customize your company cover photo to ensure a consistent and professional look across all your projects and client proposals.
💡Recommended Reading