First, choose the project for which you want to create a takeoff and head to the Takeoff module from the left-hand menu.
Here you will have two options:
-
Create folder
-
Add plan
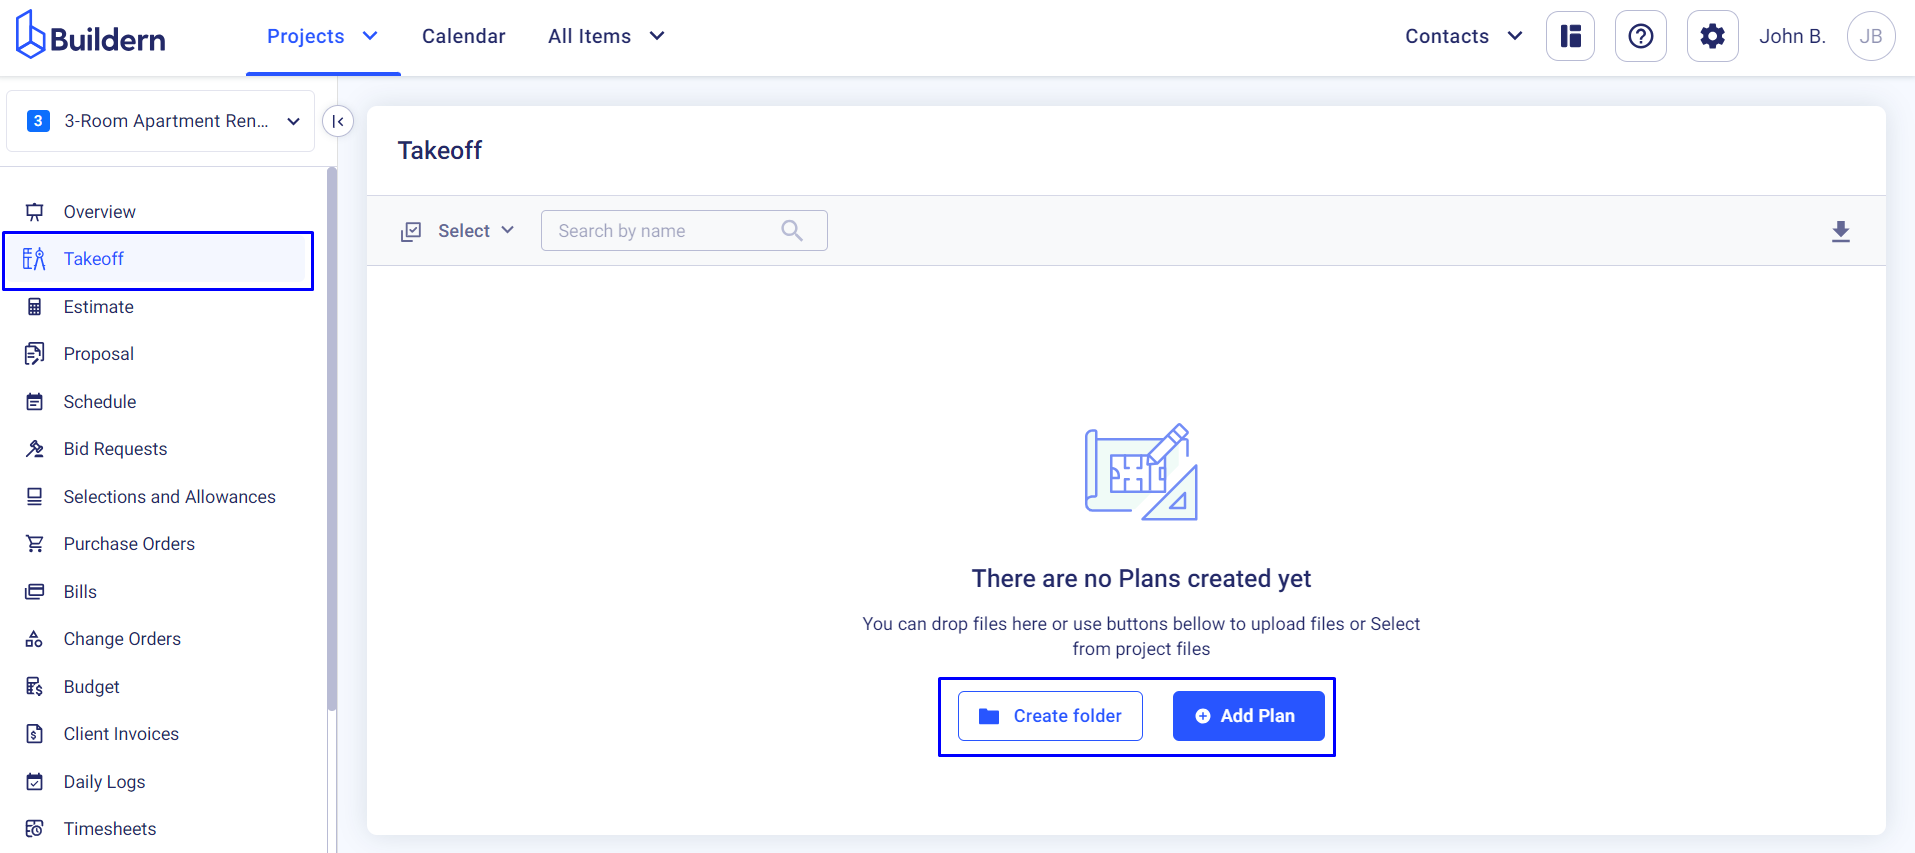
Creating a folder means that you can organize your files by placing them into individual folders and even subfolders. By adding a plan, you can either choose a takeoff from the file library or upload it in a PDF format directly from your computer.
Uploading takeoffs to Buildern ⤵️
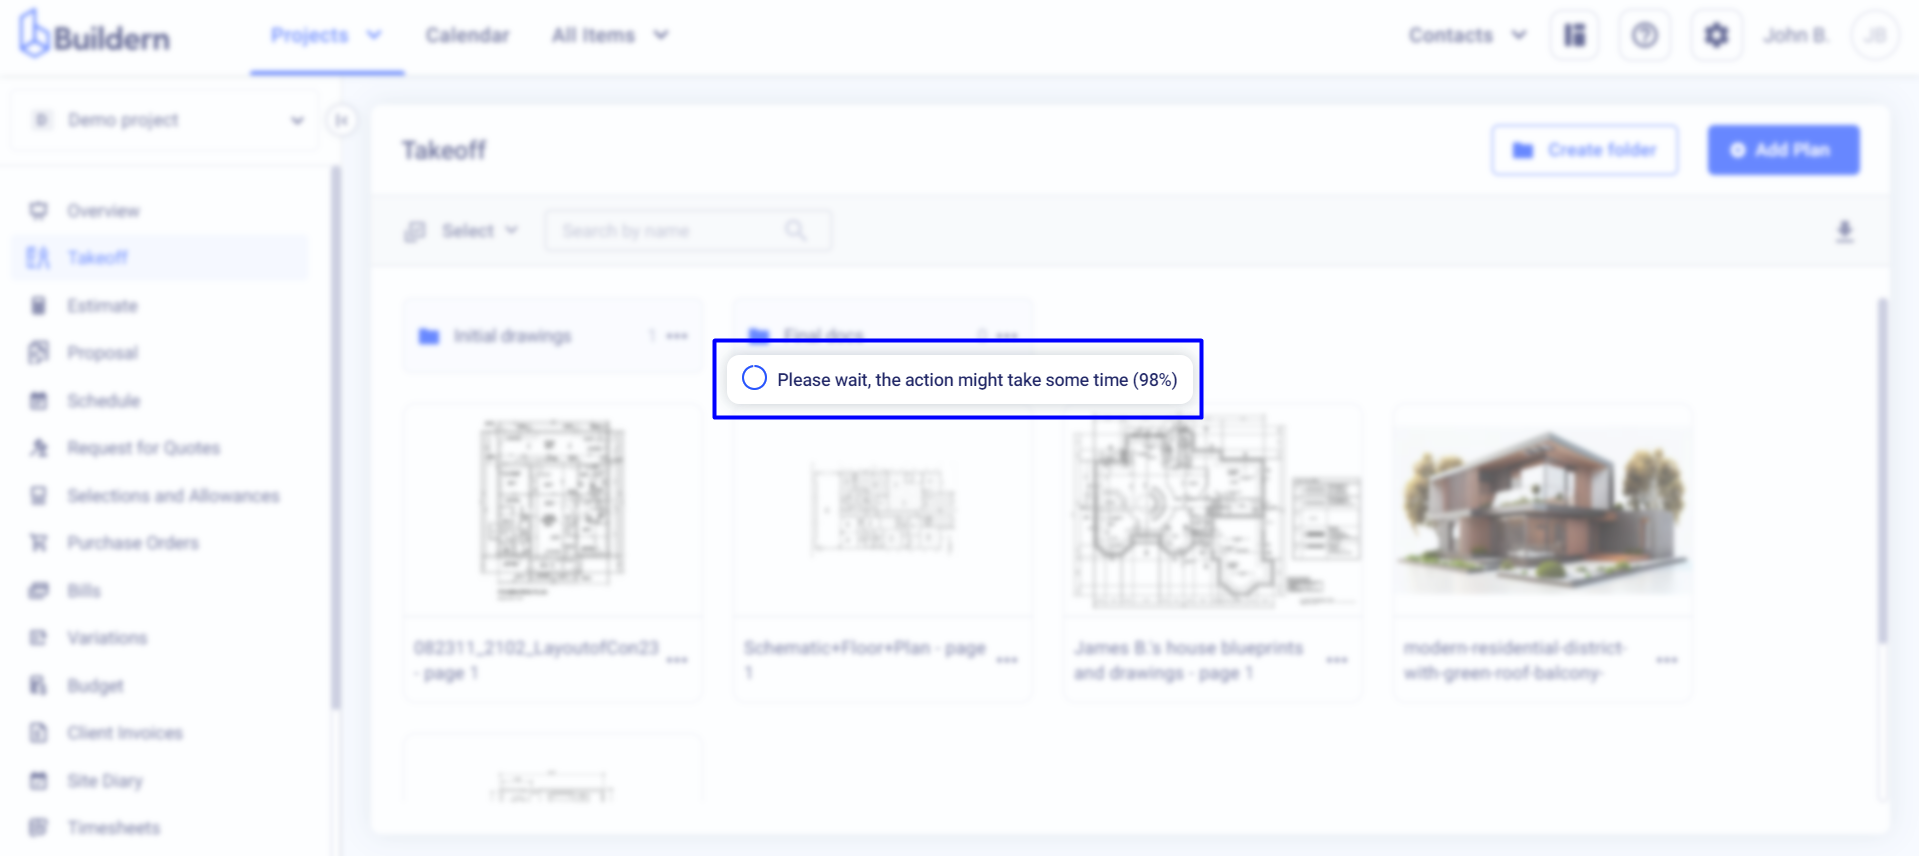
Buildern is processing your takeoffs ⤵️
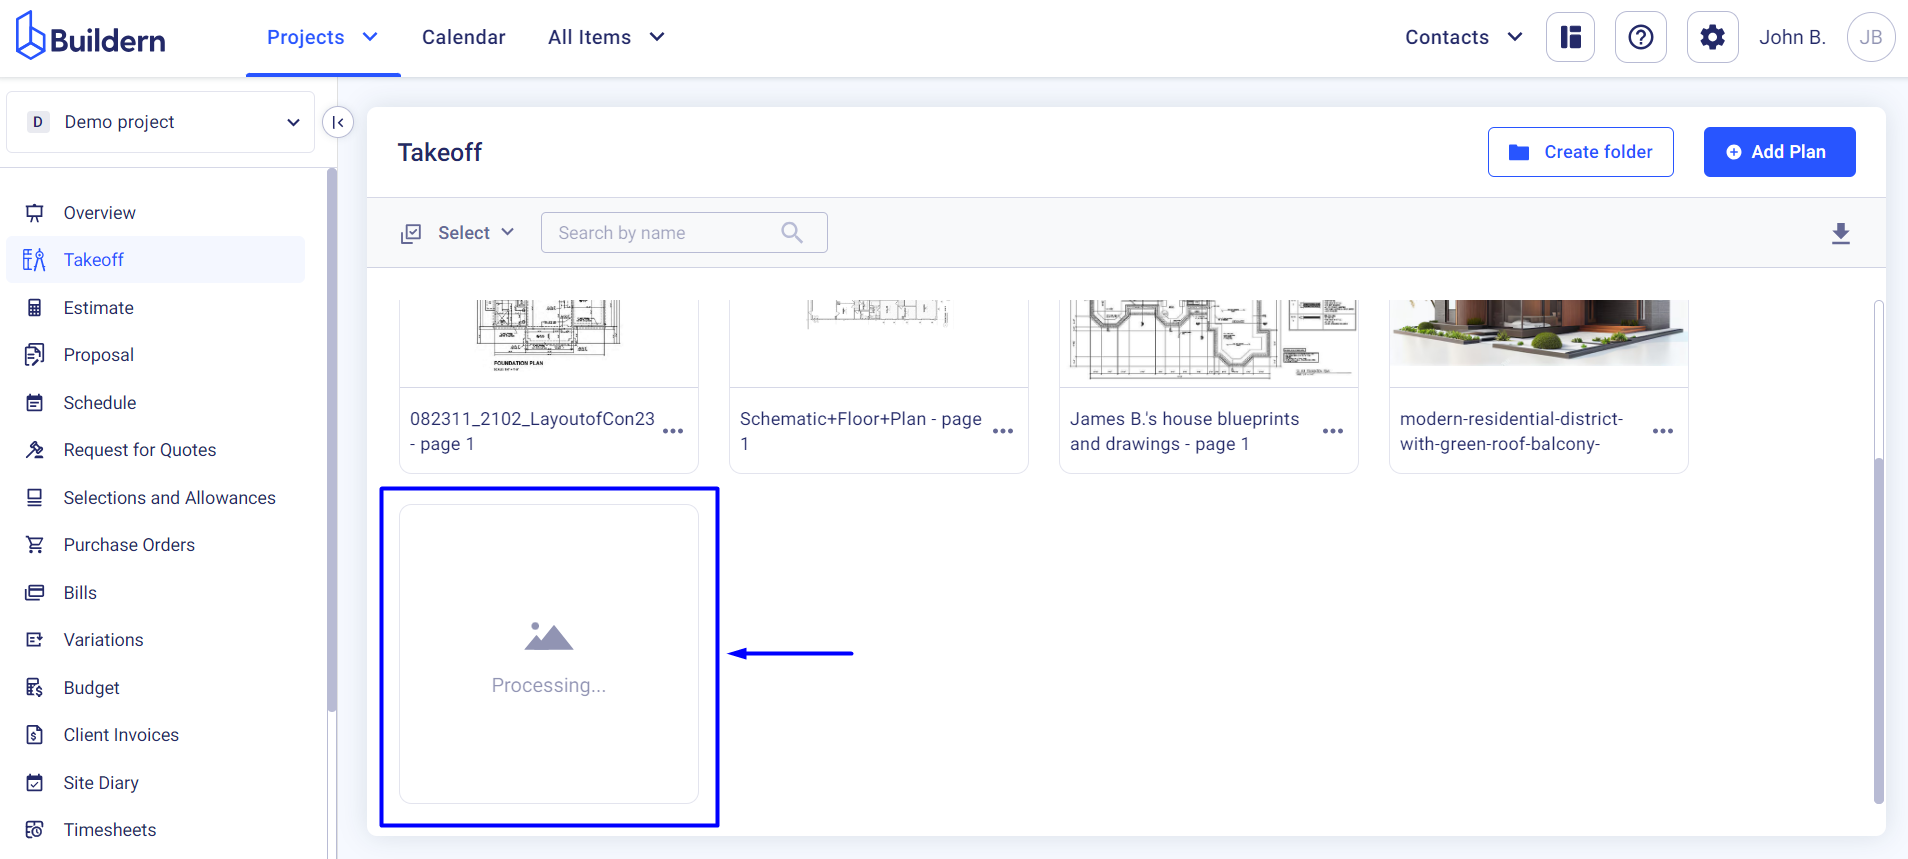
While processing Buildern reads and analyzes your plan with all the pages and layers, so you can freely work on your takeoff later.
Now, suppose you have already created the folders and added a couple of plans.
Let’s further see how easy it is to begin the measurements and work with Buildern.

Click on any plan to begin.
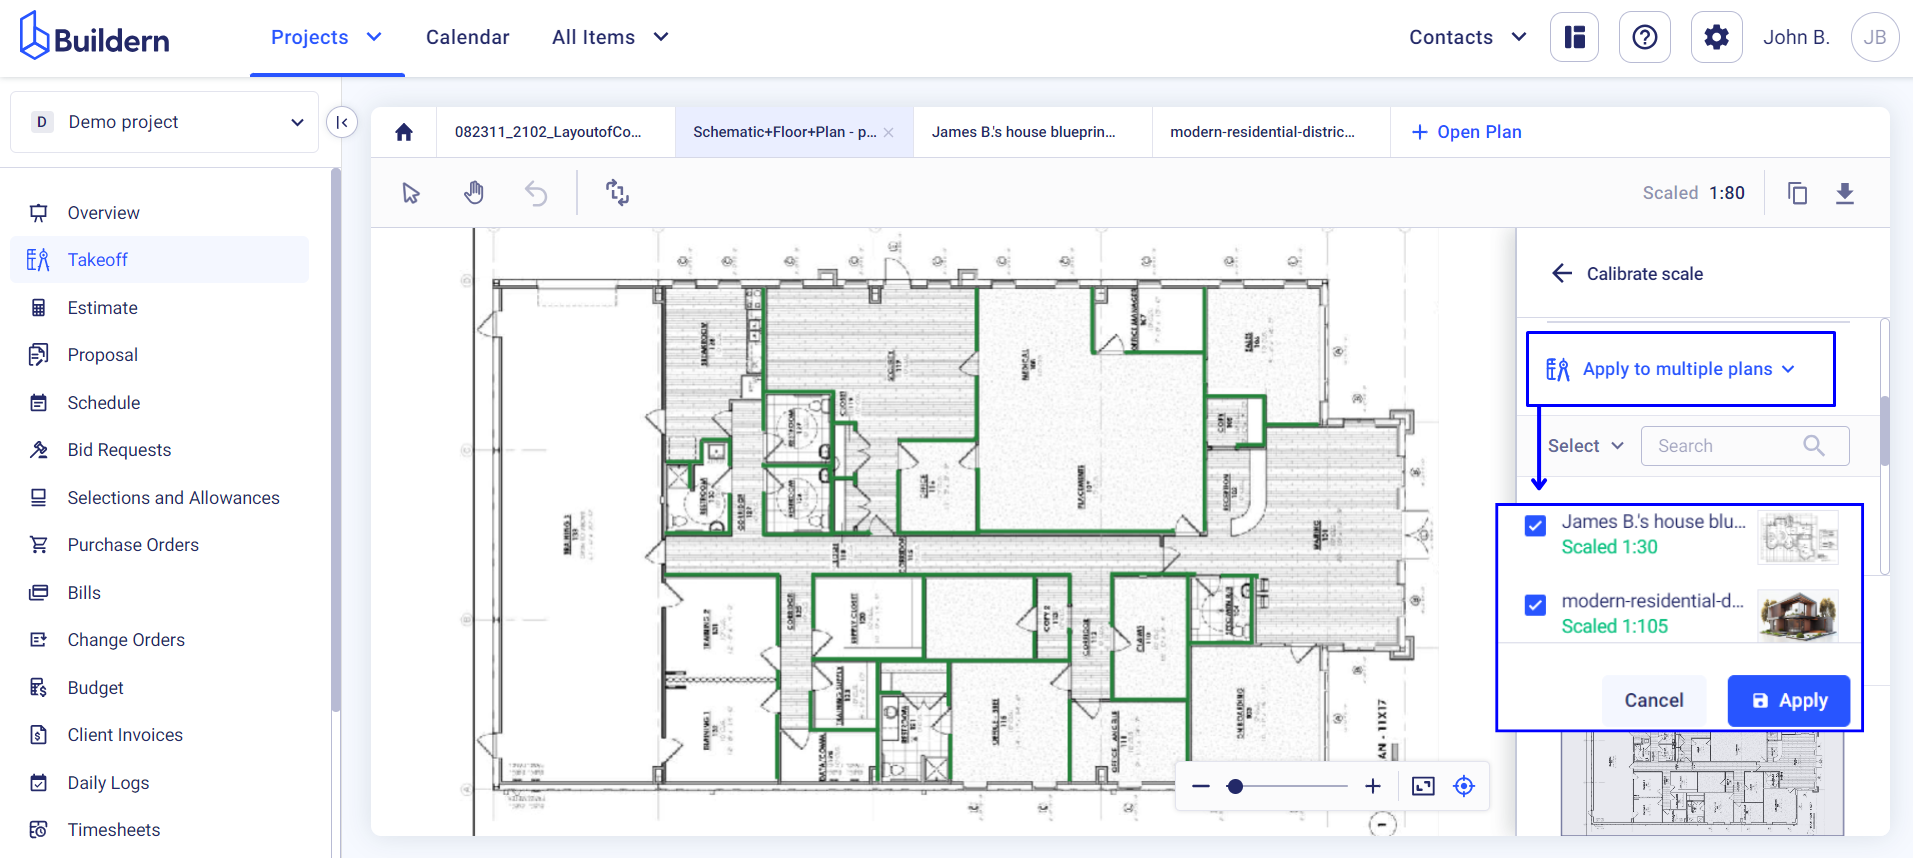
First, you should scale the plans. Click the red Scale button in the upper-right corner. Buildern allows you to choose either from the pre-added common scales or set a scale manually.
💡How to Manually Set a Scale in Takeoff?
Set the scale for accurate and precise measurements.
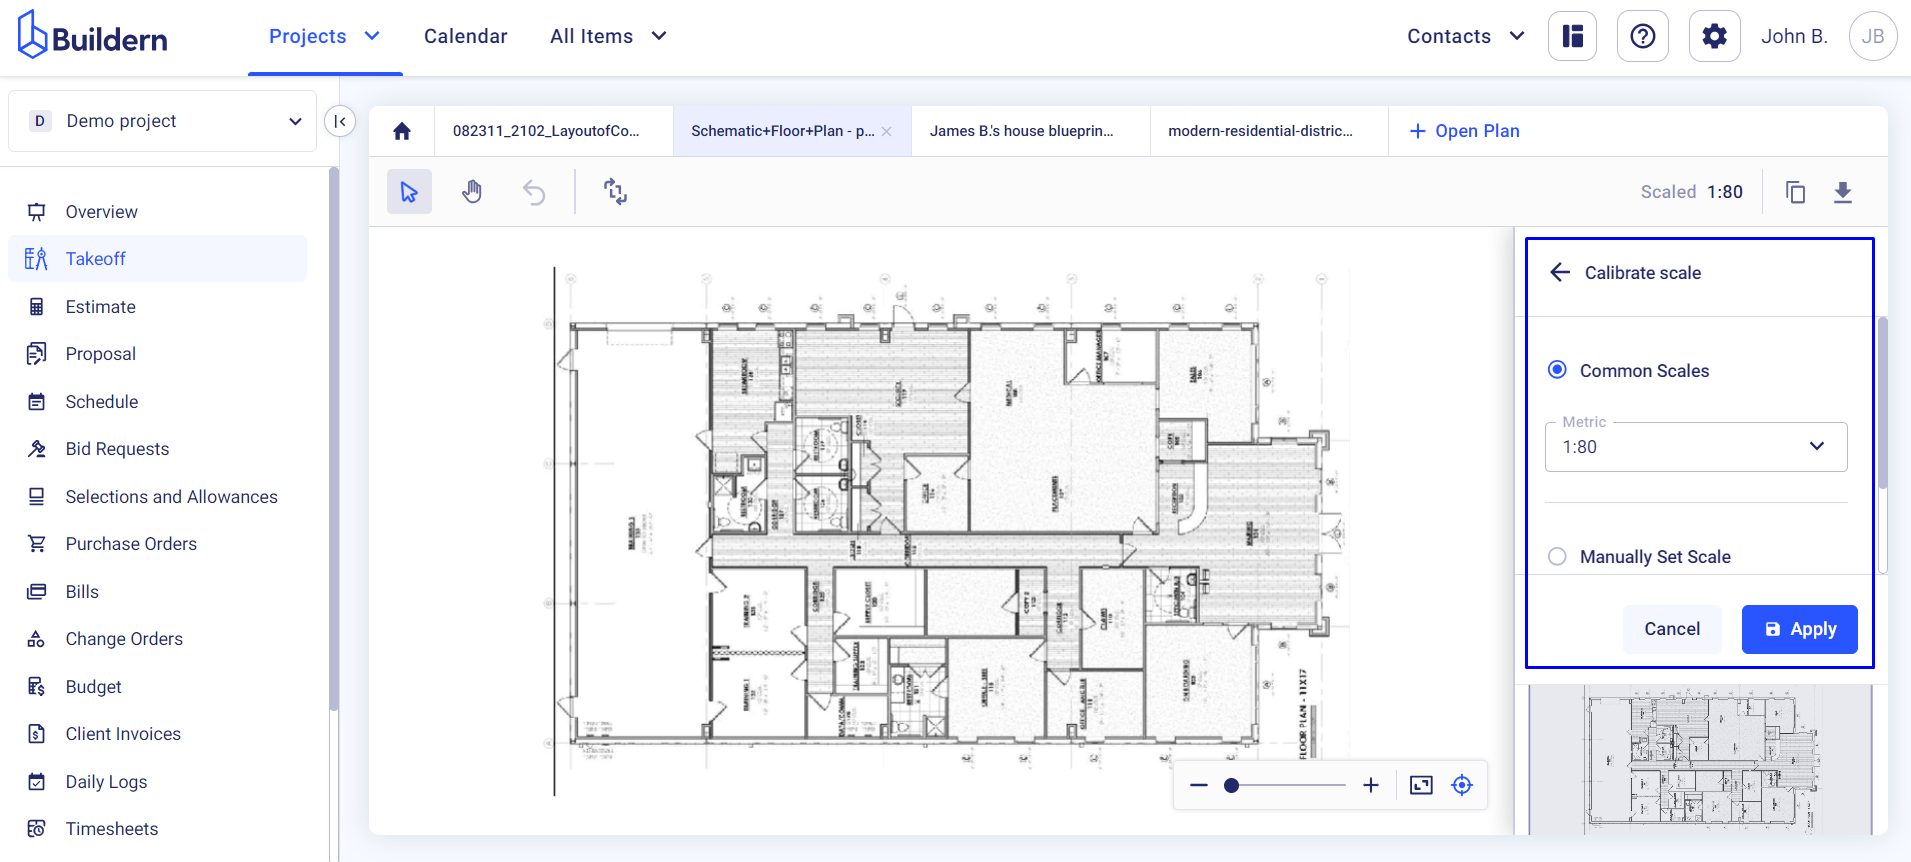
You can also apply the scale to multiple plans by hitting the corresponding command and selecting the pre-added plans.
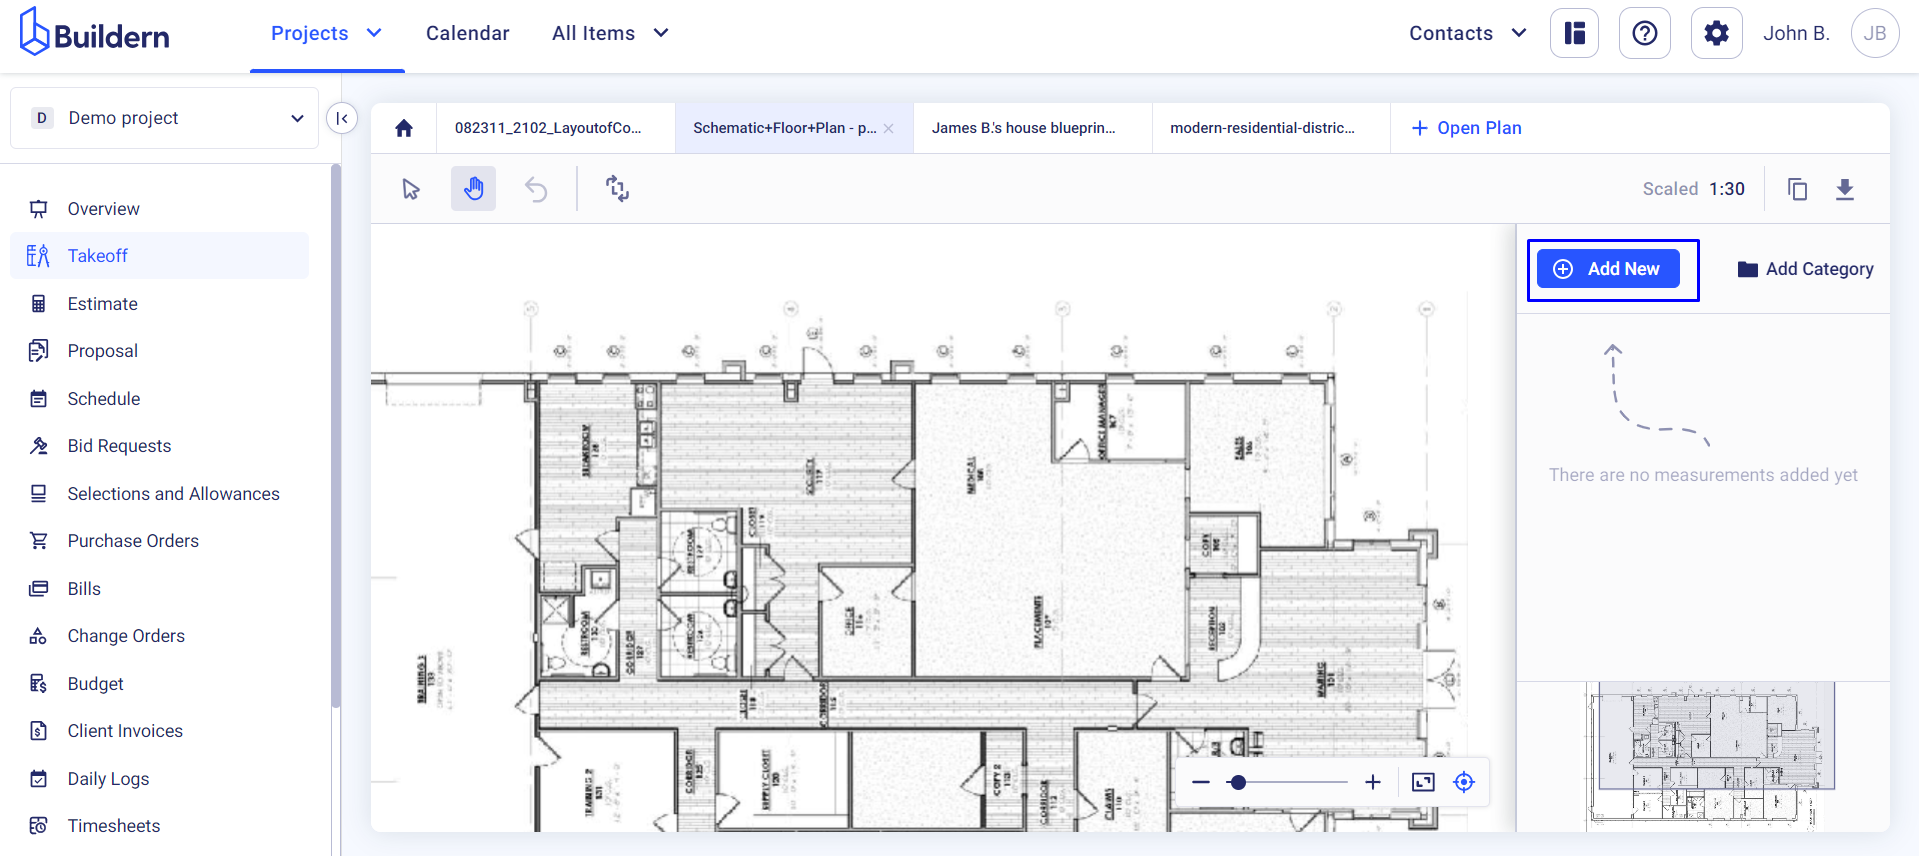
You are now ready to add new measurements. Click the Add New button to begin.
Buildern allows you to measure your blueprints with the following different types:
-
Area
-
Roof area
-
Vertical area
-
Length
-
Count
-
Count with length
-
Volume
Suppose you want to start with the area measurements. Set it as the measurement type then give a name (Floor in our case). You can also assign the measurement to a category to get really granular about the customization and work within our takeoffs.
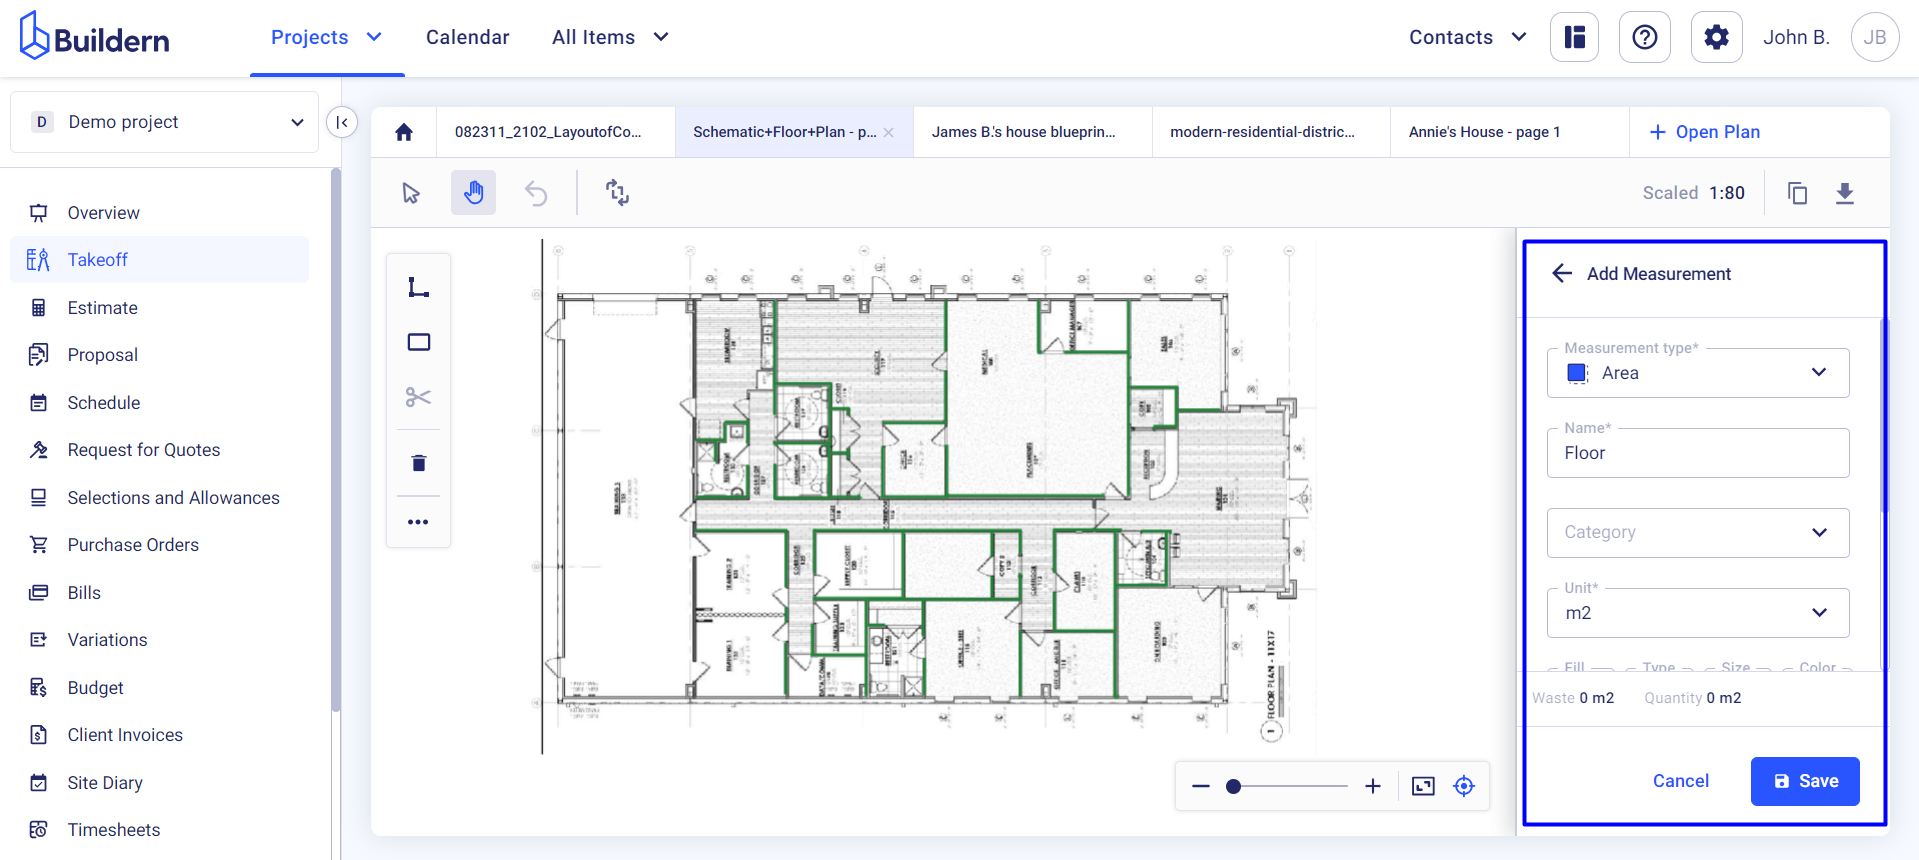
Next is to set the measurement unit and define the waste percentage.
Once you save the details, you are ready to proceed with the measurements. For this, choose the measurement, and use the takeoff tools that will appear on the left. You can draw straight lines, non-straight lines, and rectangles to get the area measured.
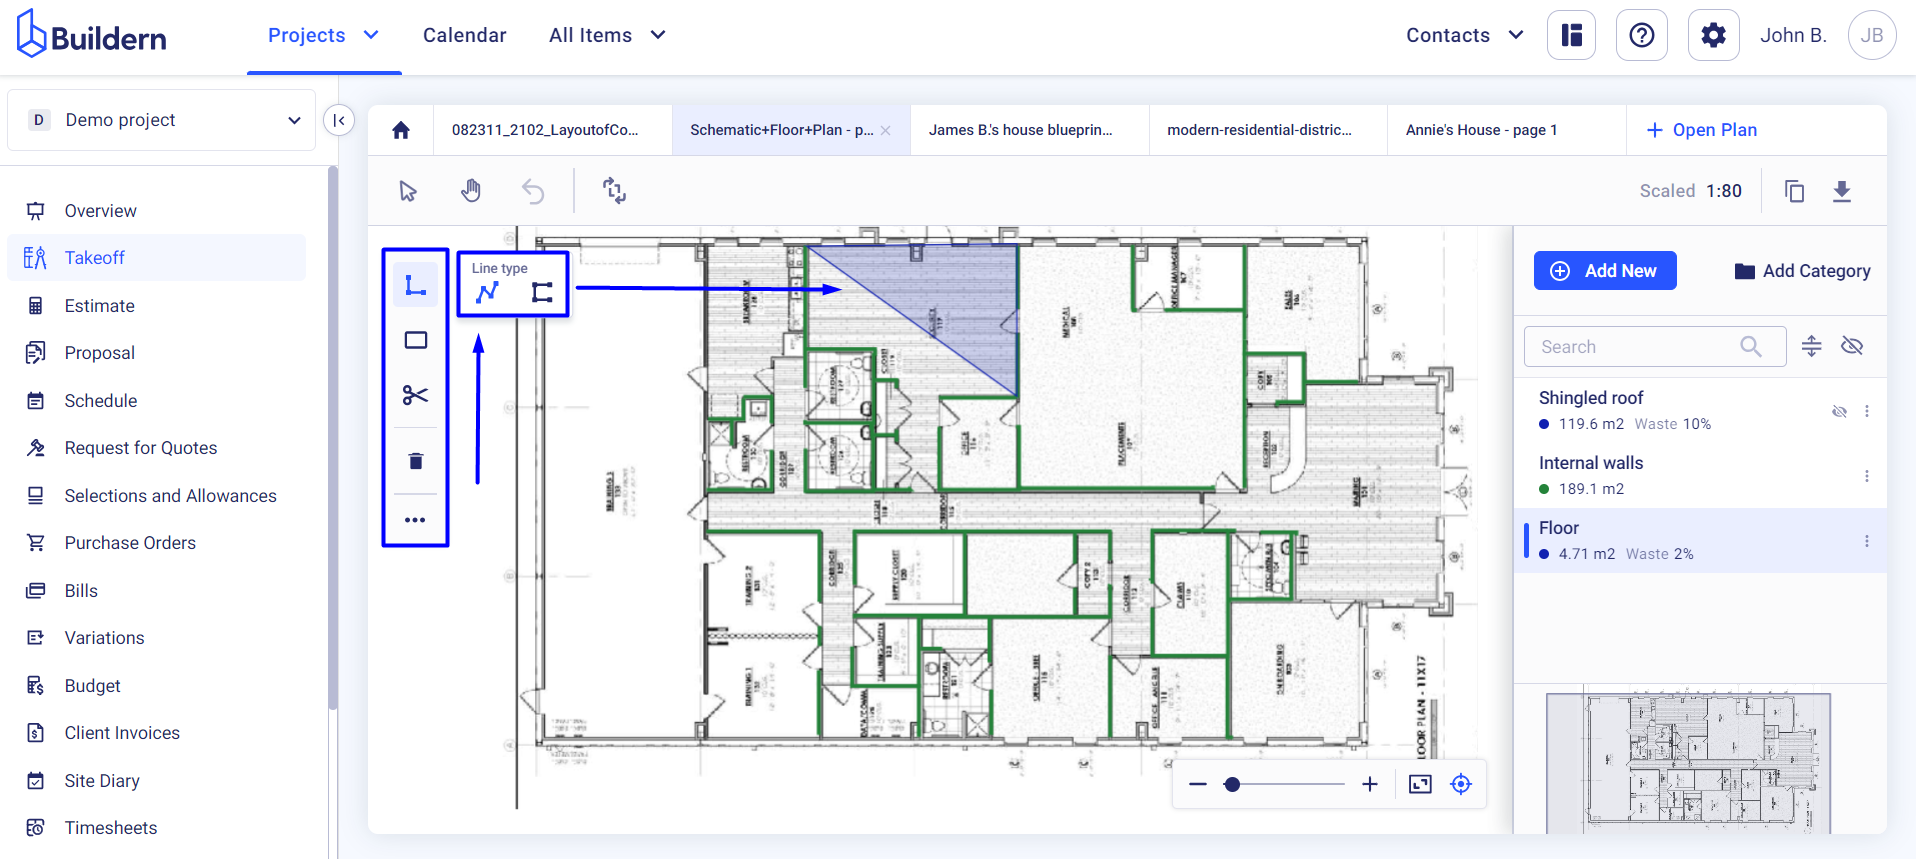
Here you can also deduct or delete the measurements or change the position of tools (check the three little dots on the left).

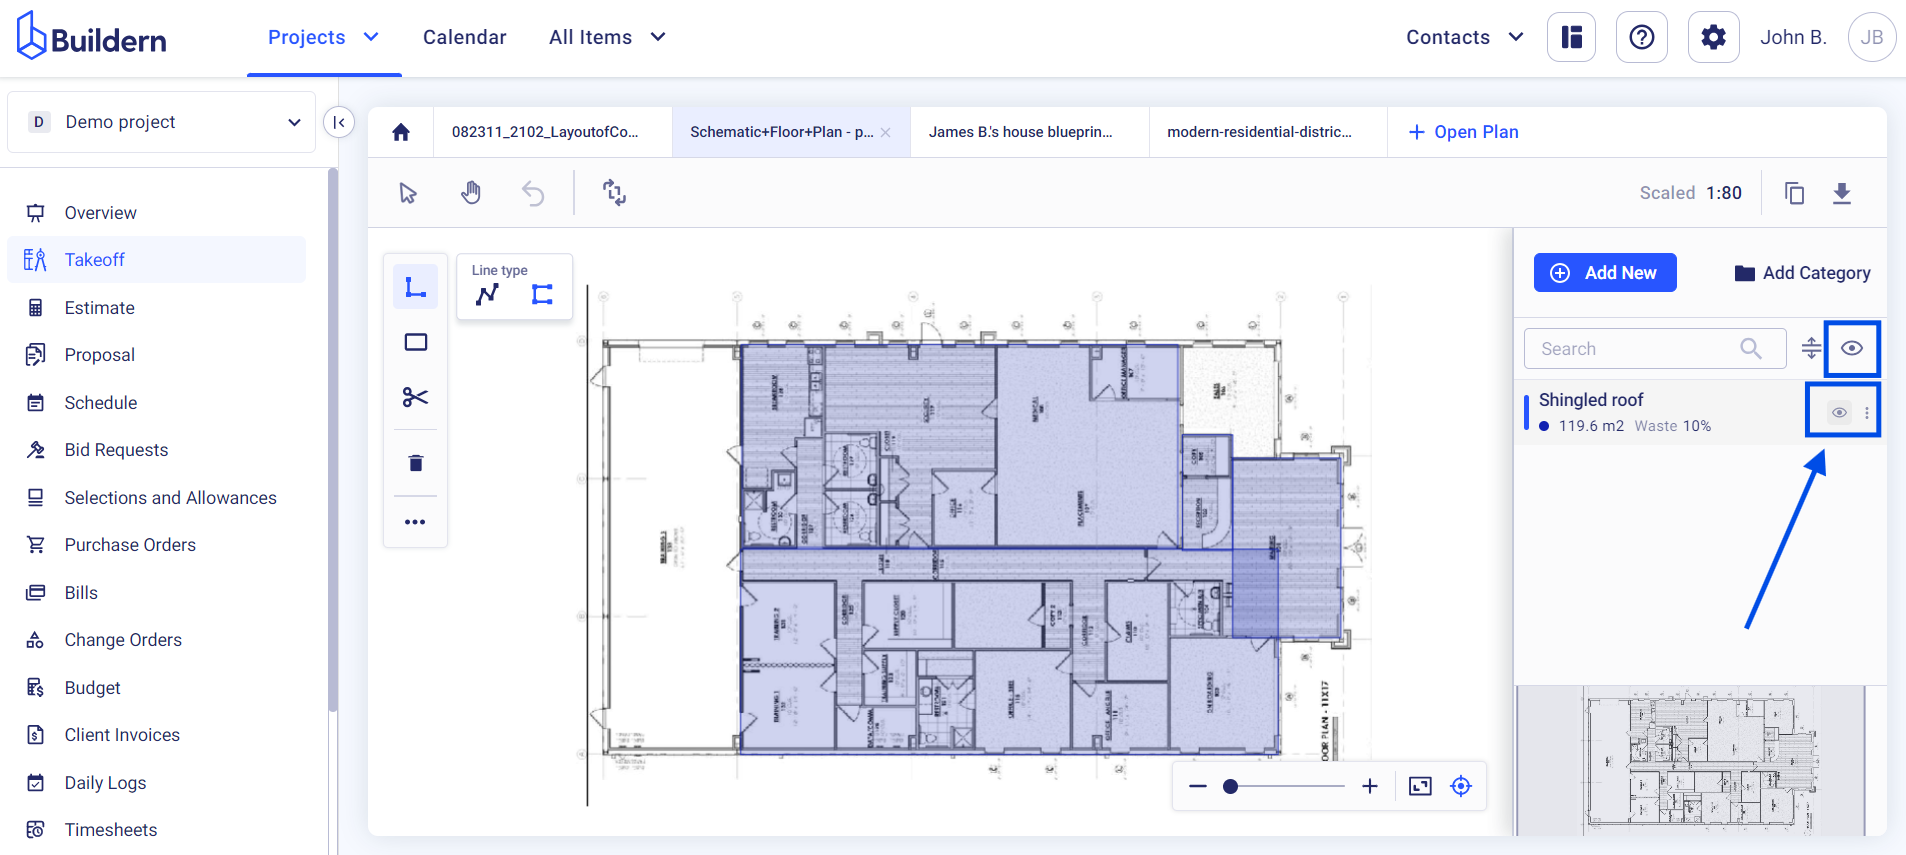
Suppose you now need to add another measurement type. You can hide the previous ones, so they don’t bother your view. Simply click on the corresponding icon as shown below.
Let’s now create a measurement for the length. Click the Add New button and choose the type from the drop-down menu.
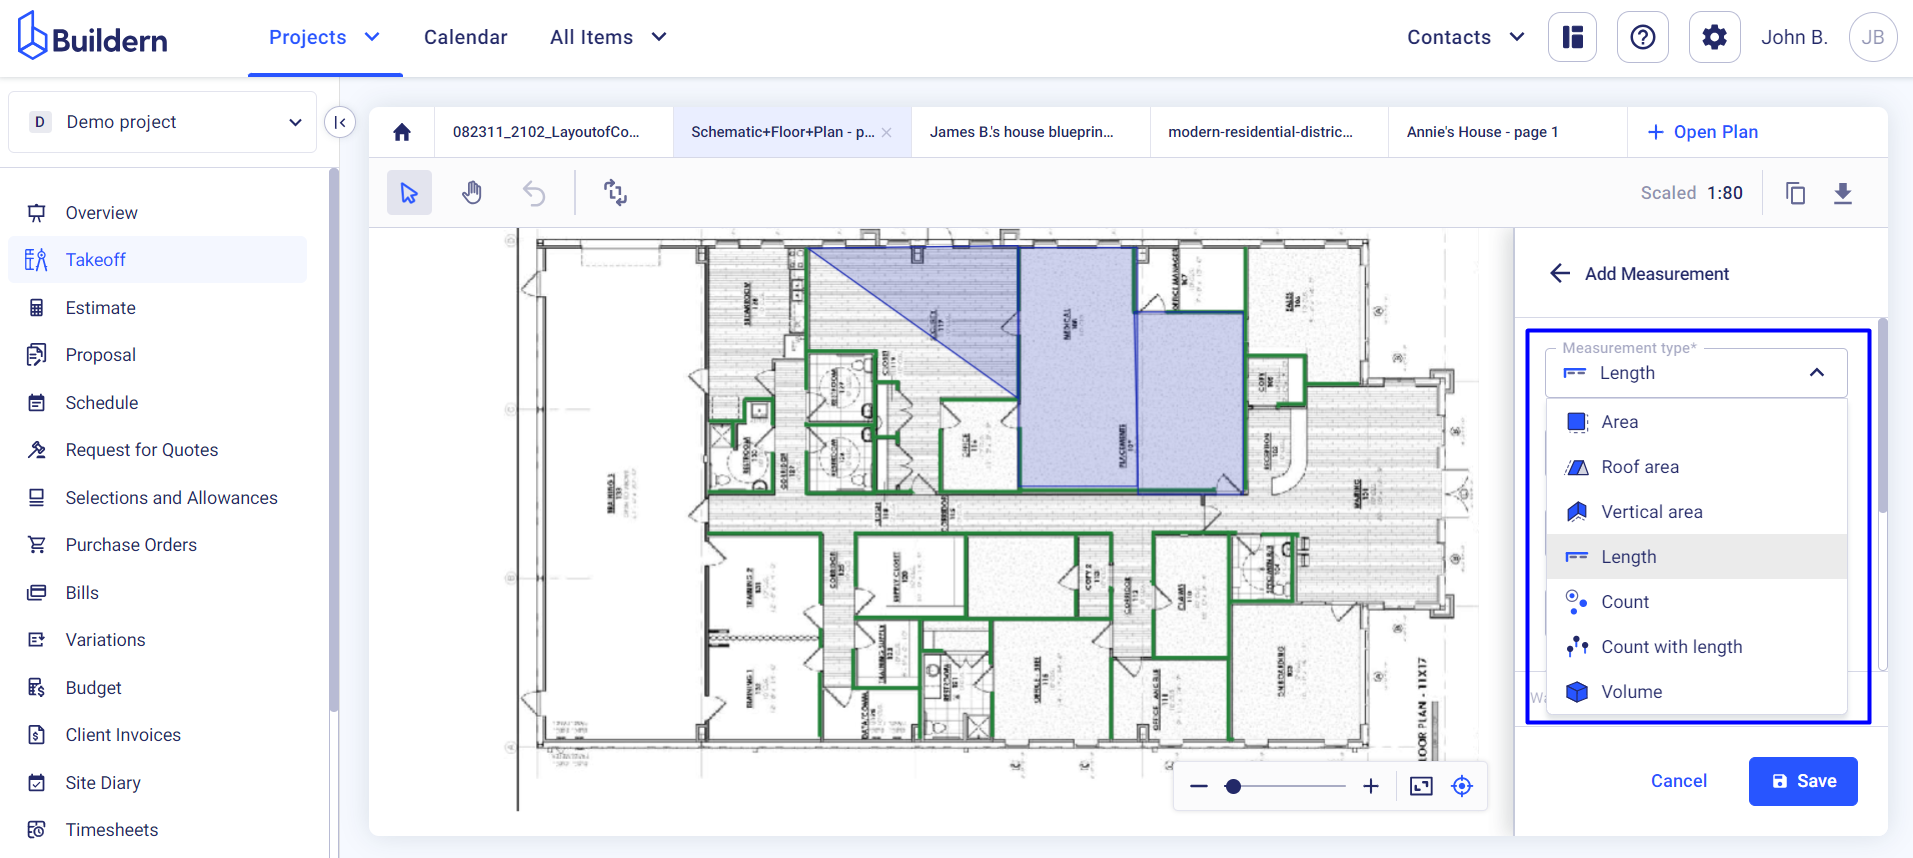
Give a name to the measurement type, choose the category, and set the waste percentage if any.
You can also customize the way this measurement appears in the plan. Consider setting a different color than the previous one and choose the line type and size parameters.
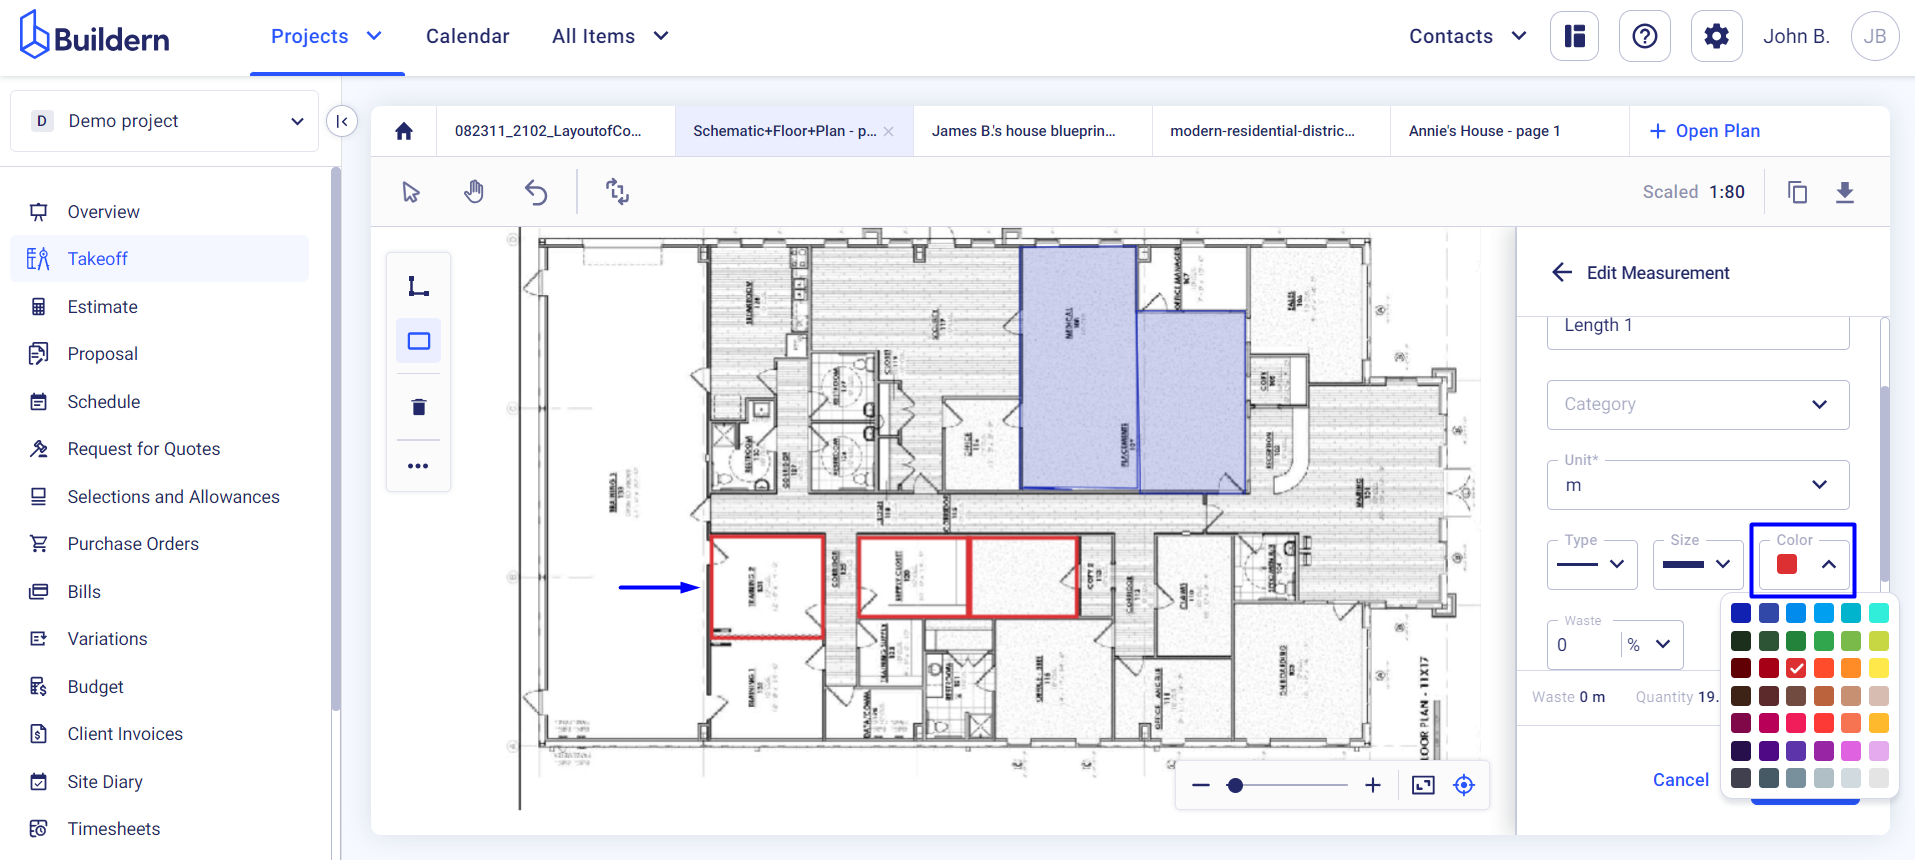
This will help you have a clear visual distinction between different types of measurements on the plan. Here’s how it will look in our case.
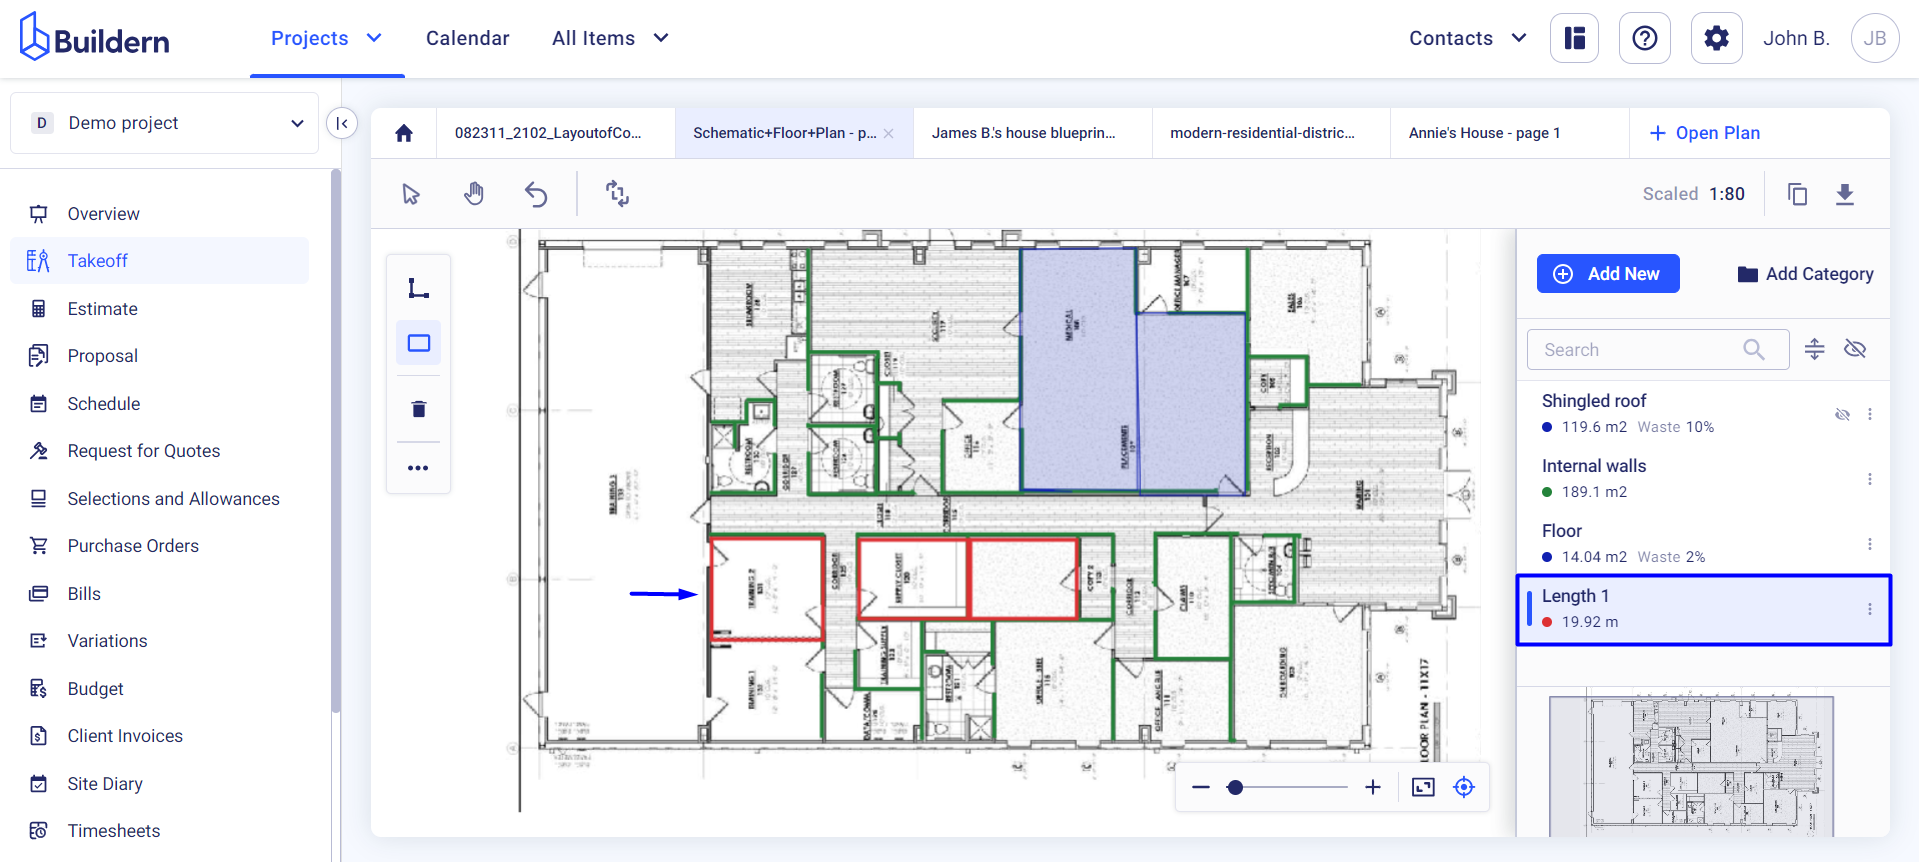
The final calculations are the sum of all the areas you’ve measured for Length.
The other measurement types work with the same logic. You add the details, measure the area on the plan, and Buildern calculates the total quantity based on the parameters you've defined.
💡Recommended Reading