Powered by PayEngine, accepting construction invoice payments through Buildern requires completing a simple onboarding process.
Please, get acquainted with the terms before proceeding:
-
VS/MC/DS 2.9% +$.30
-
AMEX 3.4% + $.30
-
ACH 1% (max $20)
-
MONTHLY $20
-
PCI $79
Here are the main steps:
Step 1. Go to your Company Settings
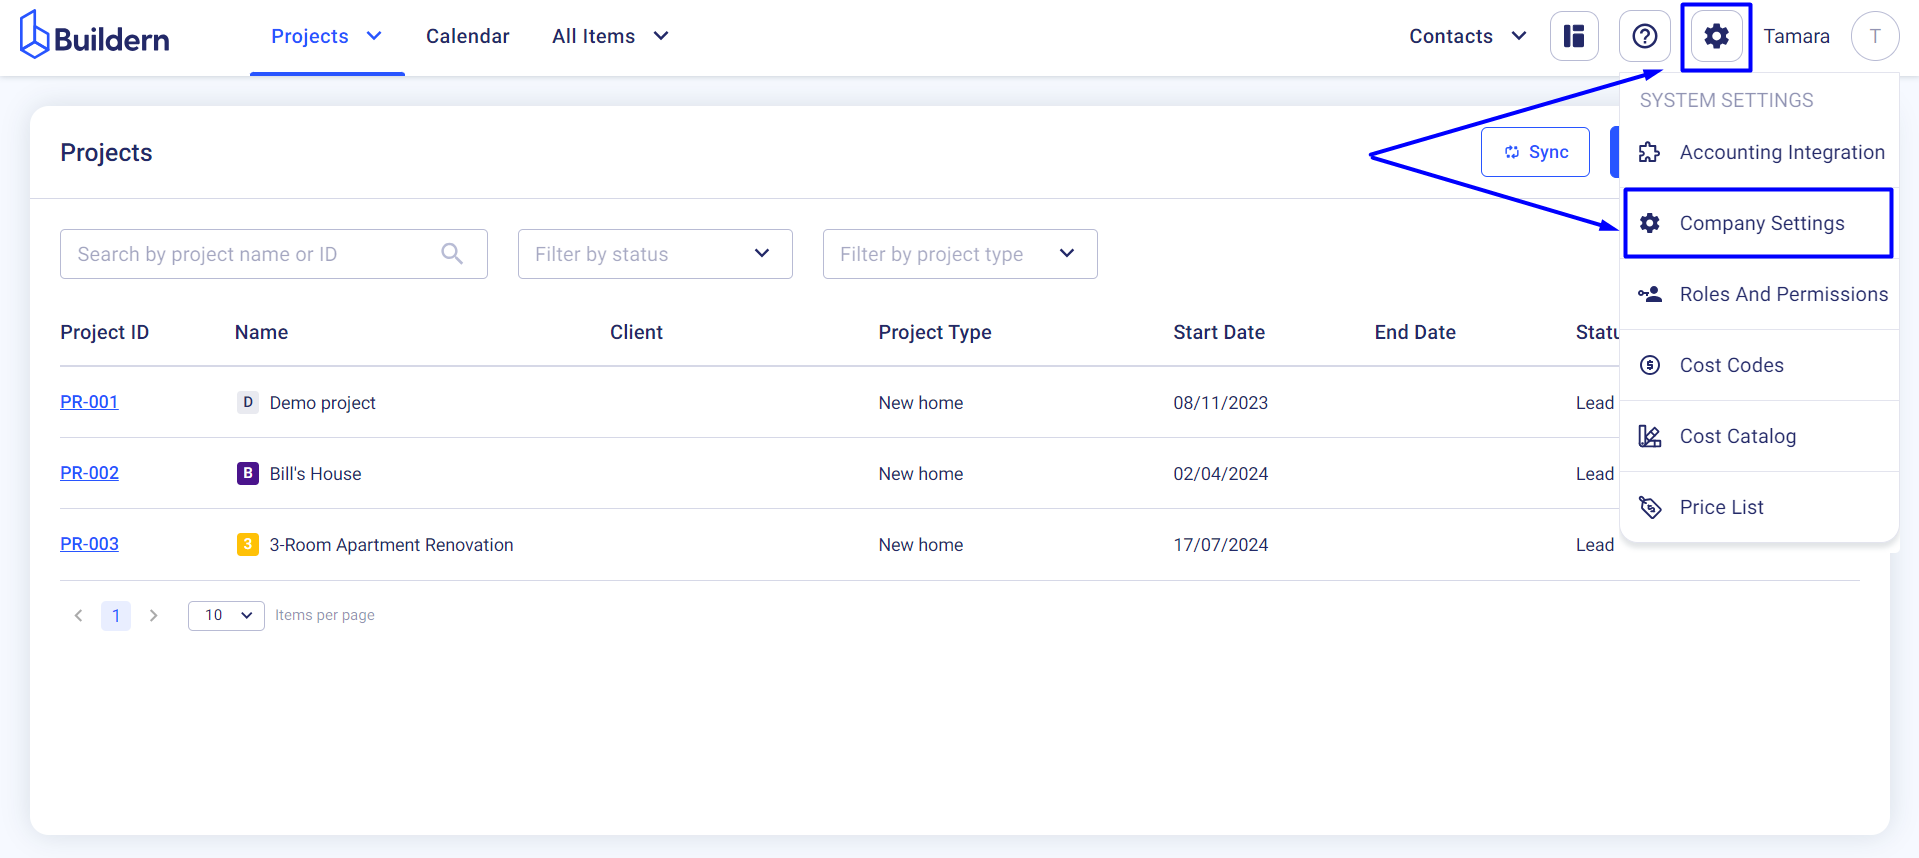
Step 2. Go to the Accept Payments section
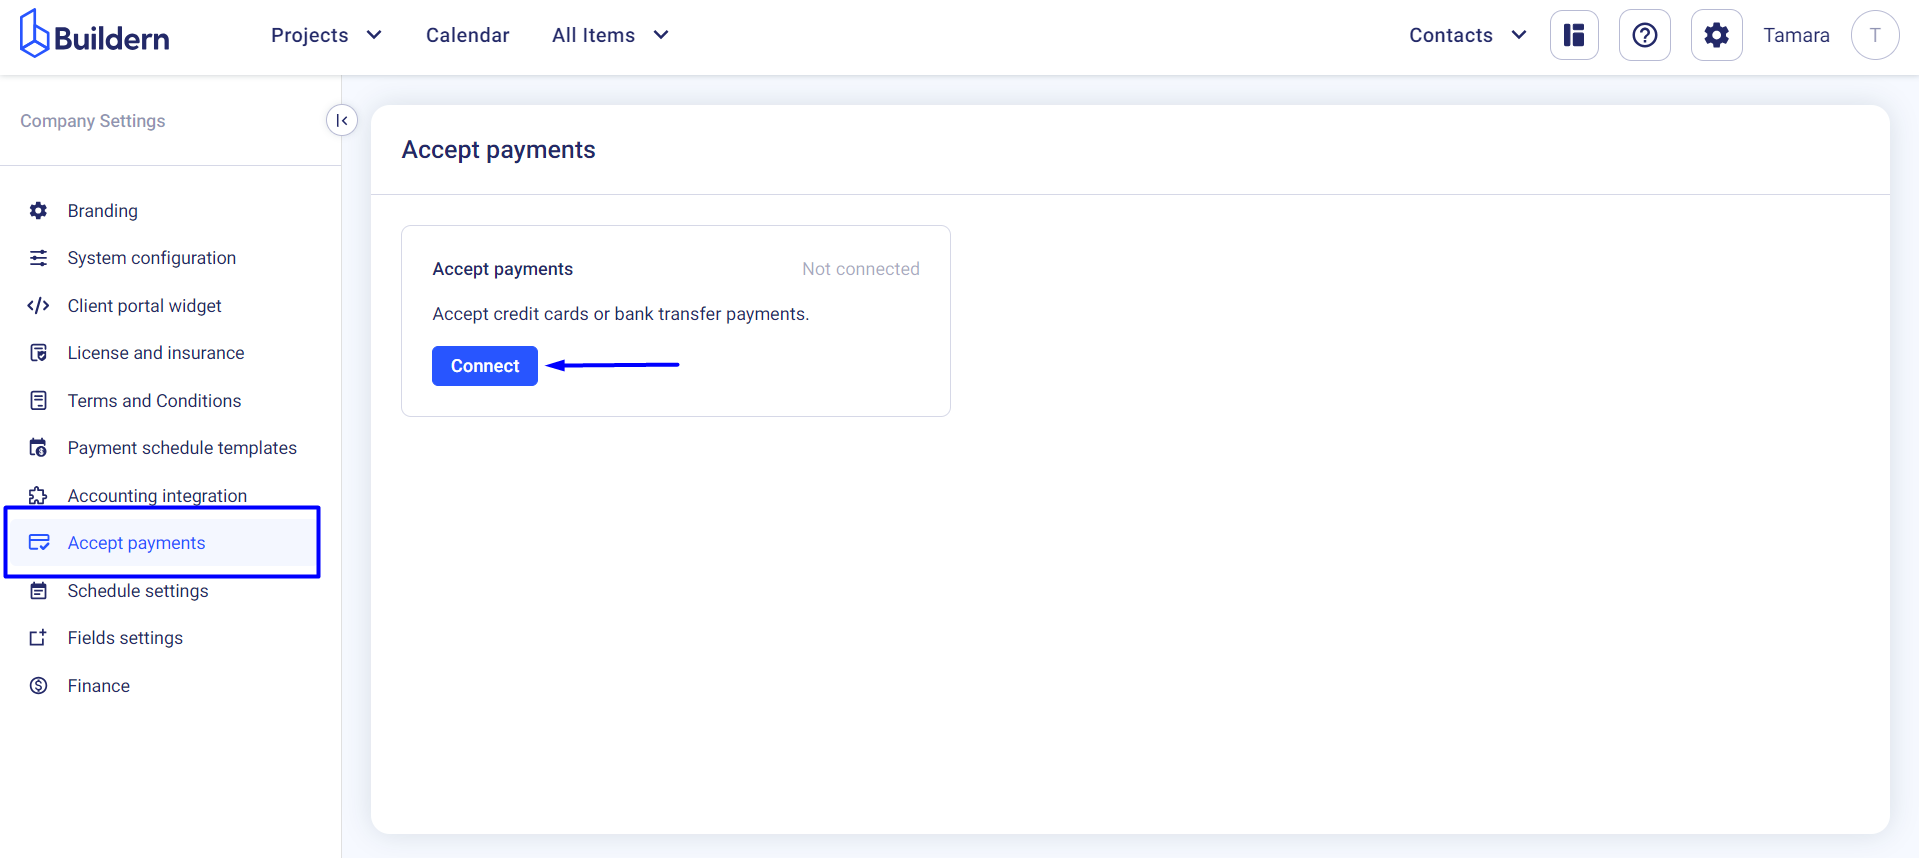
Click the Connect button to begin.
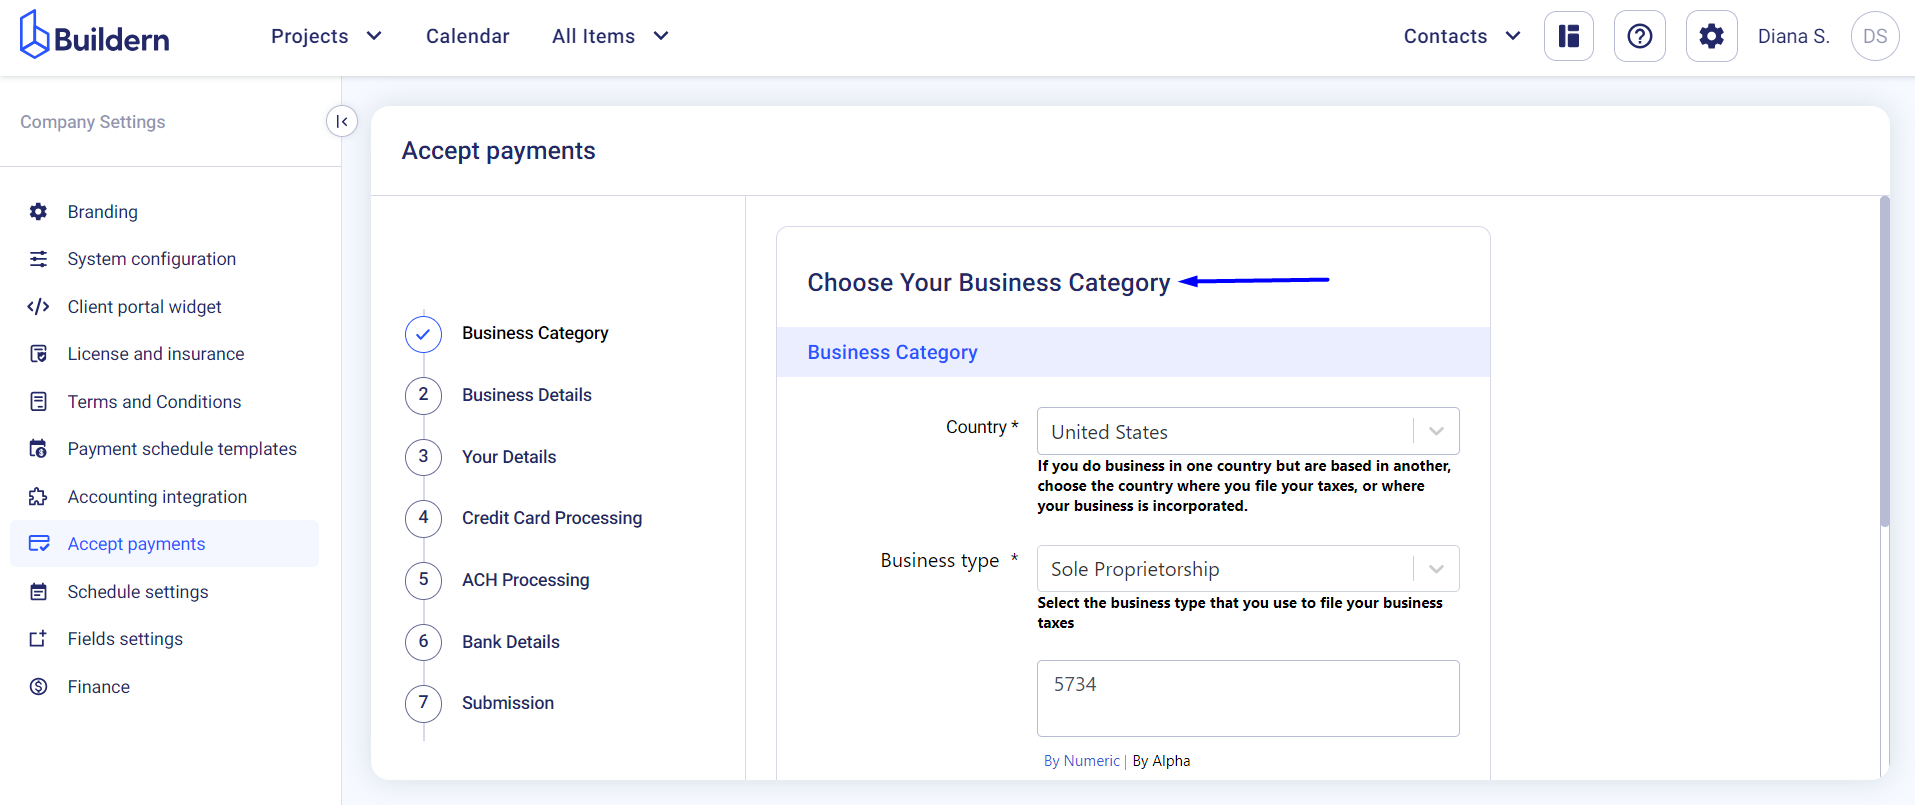
Step 3. Provide information about your business category
Note that all fields are required.
-
Country: Our system currently supports accepting payments for US and Canada-based companies. If your business operations span multiple countries, select the country where your business is officially registered or where you file your taxes.
-
Business Category: Select the business type you use to file your business taxes. The options include C Corporation, Multiple Member LLC, Non-Profit Corporation, Partnership, Sole Proprietorship, Single Member LLC, and S Corporation.
-
Merchant Category Code (MCC): This is a four-digit code that classifies your business into an industry category. Select the relevant MCC from the drop-down menu.
Save and Continue to other steps.
Step 4. Provide business details
This step involves filing information for three sections:
1. Legal Details
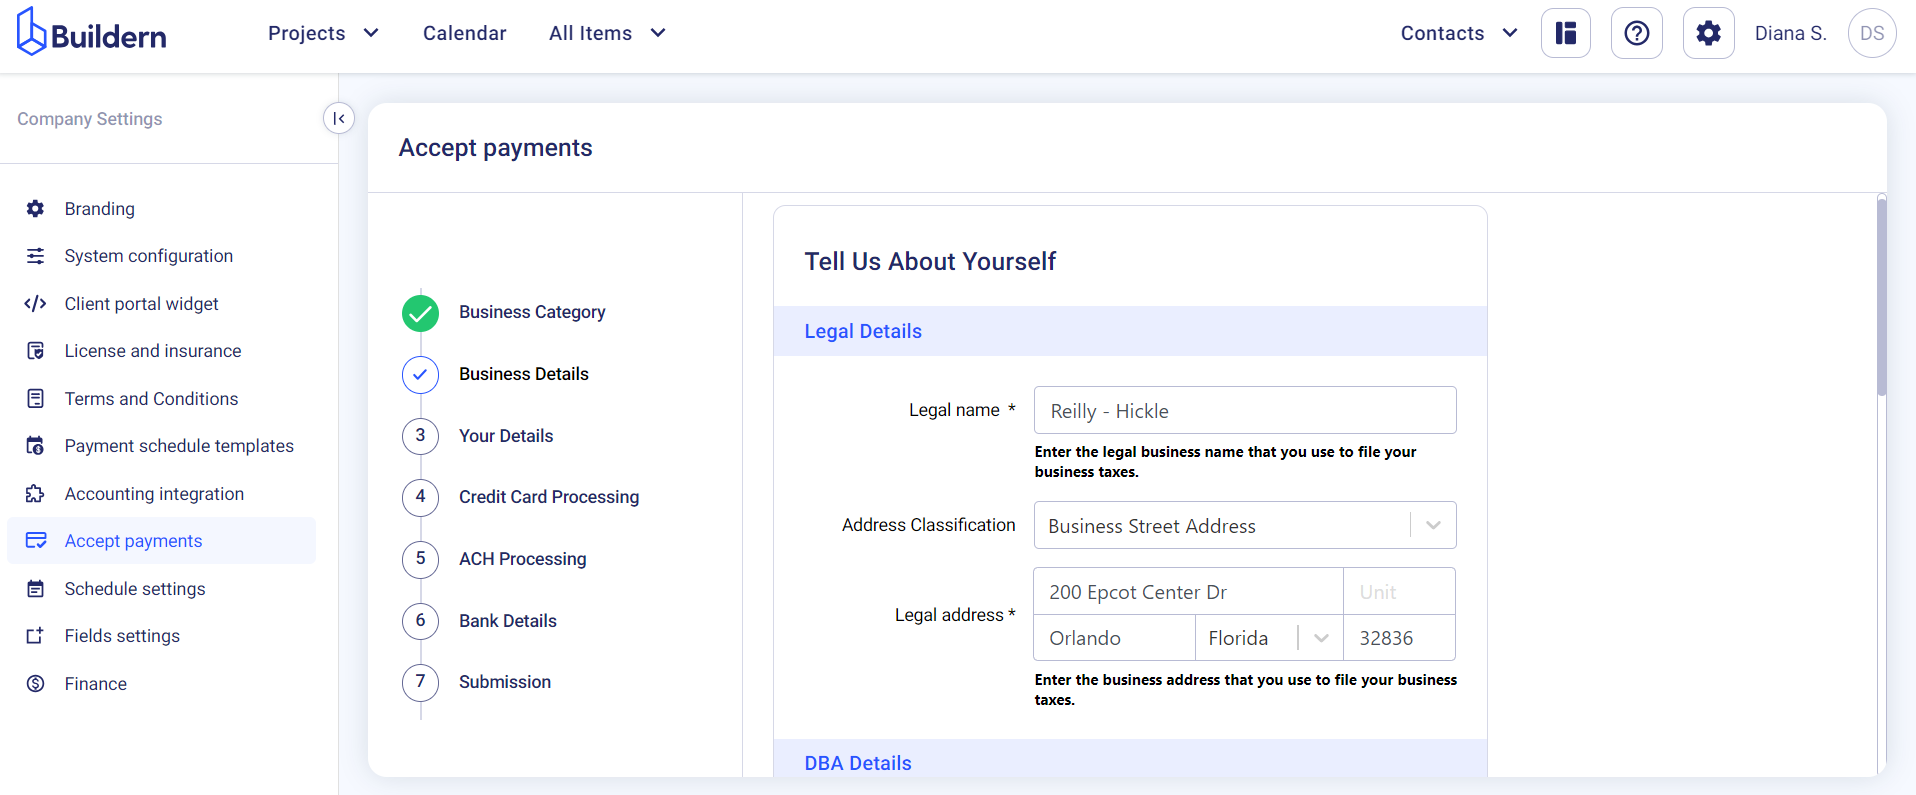
2. DBA Details and Business information
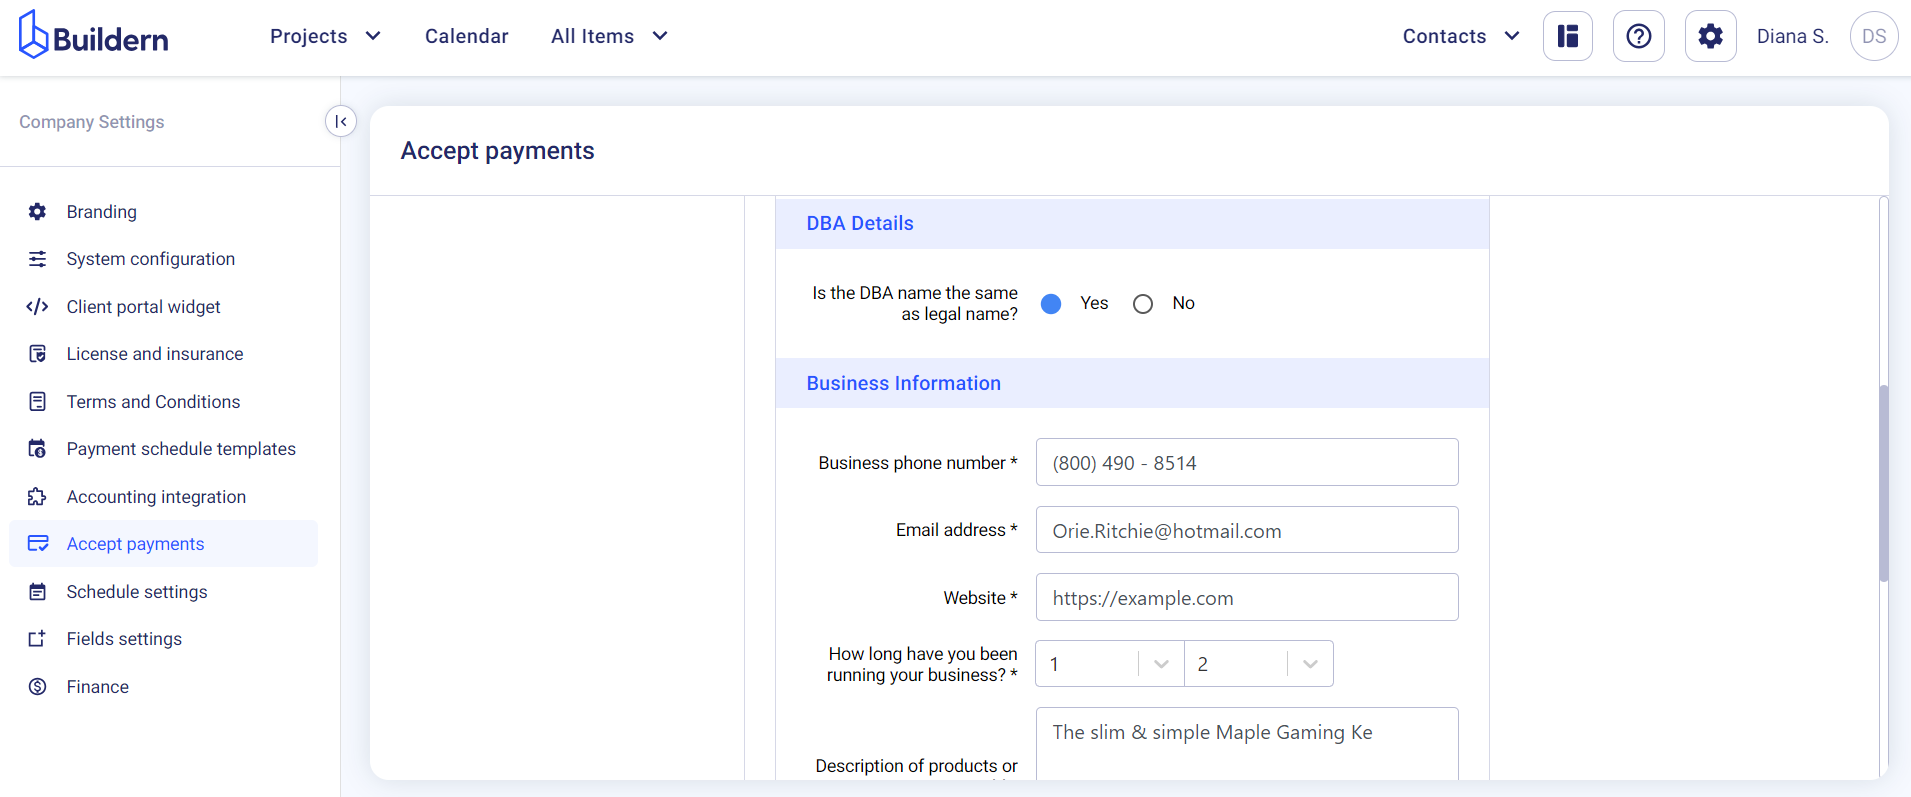
Note that all fields are required when providing business information.
Here you will need to list the following:
-
Business phone number
-
Email address
-
Company website
-
The number of days you've been running your business
-
Product/service description
-
The number of days it takes for the cardholder to receive their product or completed service
-
Annual revenue $
-
Type of tax ID
-
Social Security Number (SSN)
This information is required to provide us with a better understanding of your business.
Save and Continue to other steps.
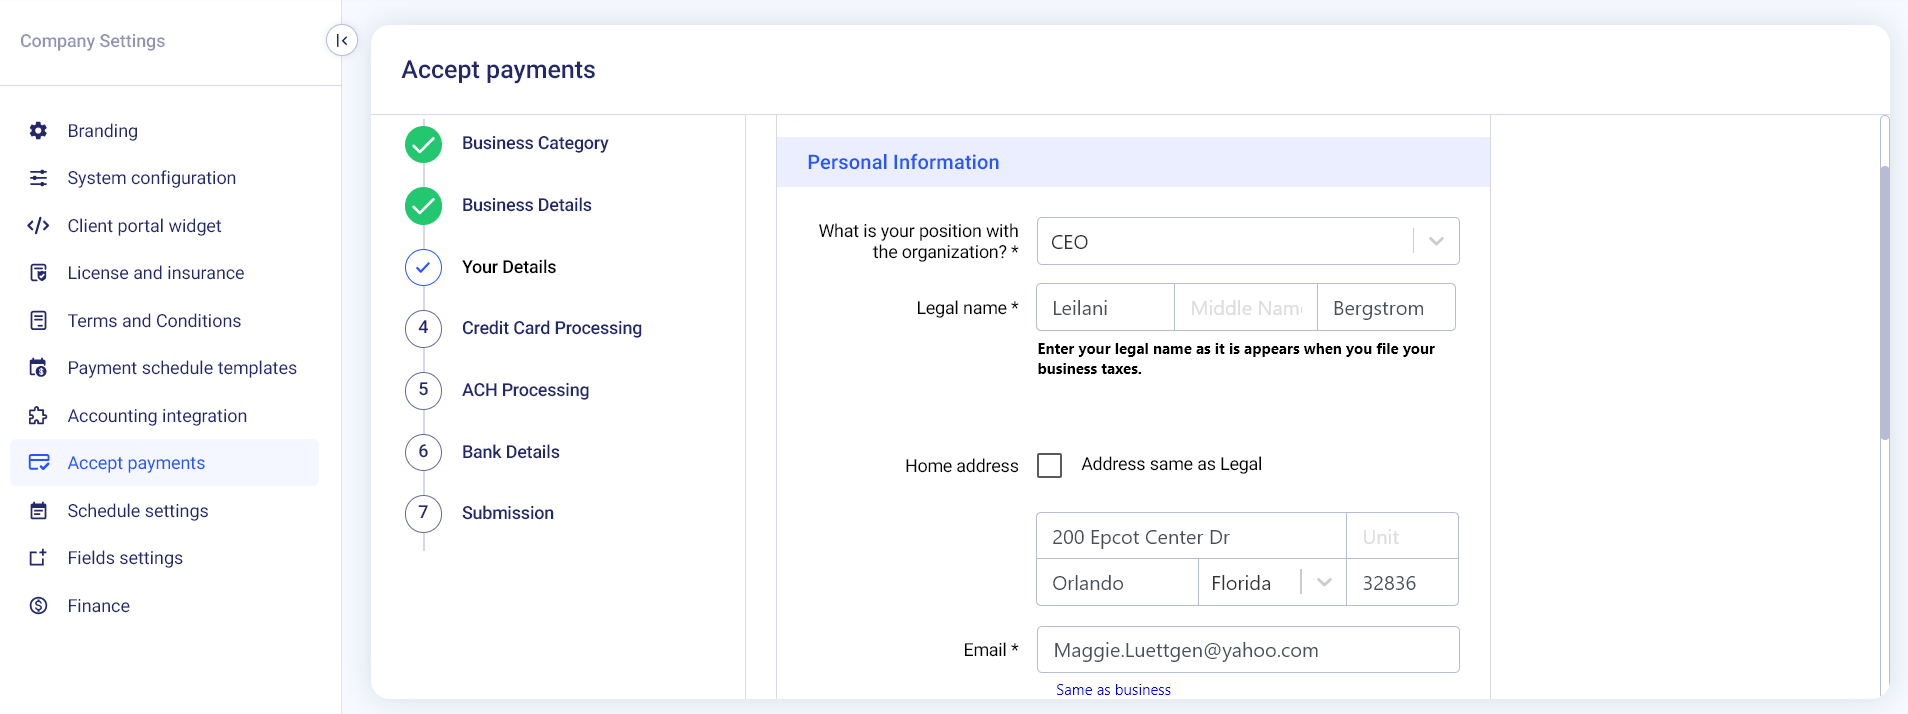
Step 5. Provide company owner details
Buildern will automatically grab data from your account and show it here. But you can also edit the information by clicking the edit icon on the right.
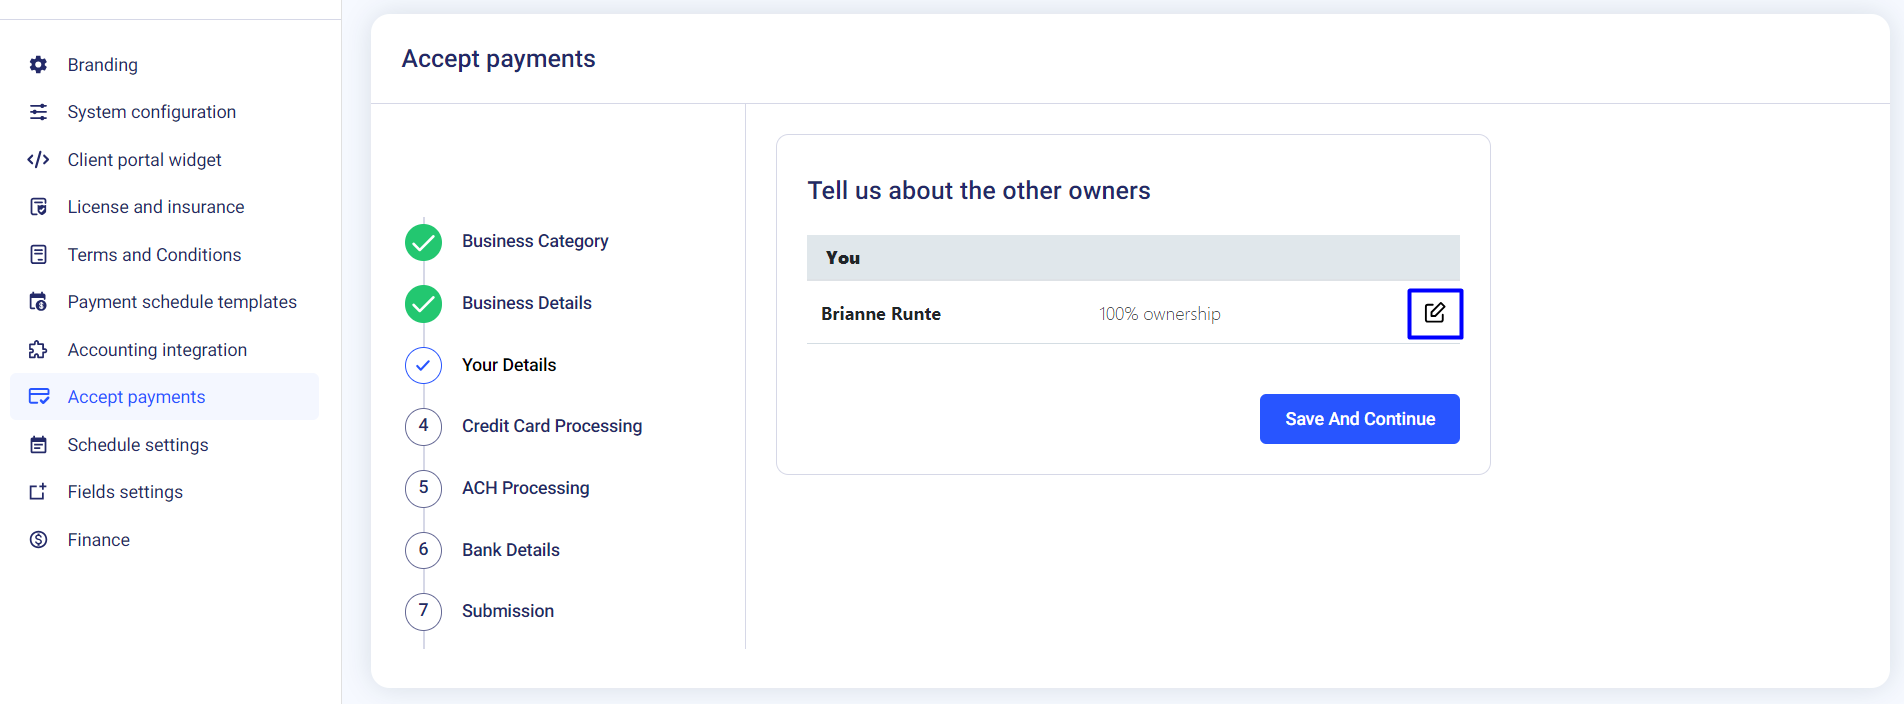
Add information as:
-
Your position within the organization
-
Your legal name, work email address, phone number
-
Date of birth
-
Social Security Number (SSN)
-
Country of citizenship
Save and Continue to other steps.
Step 6. Credit card processing
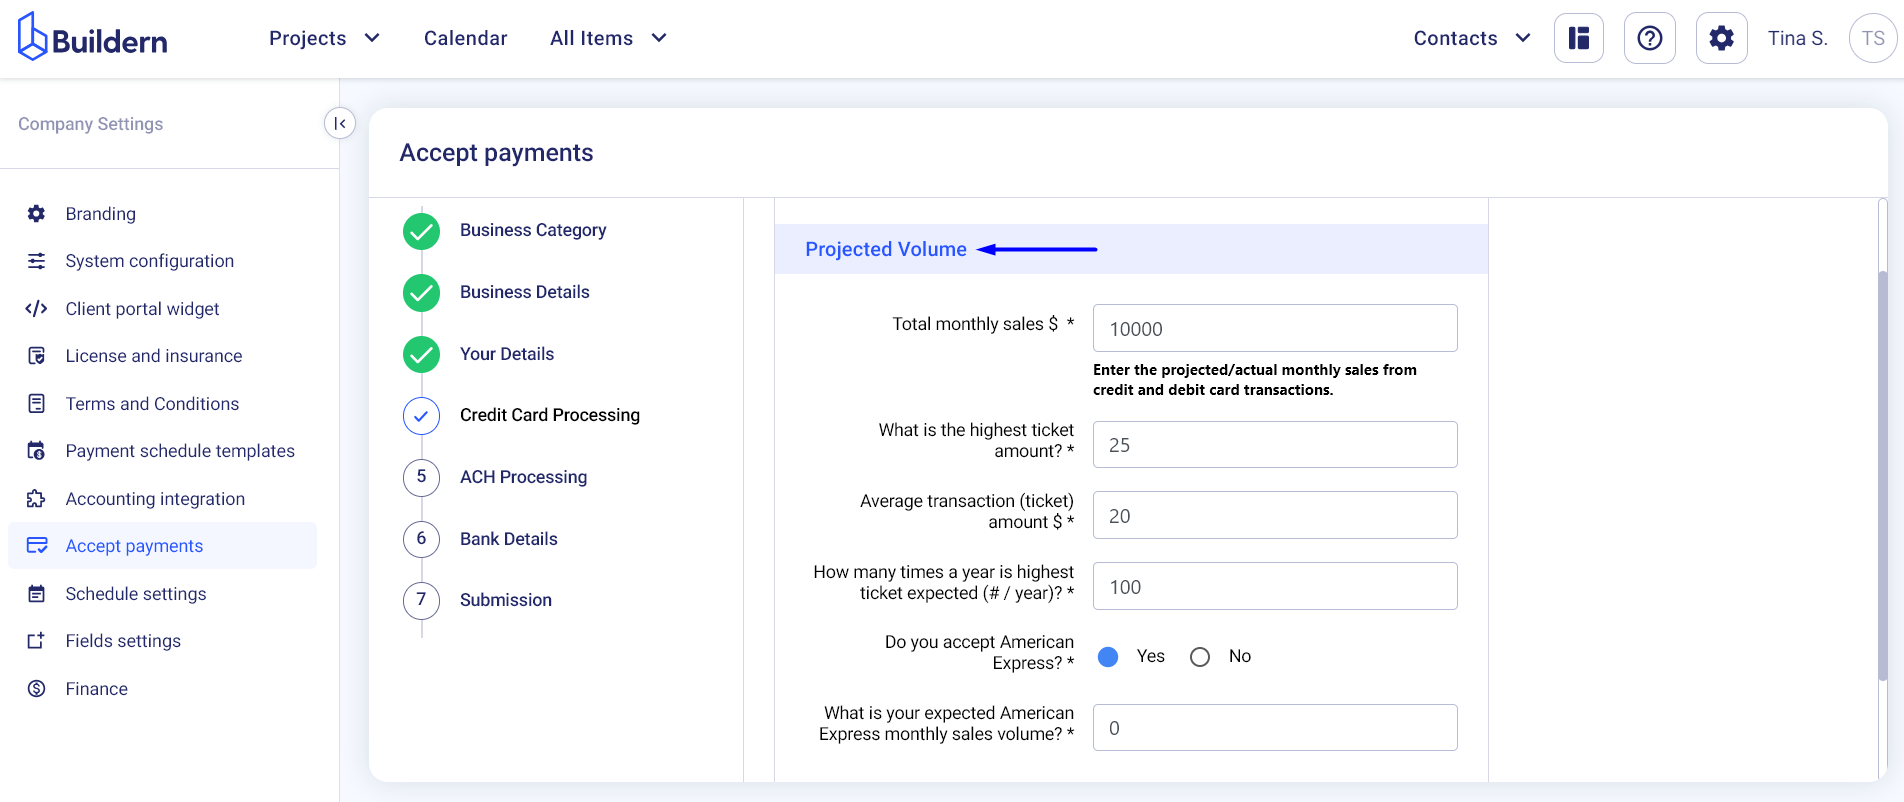
At this stage, you will be required to fill in information about the projected value. Try to share as precise data as you can. The system needs this information to be able to assess your business performance.
Consider sharing information about:
-
The total monthly sales in US dollars
-
The highest ticket amount
-
The average transaction amount
-
The frequency you expect to receive the highest ticket
-
Details regarding your work with American Express
Save and Continue to other steps.
Step 7. ACH Processing Details
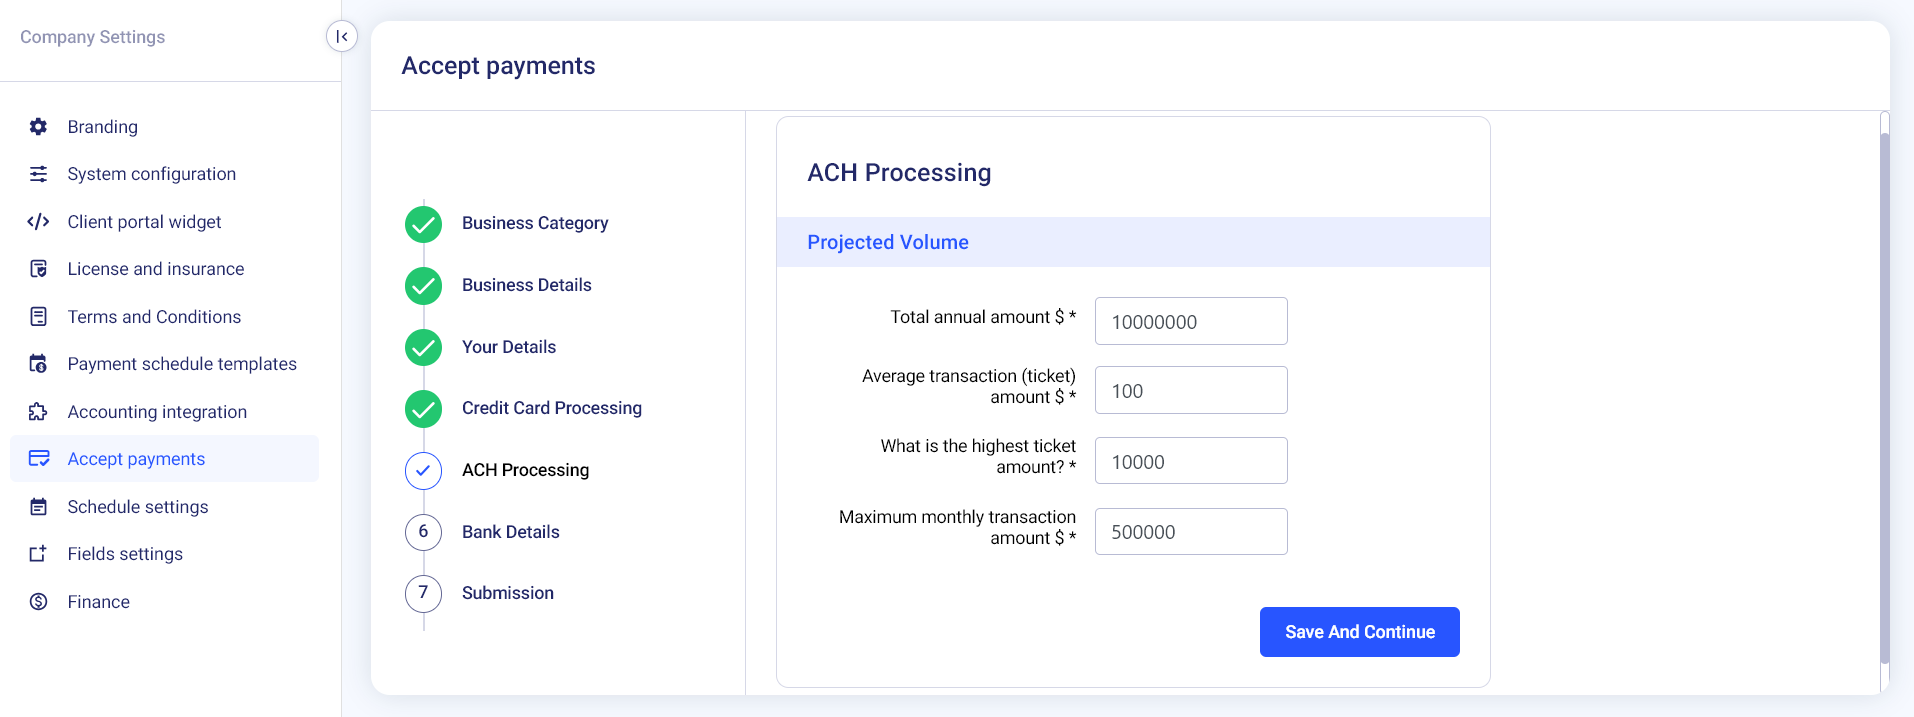
Next is providing details about the direct payments through ACH processing. Also known as "direct payments", ACH processing means transferring money via paper checks, credit card networks, wire transfers, or cash.
To access Buildern's payment system you will need to share realistic amounts, so it is required that you provide the following:
-
The total annual amount
-
The average transaction amount
-
The highest ticket amount
-
Maximum monthly transaction amount
Save and Continue to other steps.
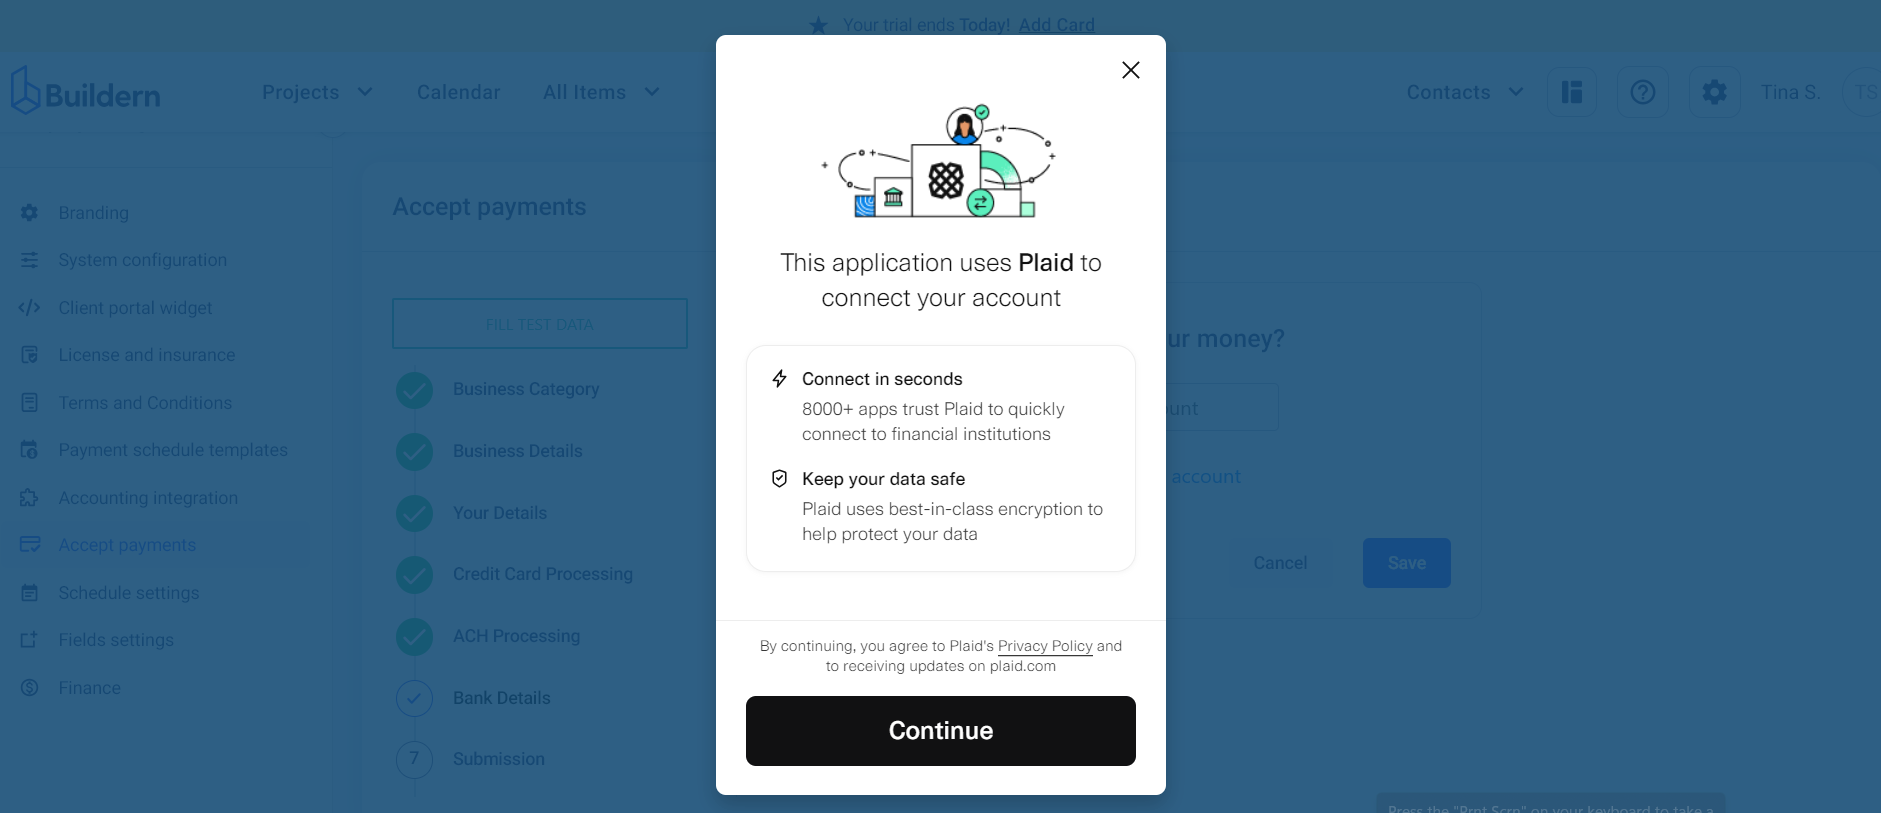
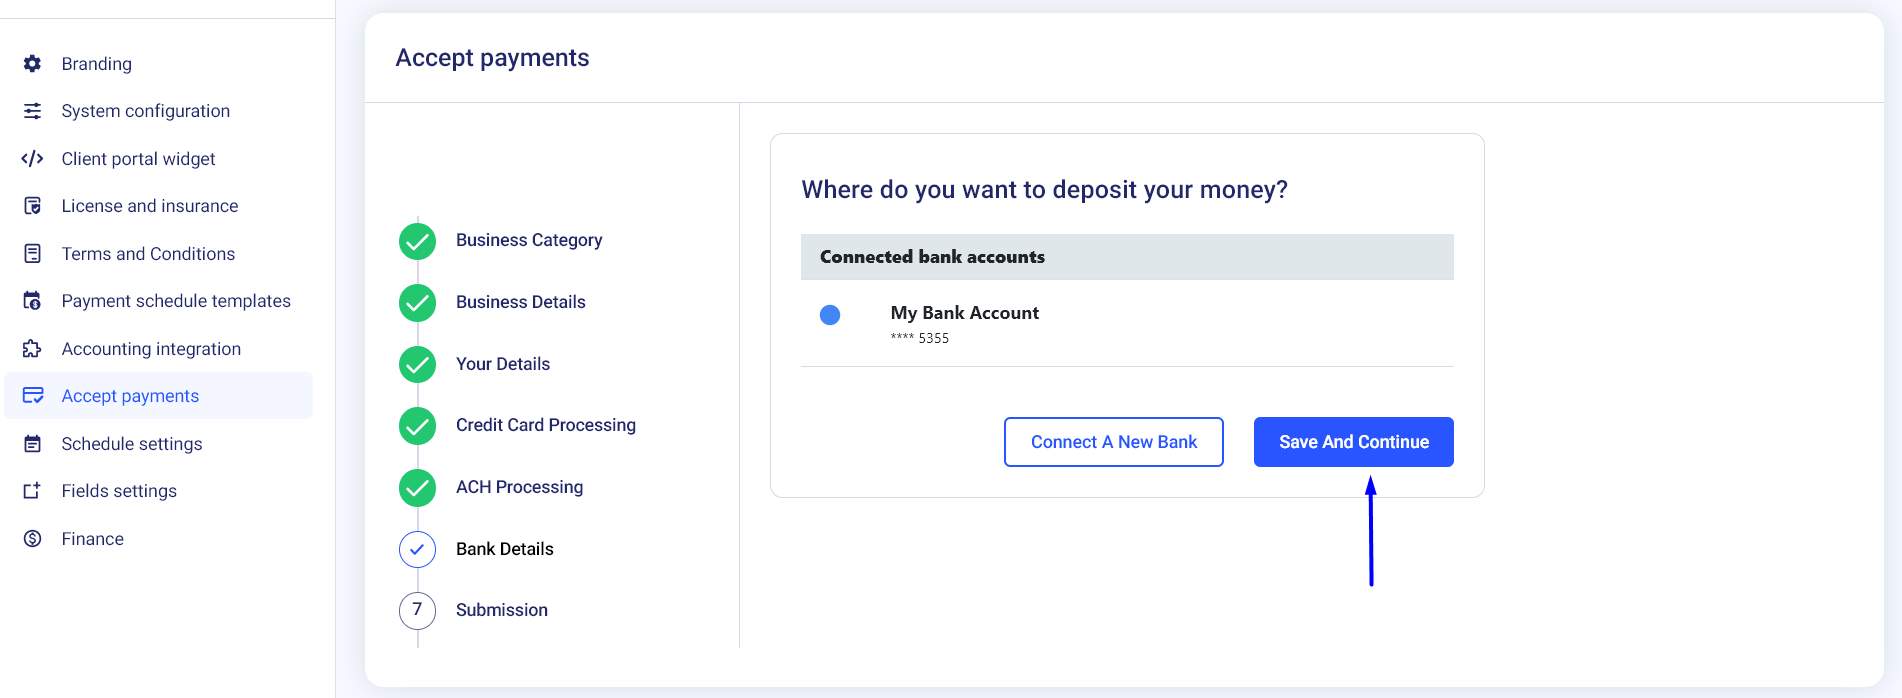
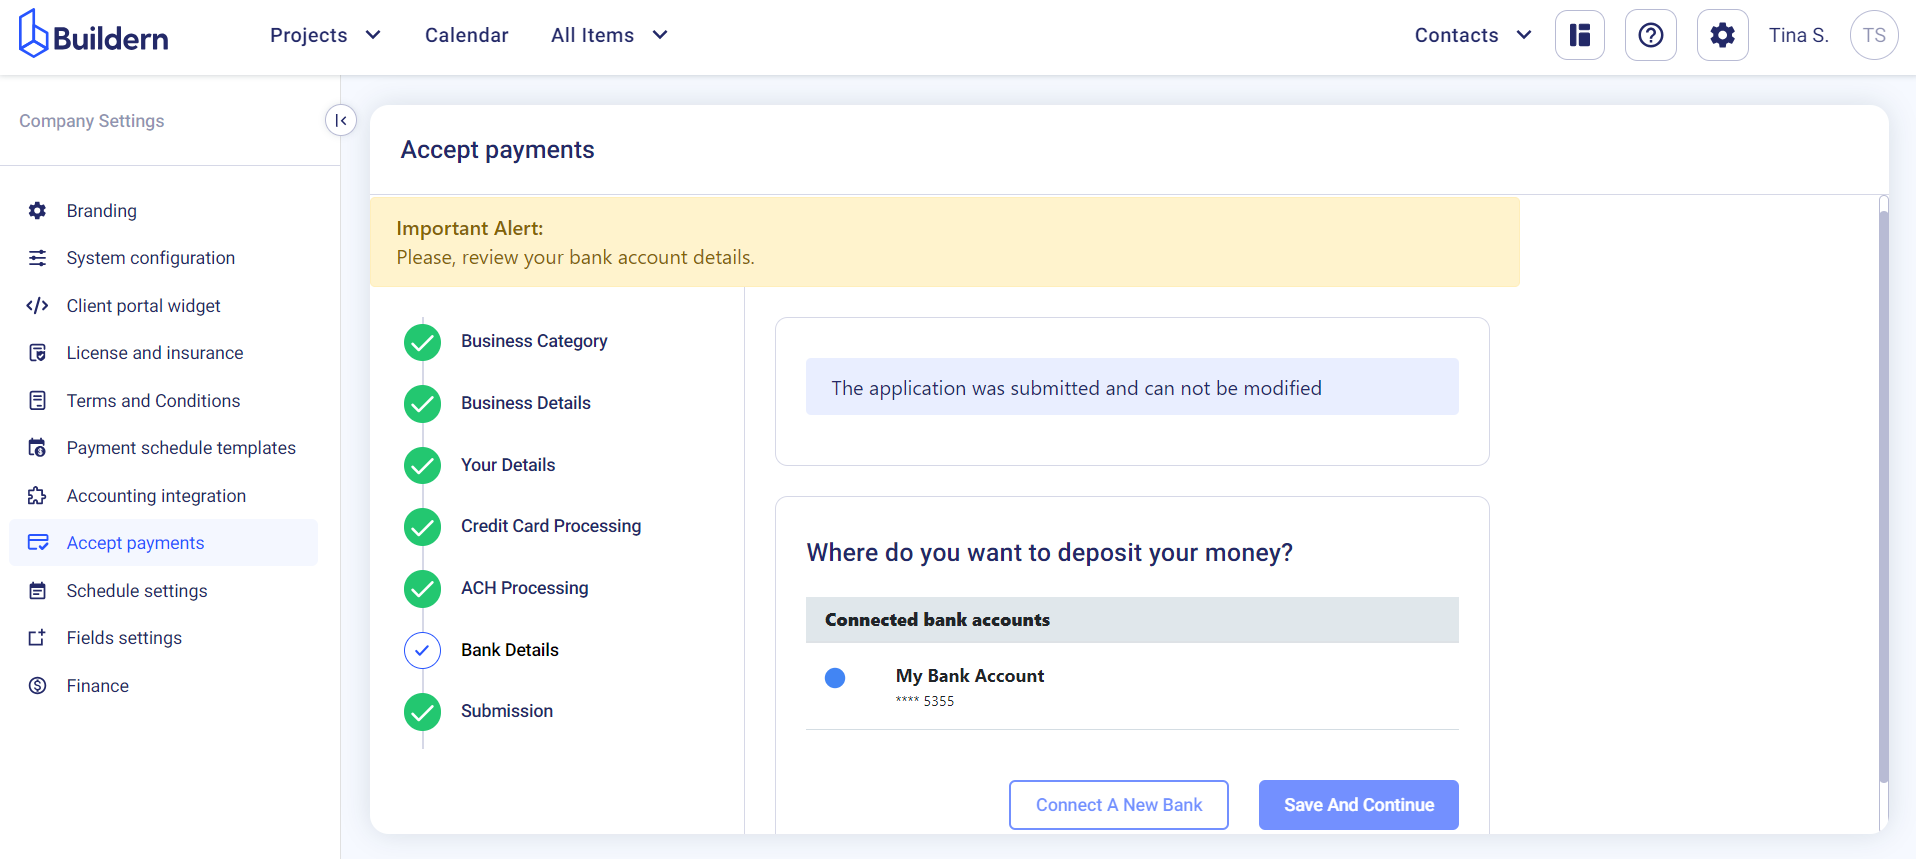
Step 8. Connect your bank account
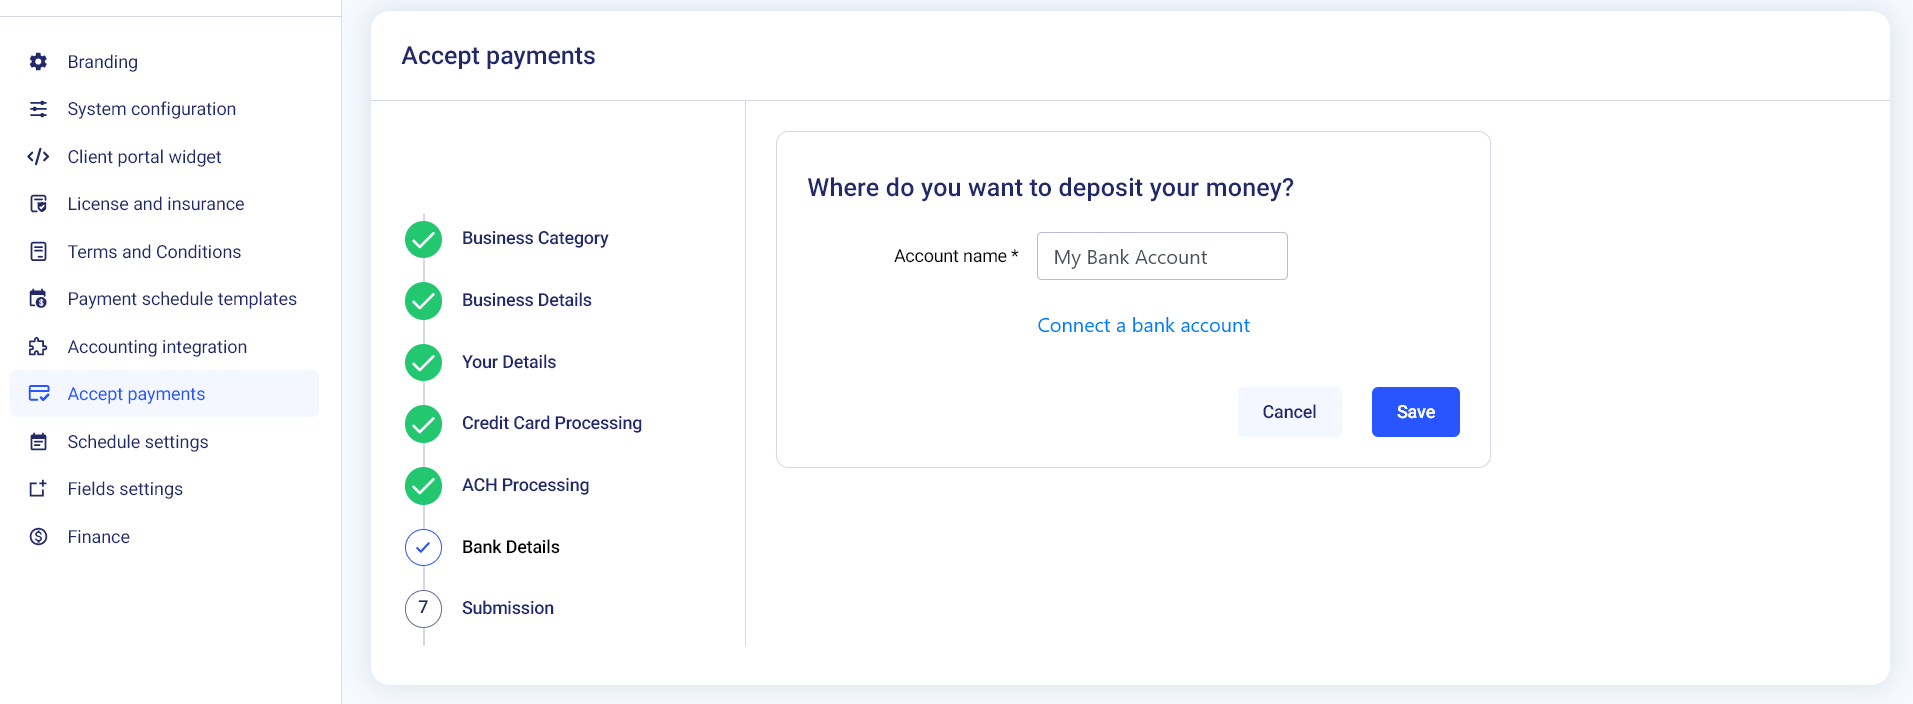
Finally, the last step is to connect your bank account. This is where you will receive your payments from clients through Buildern's payment system.
Follow the prompts to link your bank account.
Continue filling in the information by choosing the account type (checking or savings) and typing the routing number and account number.
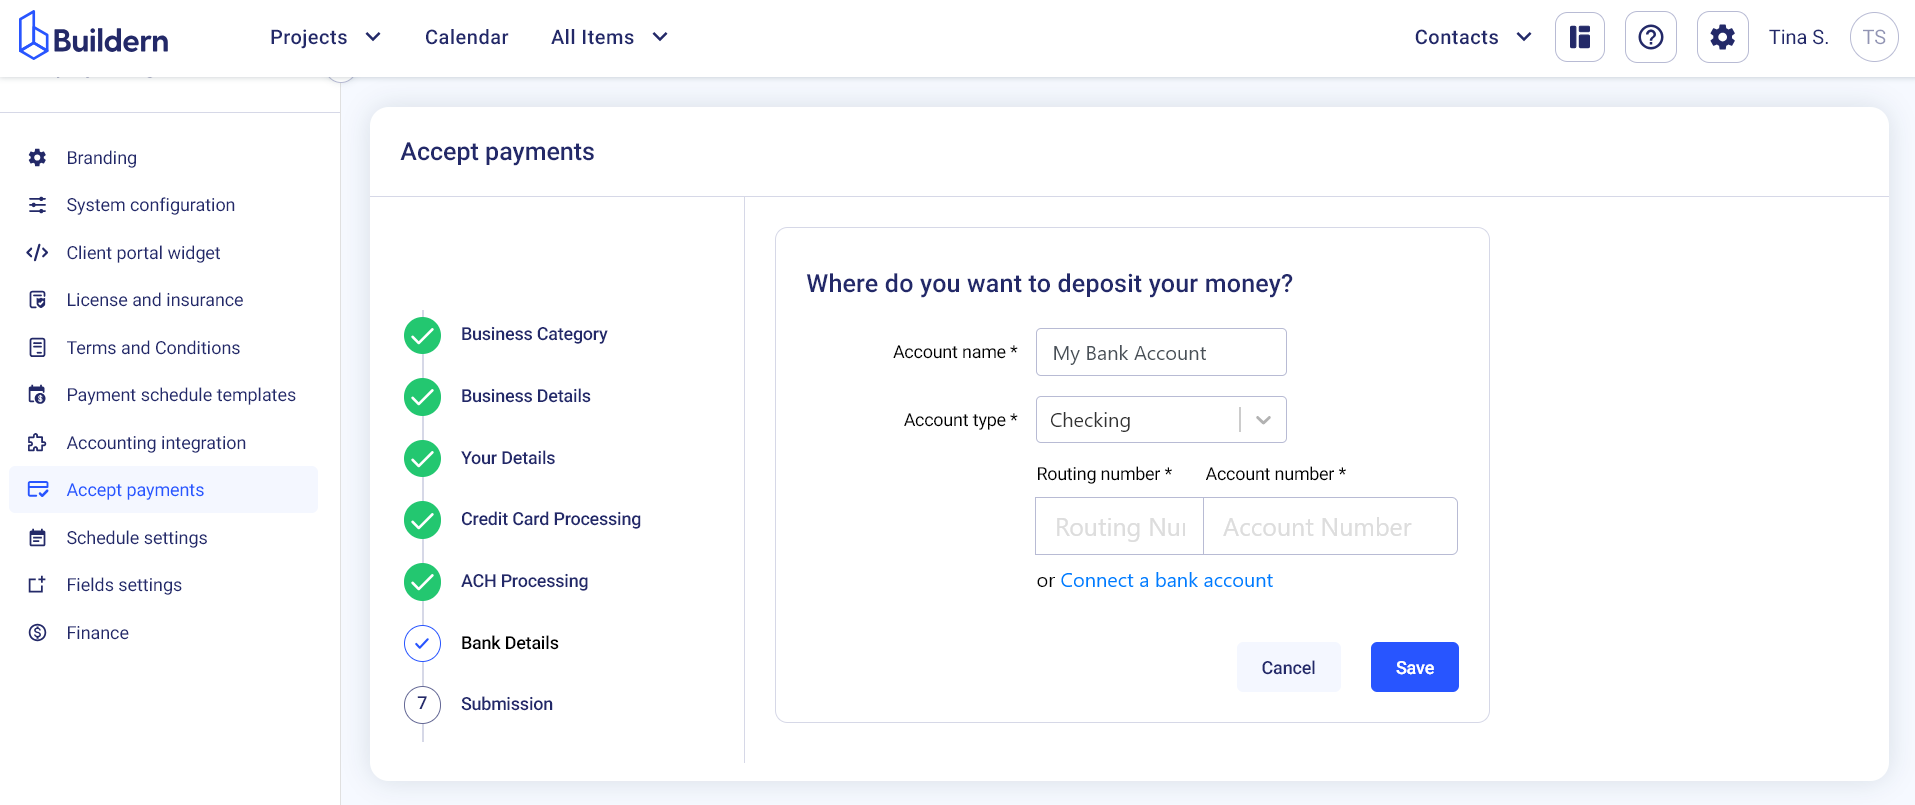
We are close to the end.
Click the Save and Continue button to submit your application for review.
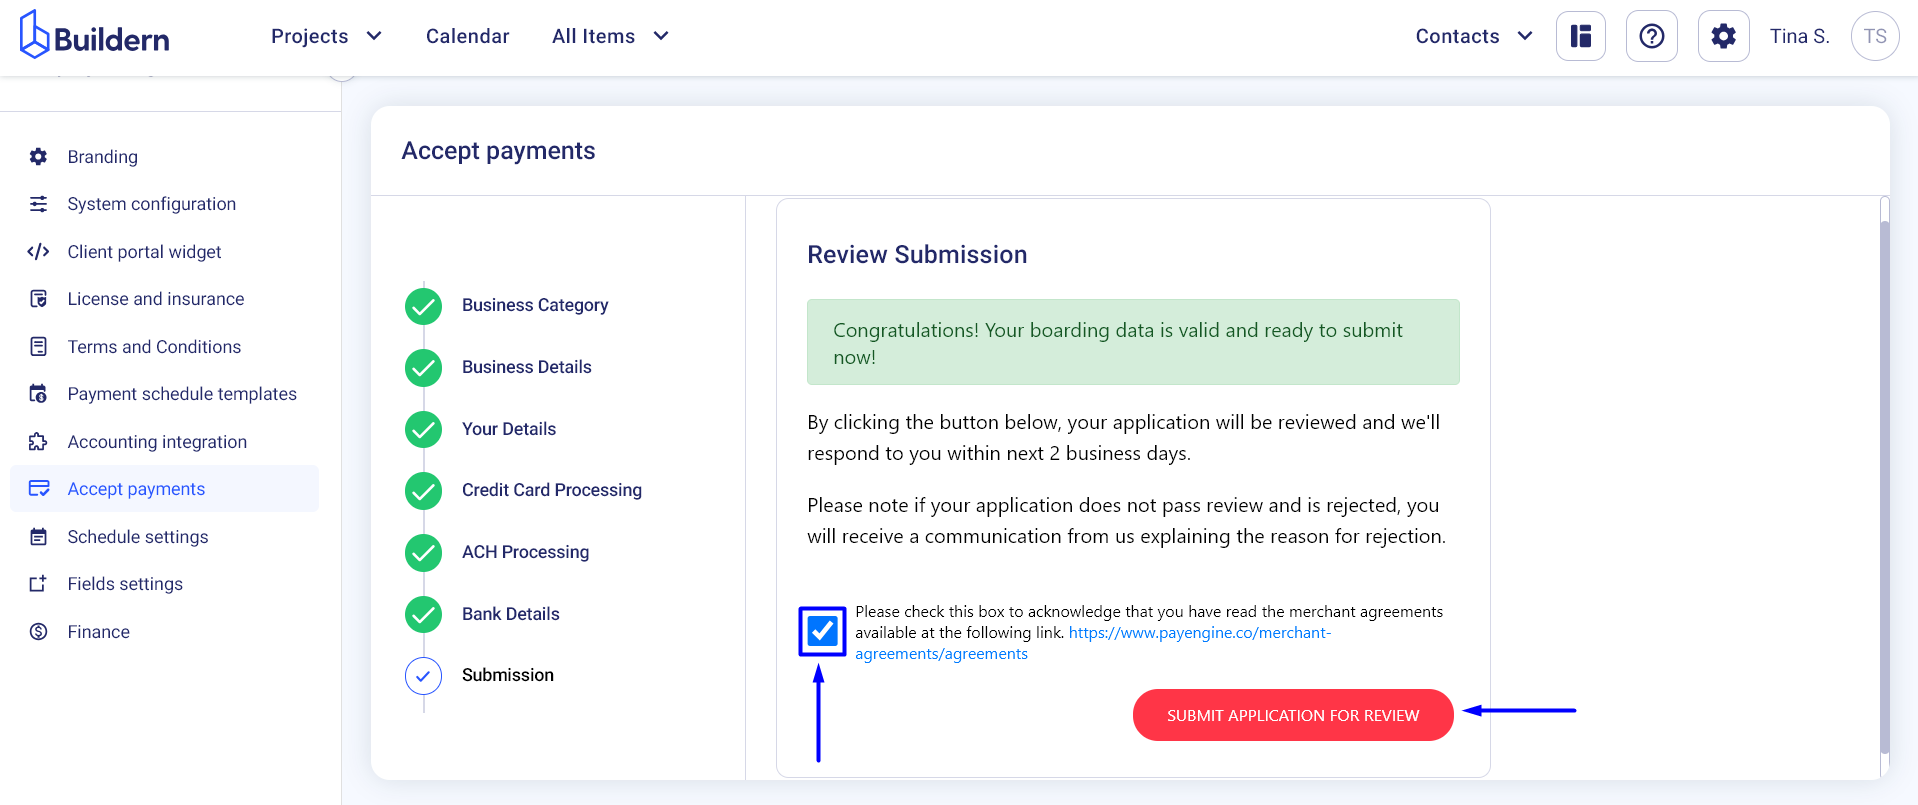
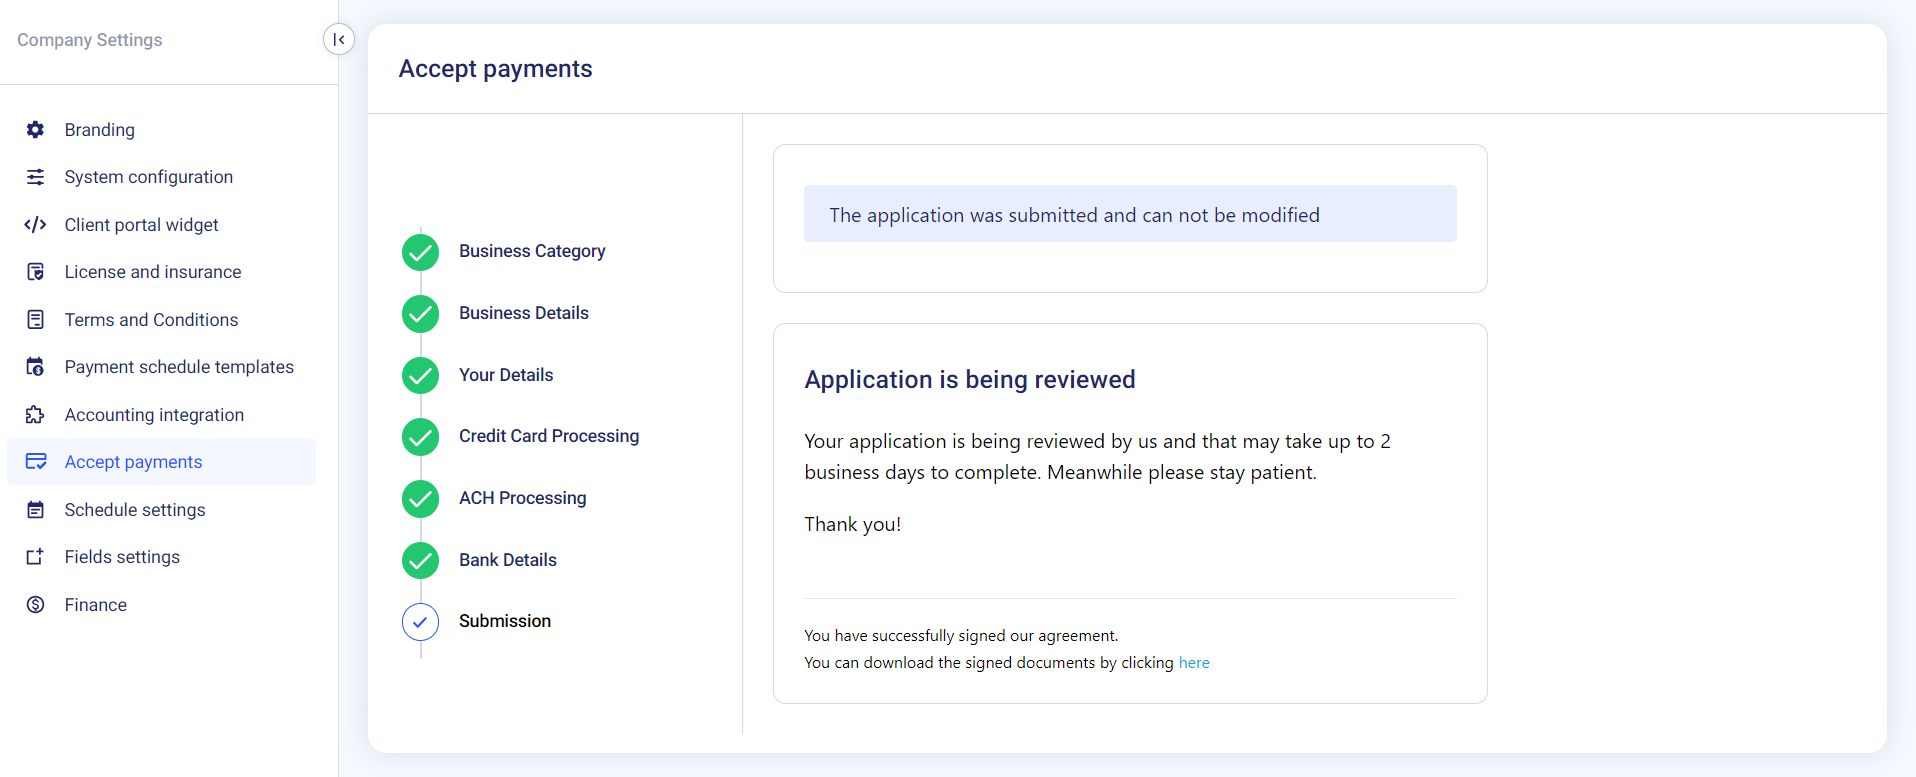
Step 9. Submission
A member of our team will review your application and once approved, the feature will be automatically enabled on your Buildern account.
Once the feature is activated, you will receive an email notification and be able to start accepting payments from clients through Buildern's payment system.
Read the merchant agreements before submitting the application and click the red button as shown below.
Signing the electronic documents
After submitting your application, you will be prompted to sign the electronic documents related to using Buildern's payment system.
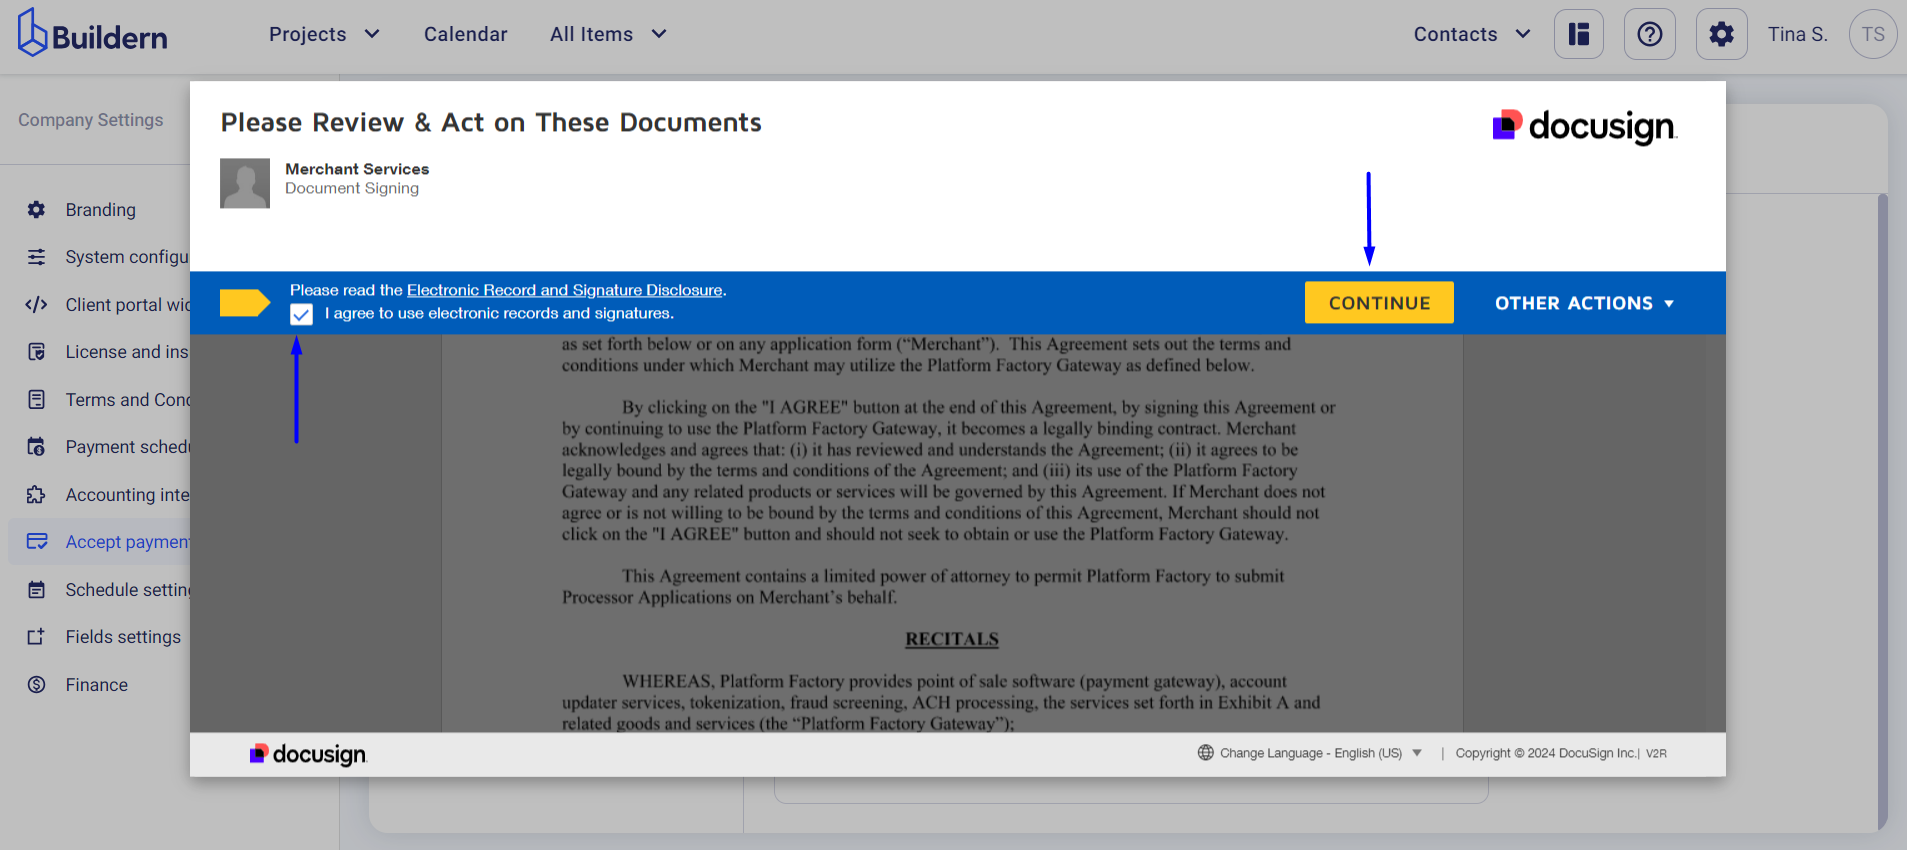
These documents include the Terms of Use and Privacy Policy. It is important to read these agreements carefully before signing them. You can also download a copy for your records.
Now, see the steps below to learn about the signing process.
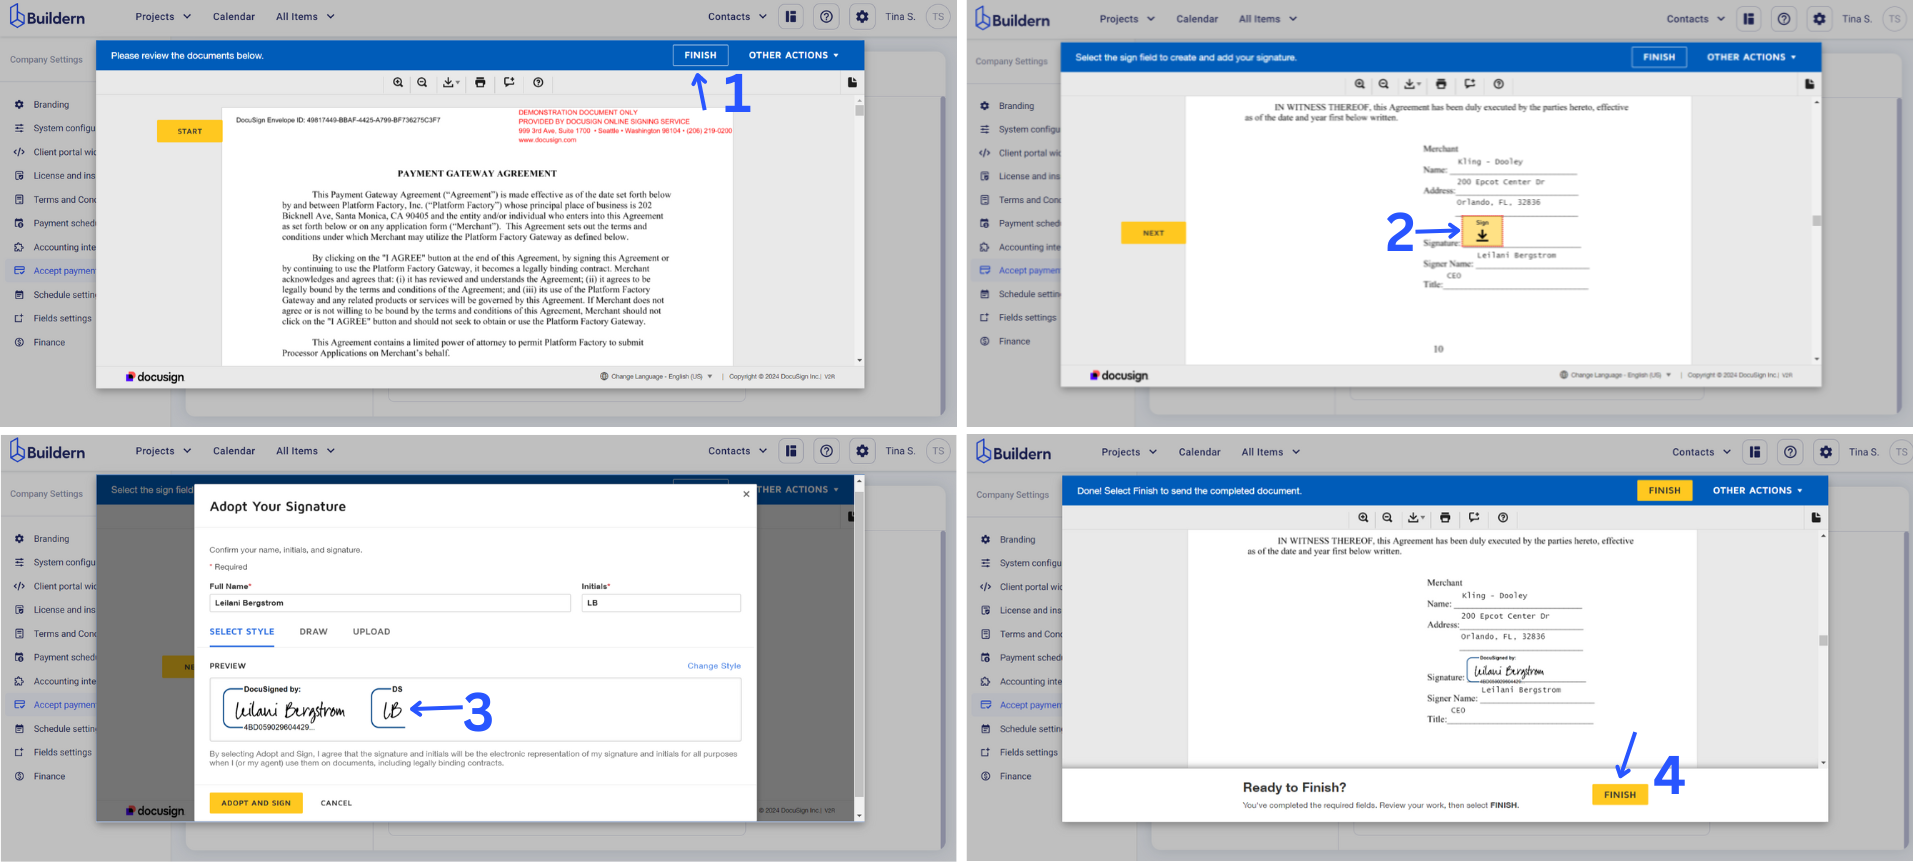
As a rule, the review takes up to 2 business days.
What should you do if the system requests additional documents?
There might be cases when the system requests additional documents or information. That’s when you will receive a note highlighted at the top of the page. Our team may also email you providing detailed feedback and instructions on making the necessary changes.
Once you have made the requested changes, you can resubmit your application for review. This process can be repeated until your application is approved.
How to configure the client invoices to accept card and ACH payments?
Now when your request is approved, the only thing left to do is start issuing invoices to your clients. Whenever creating or editing an invoice, you can configure it to accept both card and ACH payments or choose one option.
Here's how you do it:
-
Go to your project's invoices and create a new invoice (or edit a draft)
-
Fill in all necessary details
-
Enable the payment options section
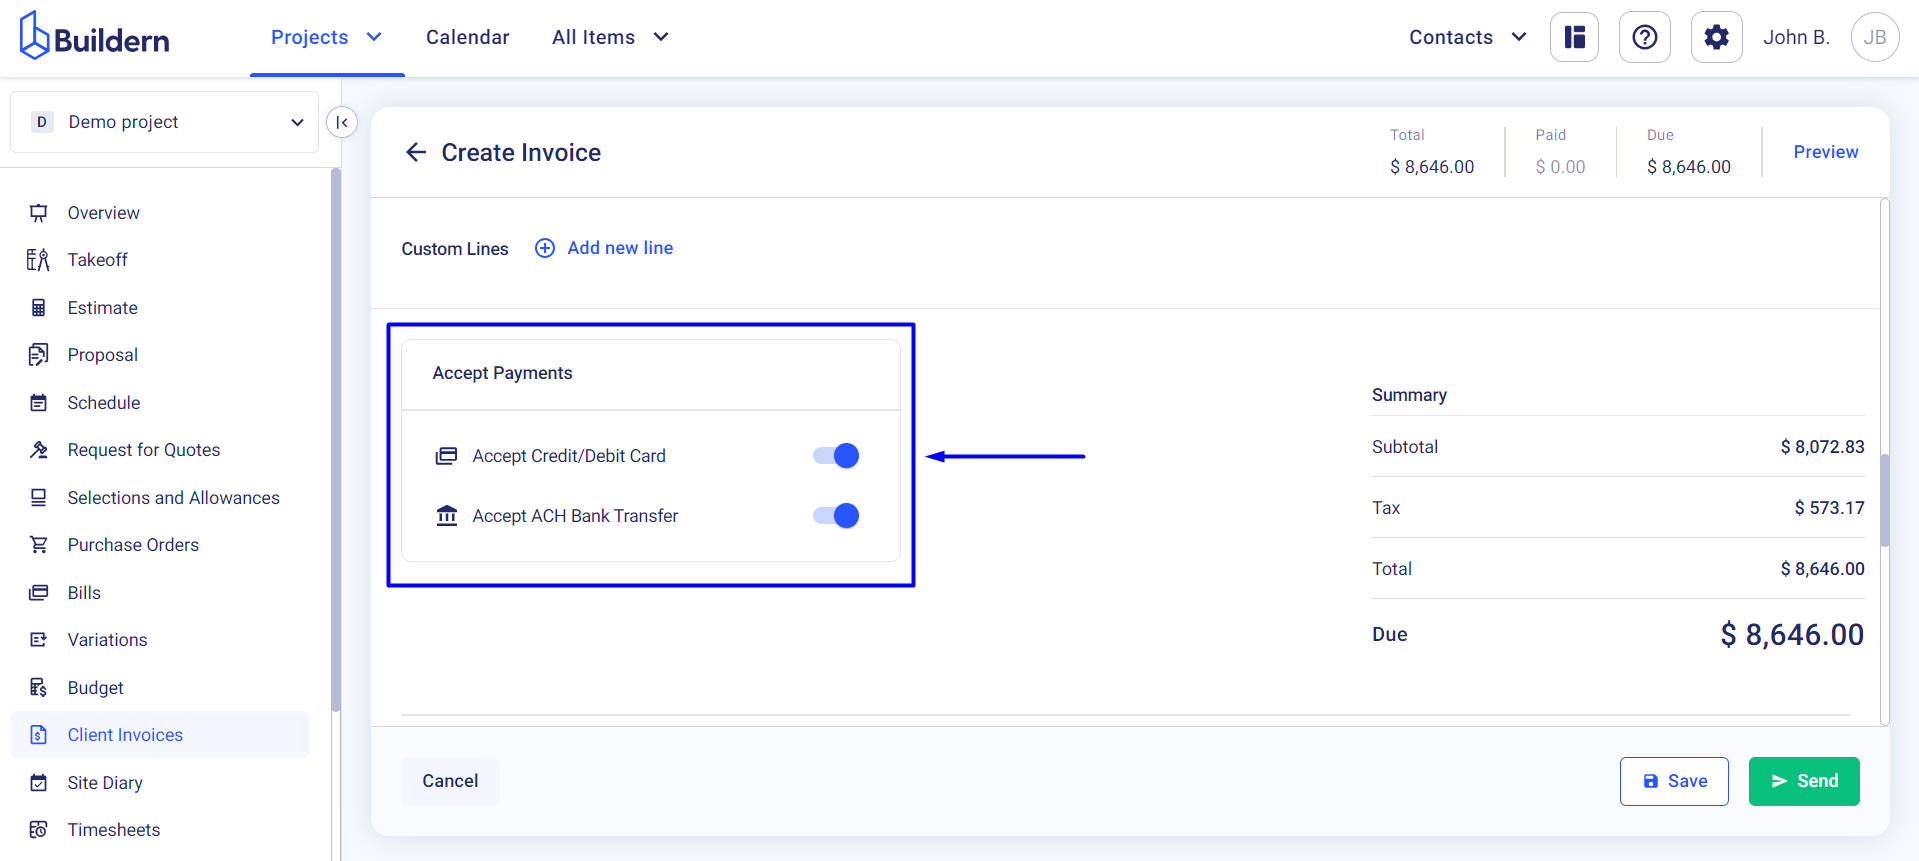
Your invoice is ready to be sent to your client!
Your clients will receive the invoice via email and can also view it in their client portal.
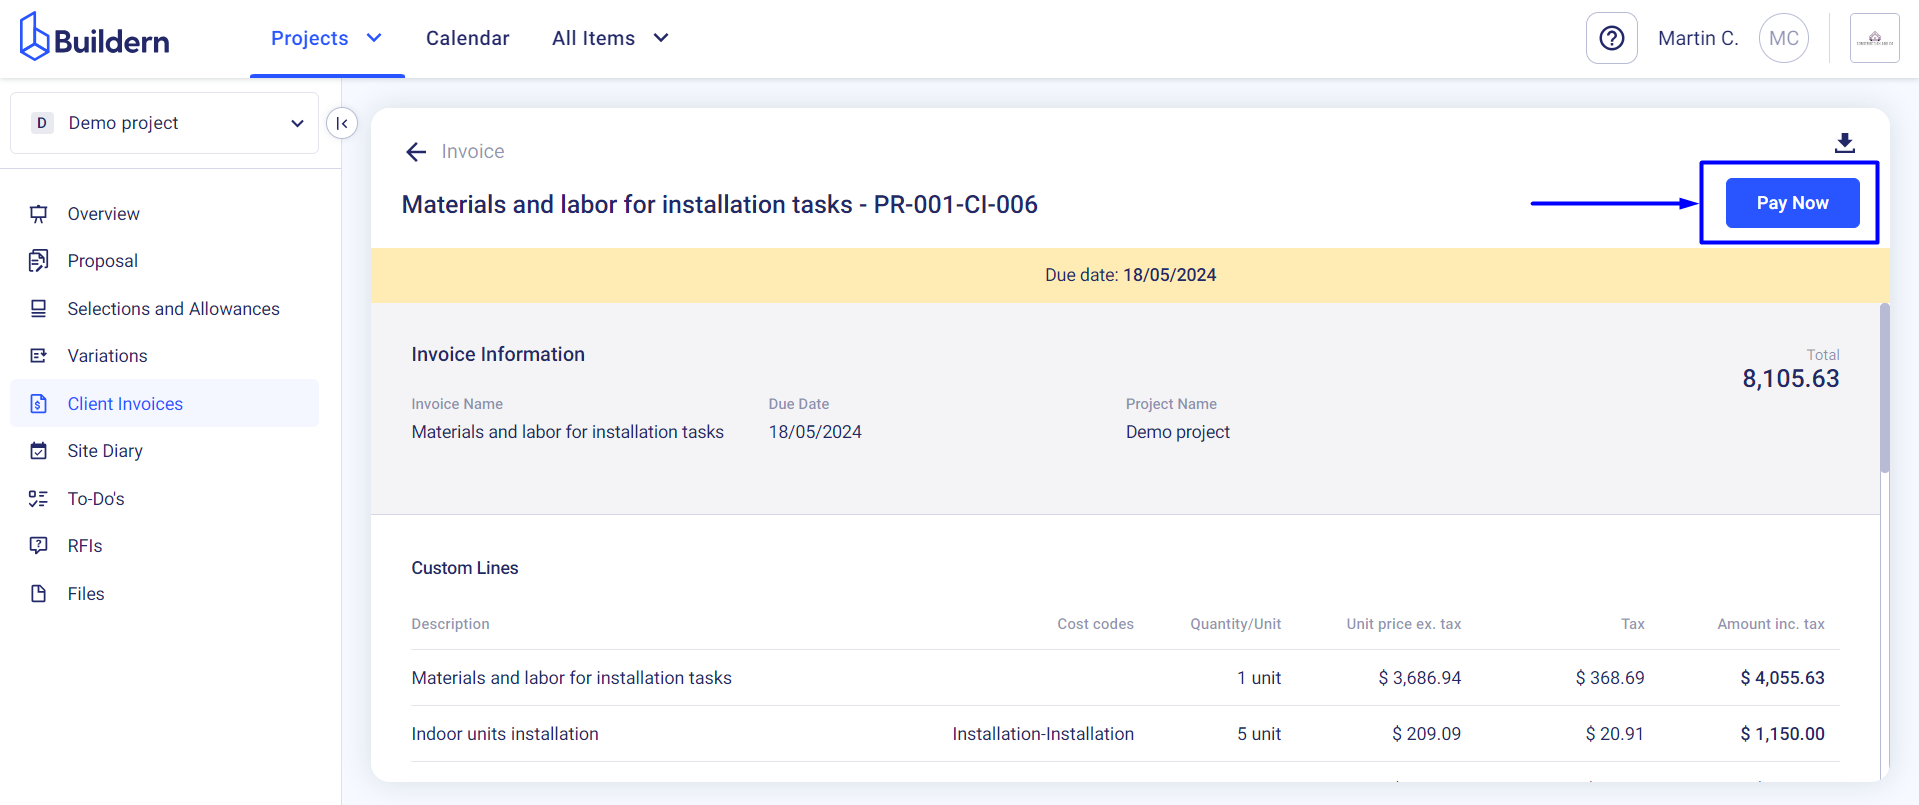
Clicking on the Pay Now button, your client will be offered the option(s) you’ve enabled before sending the invoice.
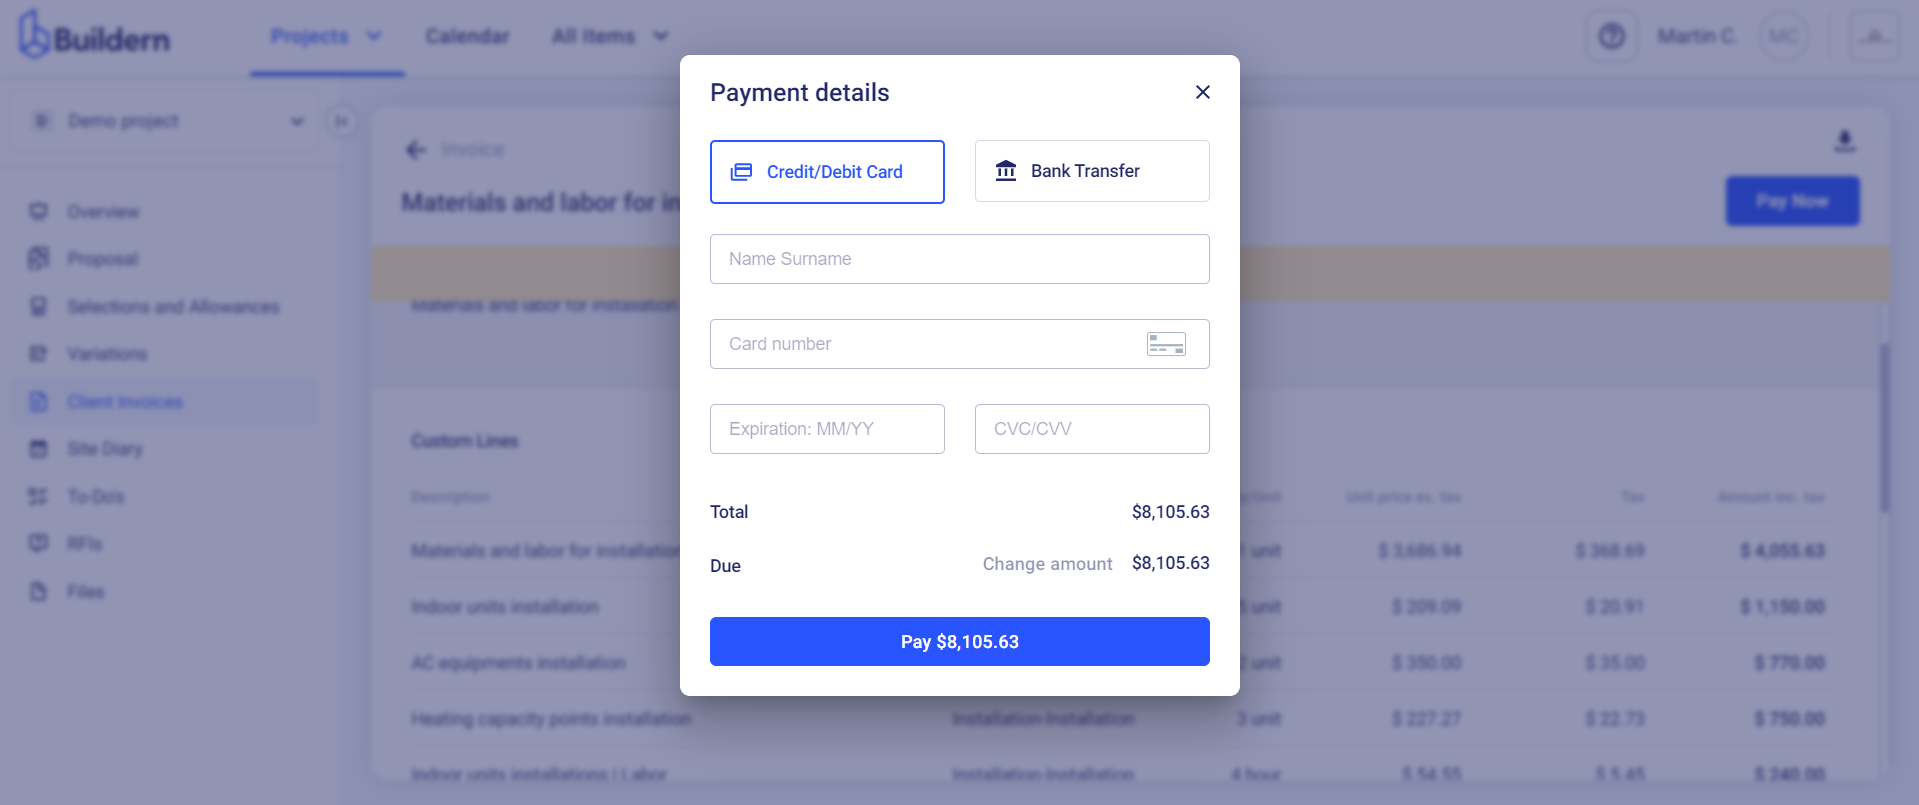
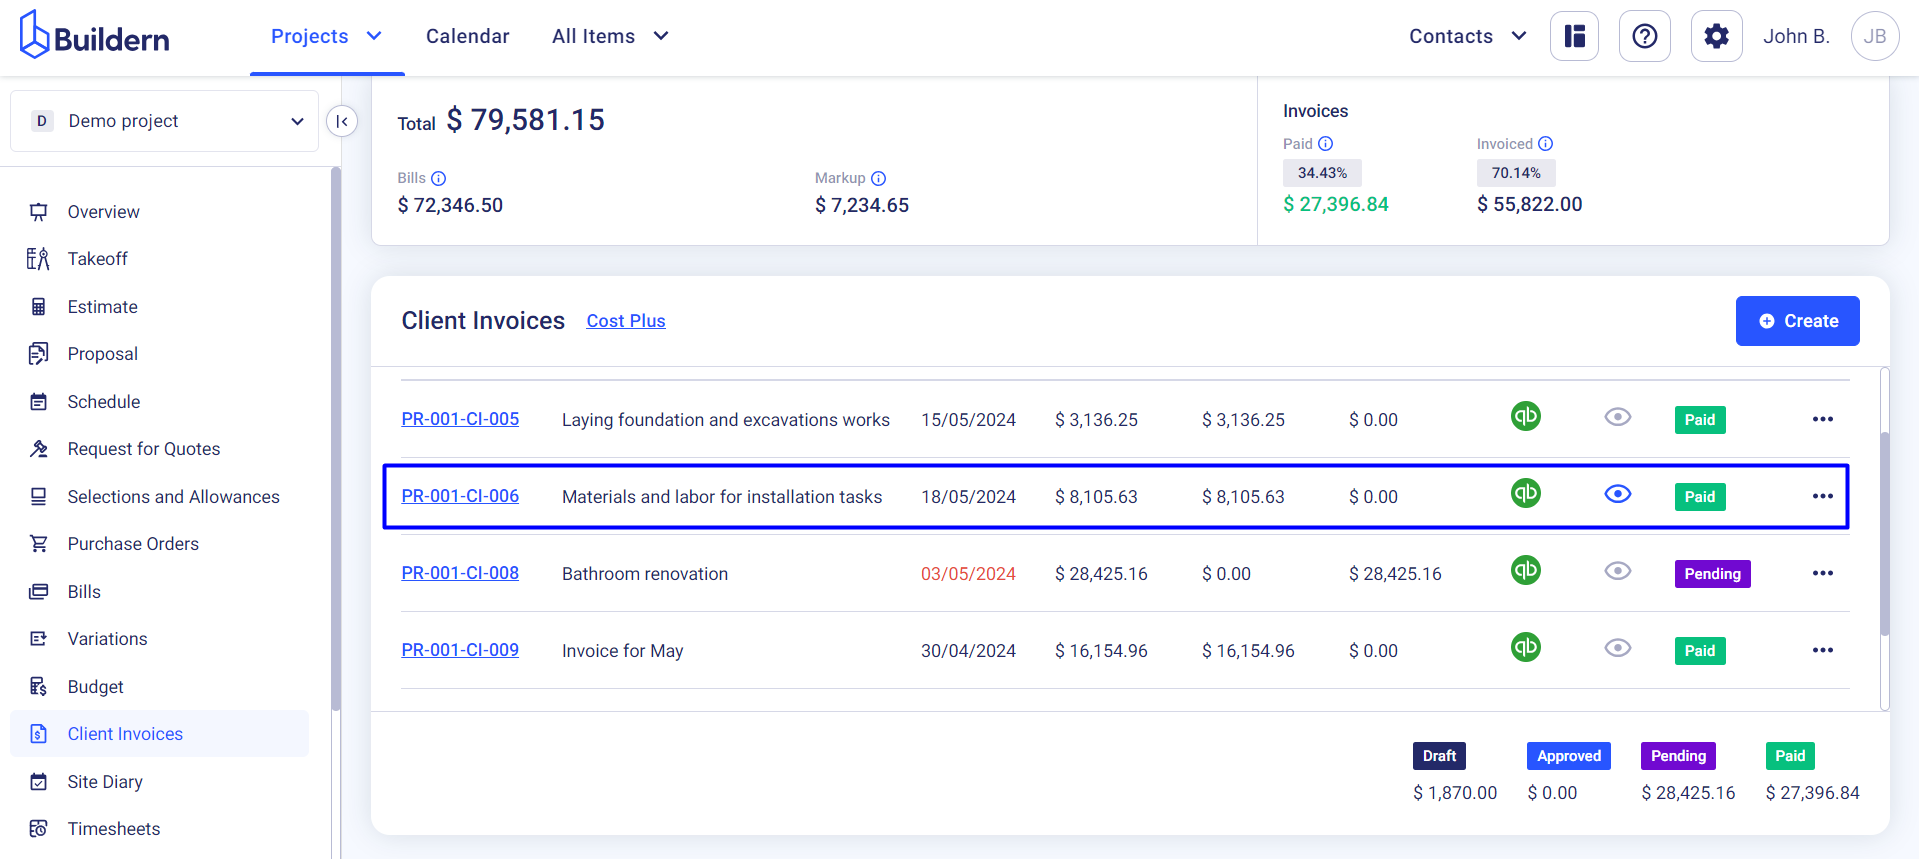
Once paid, the invoice status will be changed automatically and you can proceed with the rest of your work.
How to configure company settings to accept card and ACH payments?
You can also configure the corresponding payment type from your company settings. To do that, go to Company Settings > Accept Payments and turn on/off the type you prefer.
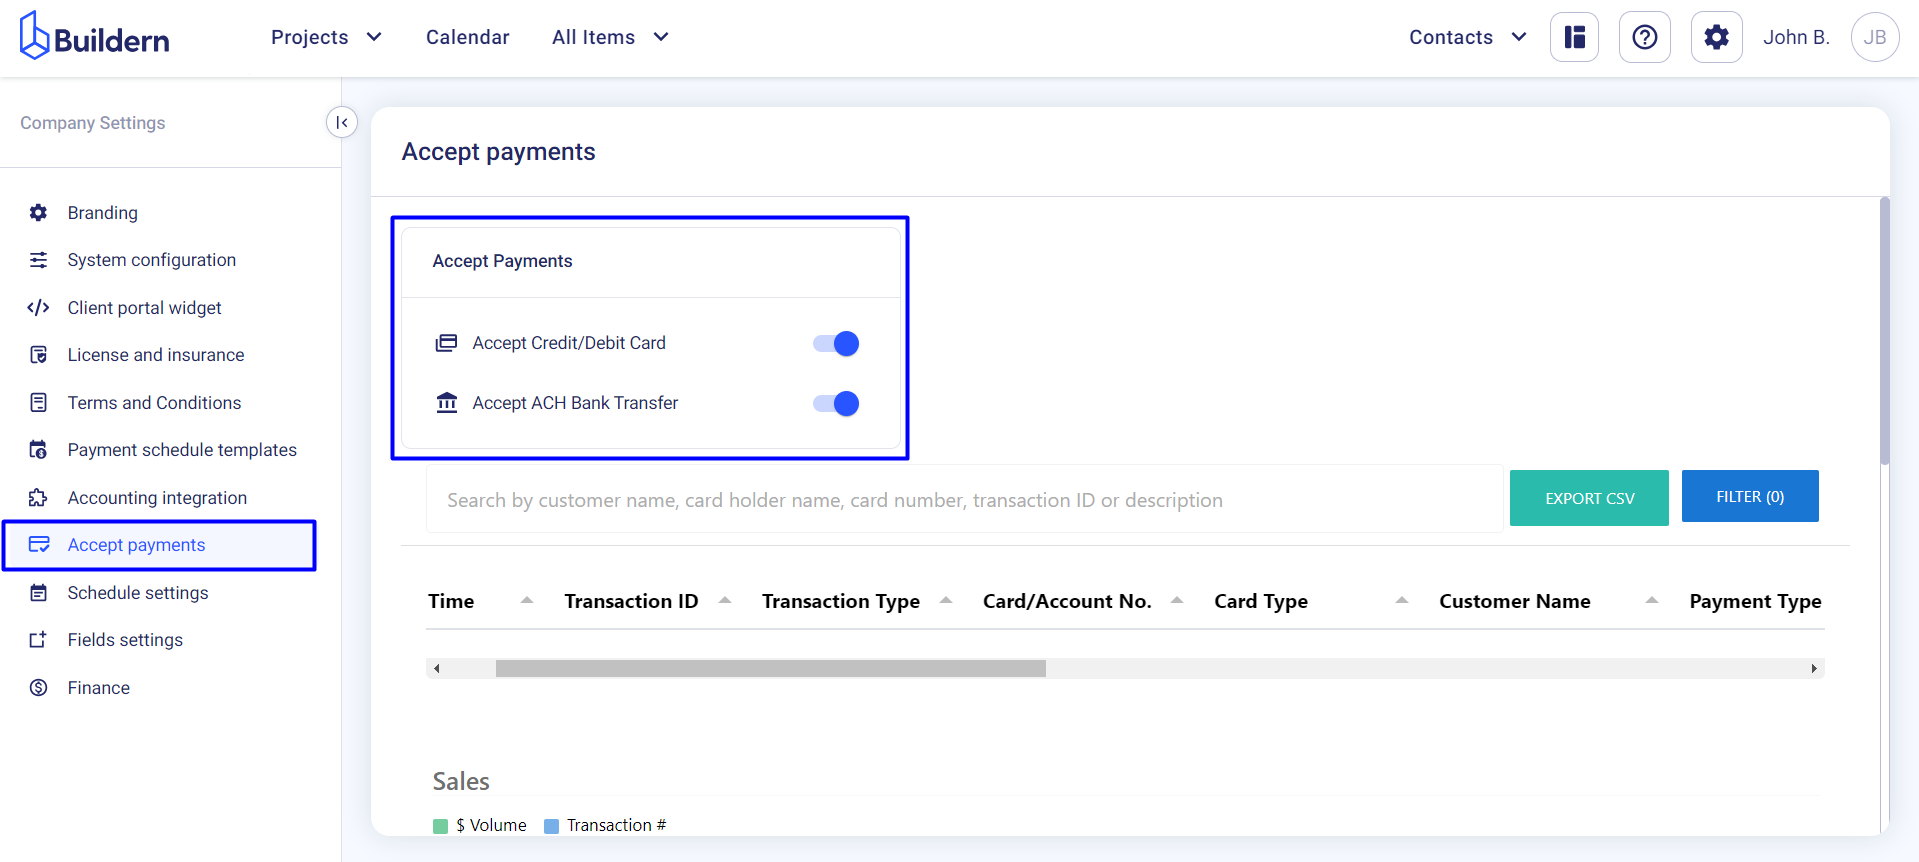
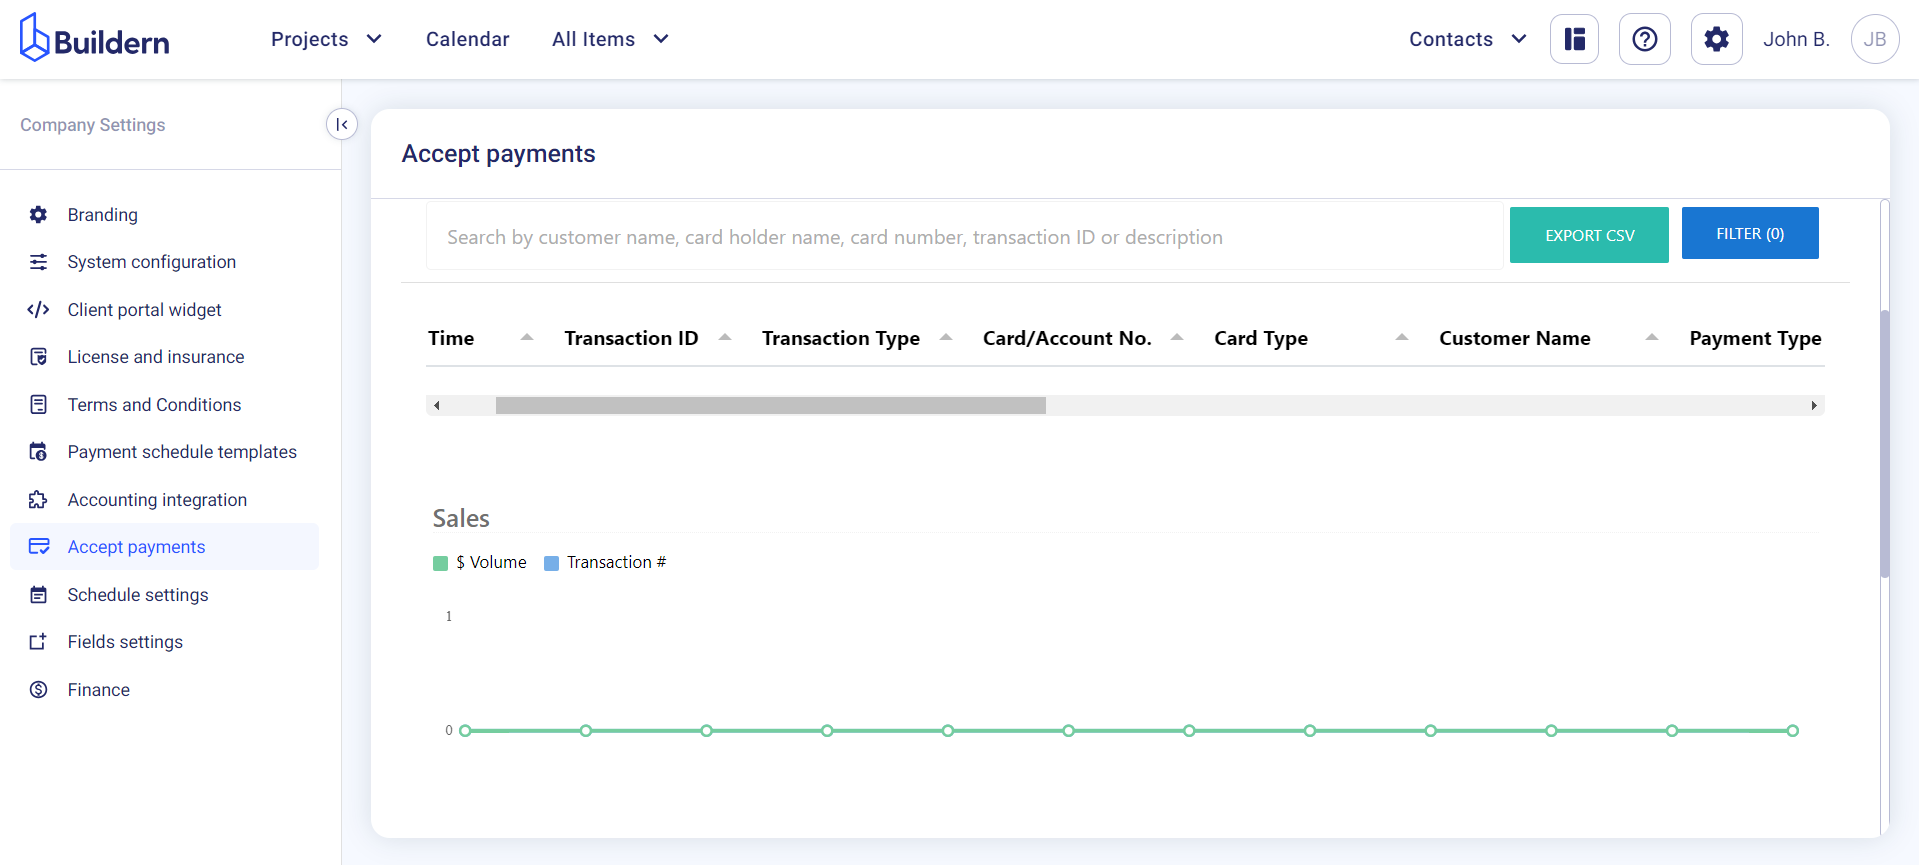
Moreover, this is where you can view the transaction history for all your clients. This centralized view allows you to keep track of all your received payments, ensuring a clear understanding of your financial status at any given moment.
💡Recommended Reading
Client Invoices in Buildern: Complete Overview
How to Forward Your Subcontractor and Vendors Emailed Invoices to Buildern to Create Bill