Basically, cost plus invoicing implies a billing method where the client agrees to pay the actual costs of the project, plus a fee or margin that covers the builder's overhead and profit.
It is particularly beneficial for builders who undertake projects where the scope is not well-defined at the outset, or where changes are expected during the project.
Continue reading or watch our detailed video guide to learn more about the cost plus invoicing with Buildern ⬇️
Let's now see how this type of invoicing works in Buildern.
Step 1. Set the Cost Plus Invoicing as Your Project Invoicing Type
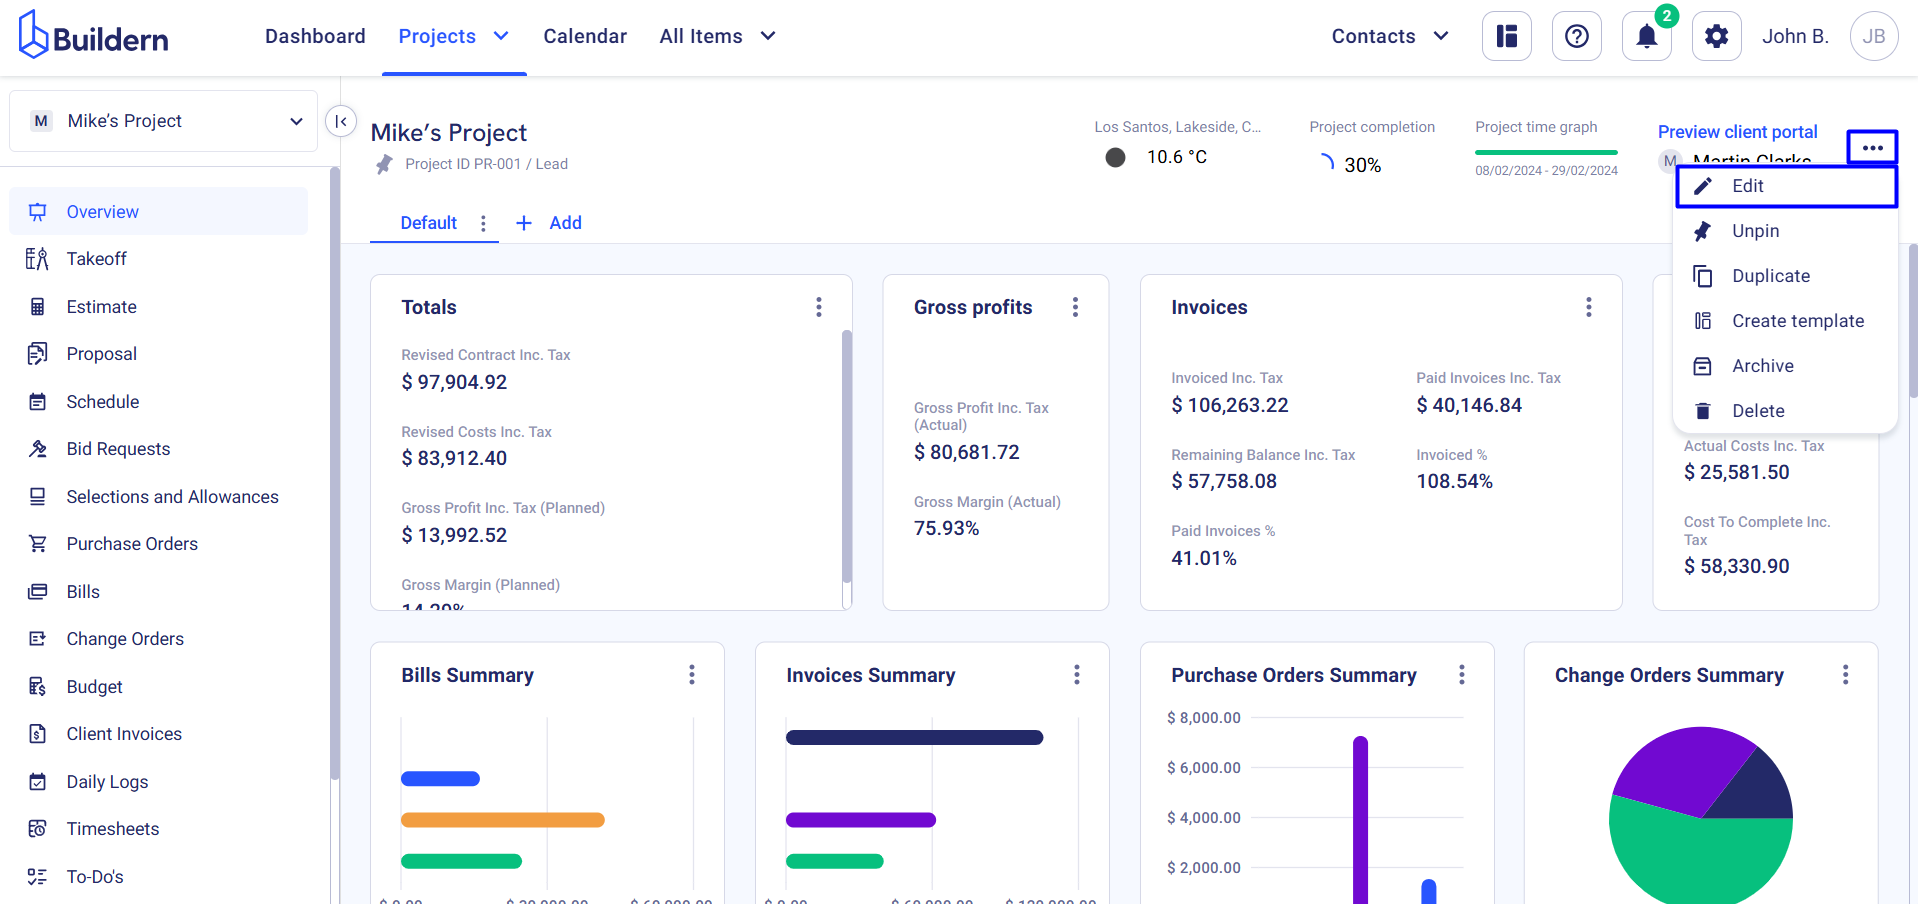
First, go to the project's Overview section. Locate the three dots icon situated to the right of the client's portal and select Edit from the dropdown menu. This action will allow you to open the project settings.
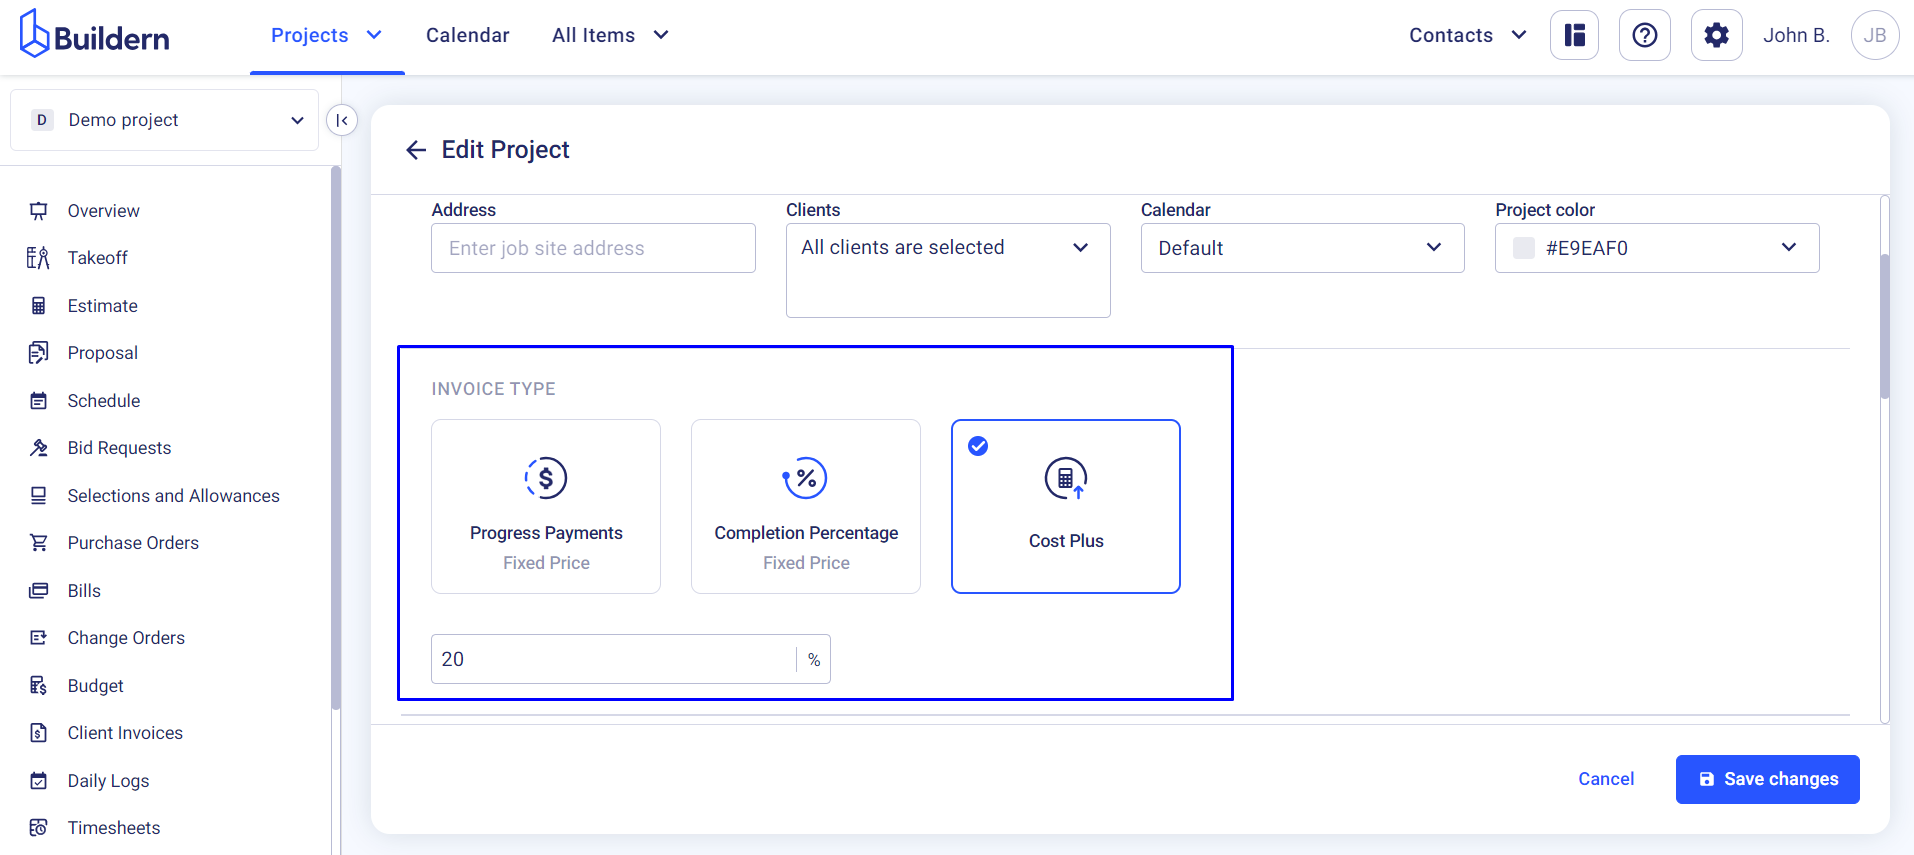
Scroll a bit, set Cost Plus as the main invoice type, and type in your markup percentage. Save the changes. The markup will be applied to all future invoices created for this project, unless you decide to update it for the whole project or specific invoices created later.
Step 2. Create an Invoice
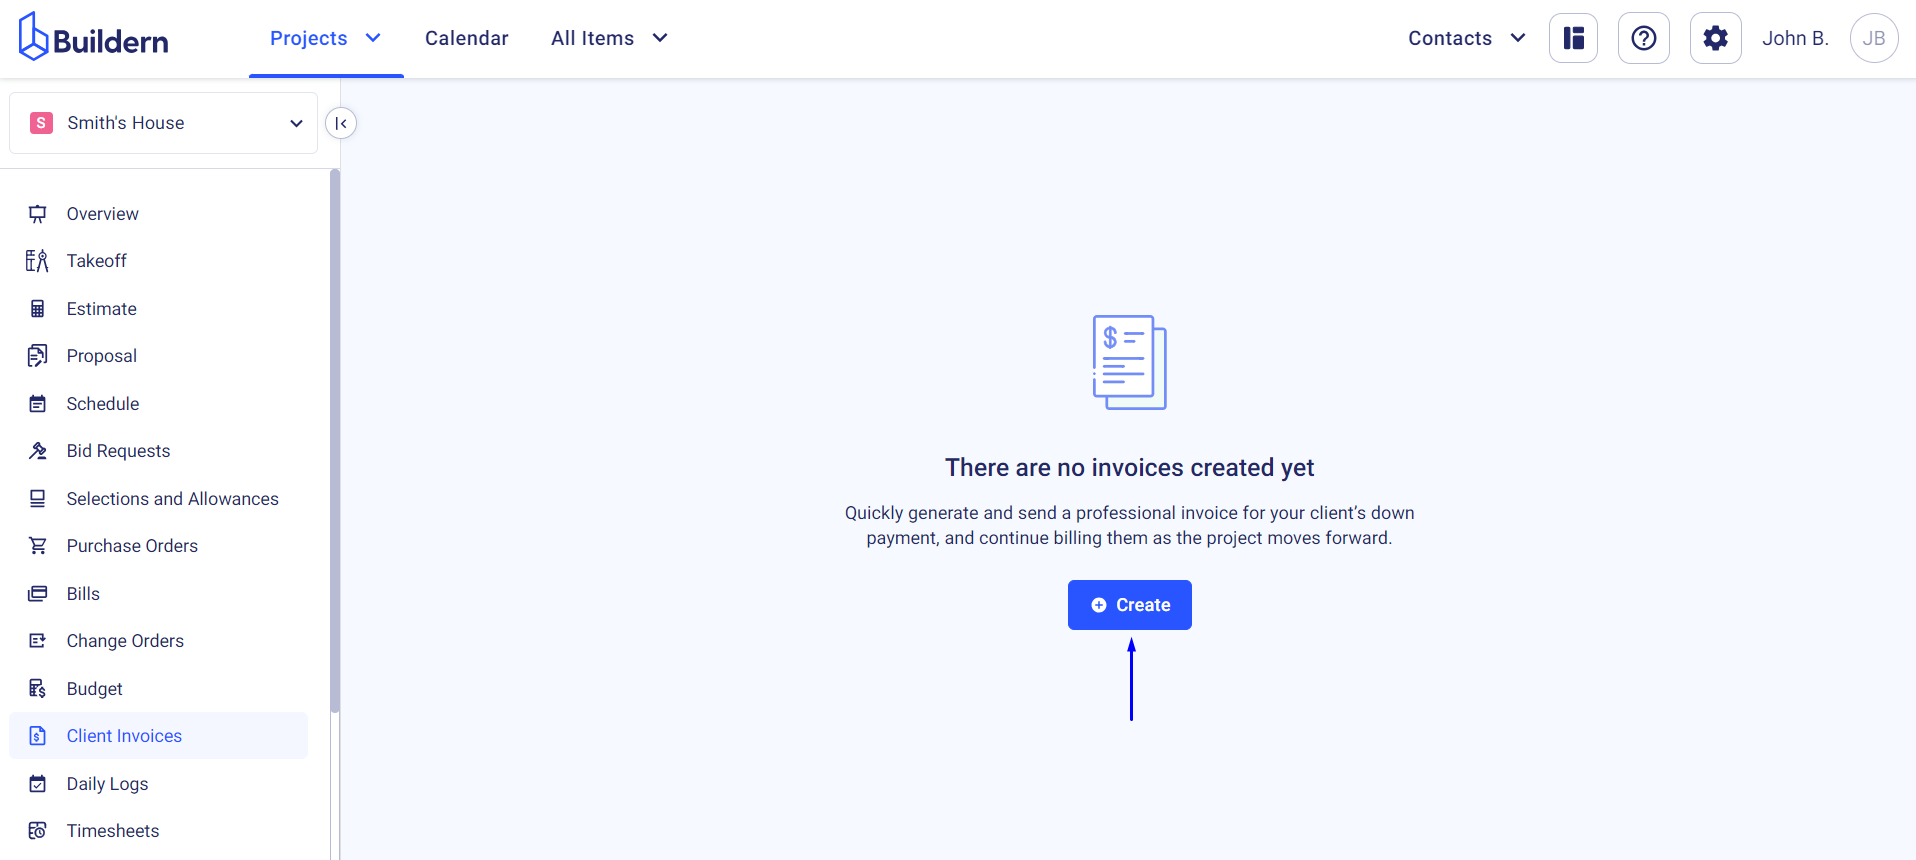
Return to your project's client invoices and click the Create button to begin.
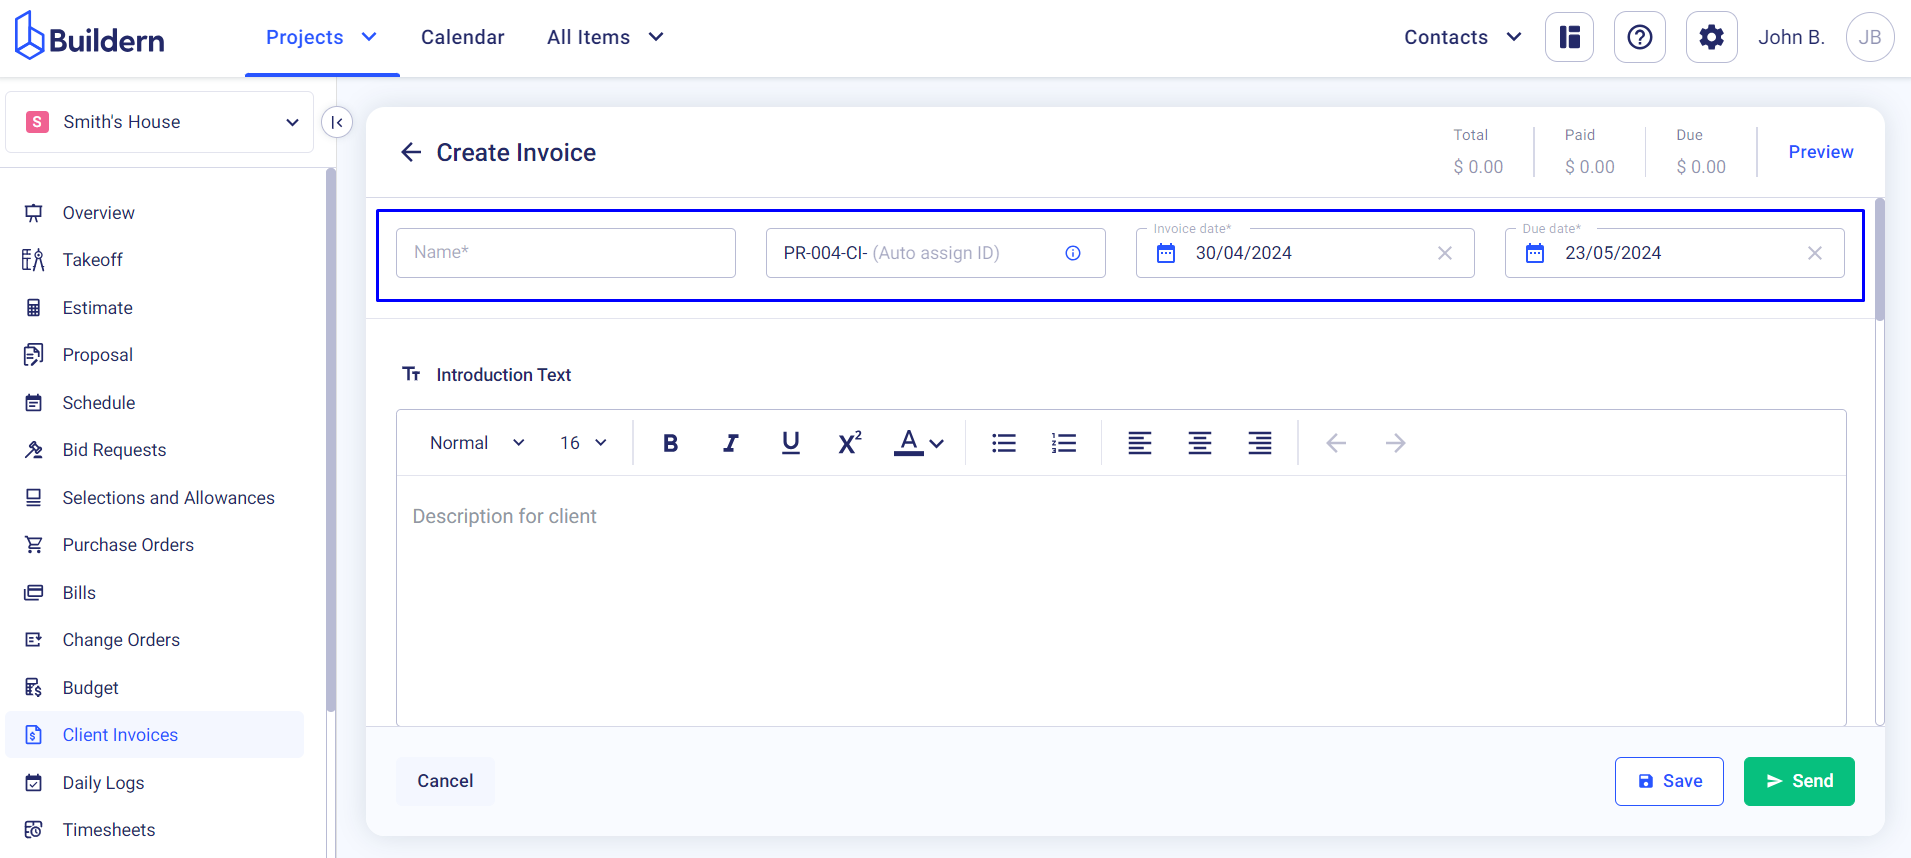
In the Create Invoice window, choose a name for the invoice or type in the client's name and set the due date. You can also set the invoice's ID for later reference or let Buildern auto-assign it.
Step 3. Start Adding Invoice Items
When working with cost plus invoicing in Buildern, you can:
-
Issue an invoice for bills
-
Issue an invoice for timesheets
-
Add custom lines
Create a Cost Plus Invoice for Bills
Let's start with the bills.
You can see all your bills created for the project here. In this tab, you can also filter bills by their status or invoiced/not invoiced property:
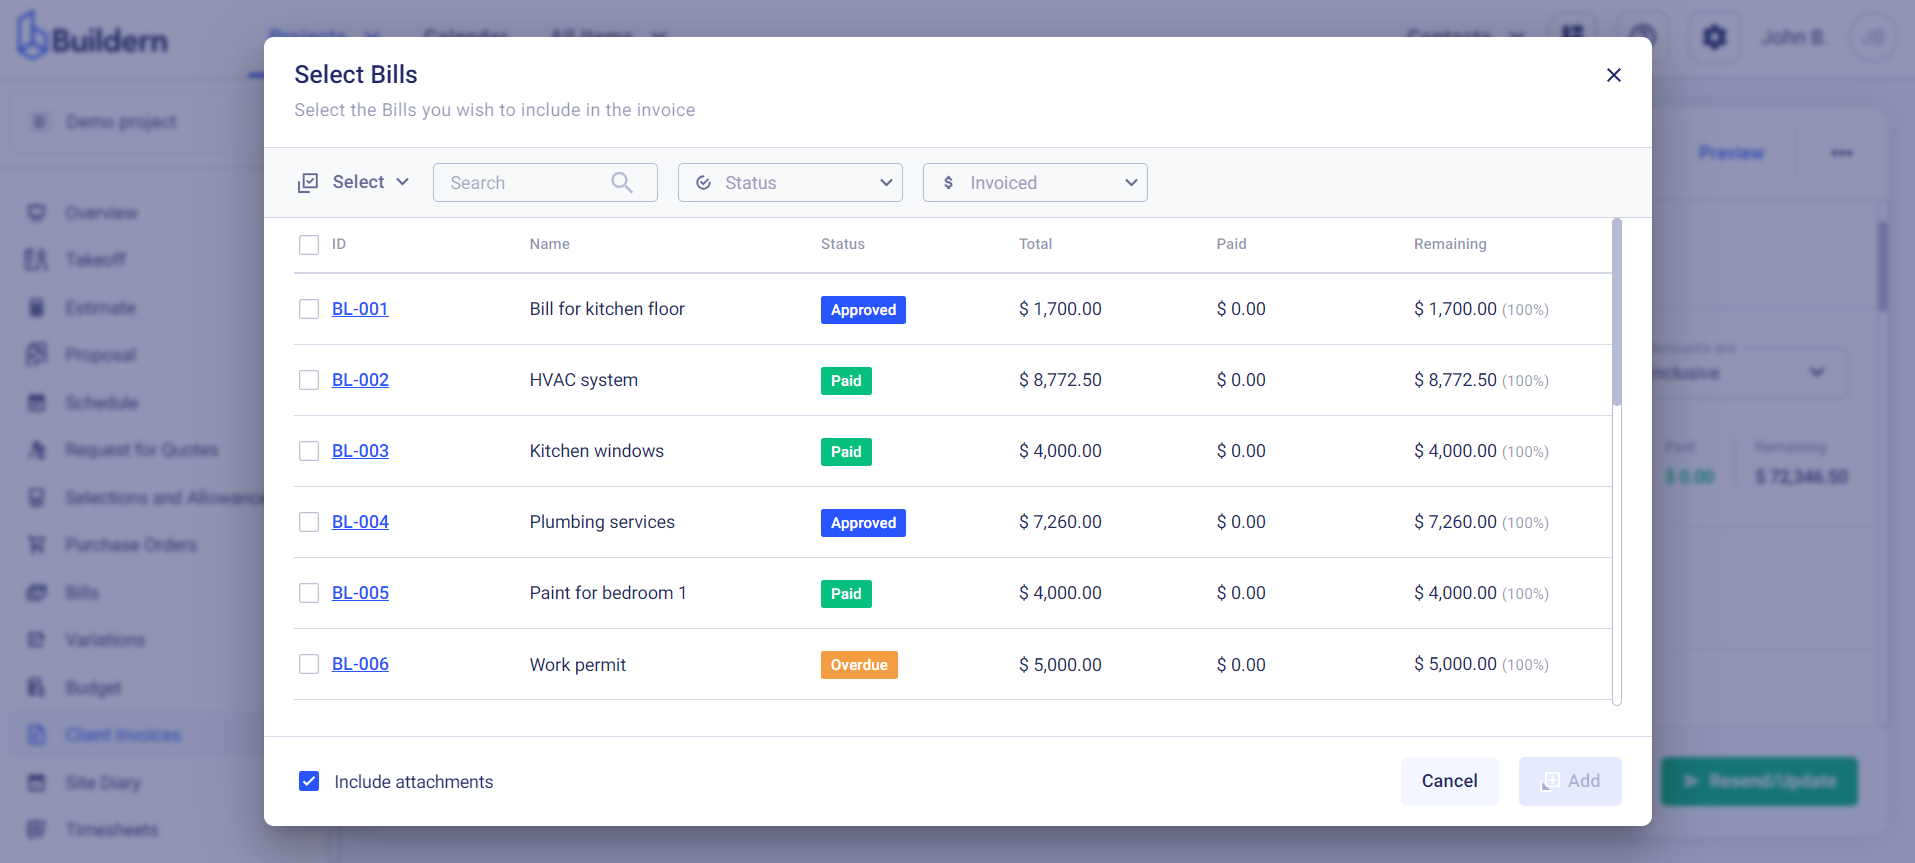
Note, that the system will keep track of the invoiced bills, so you shouldn't worry about remembering and calculating everything manually.
You can decide on how you want to invoice based on bills:
-
Including the total bill price in the invoice
-
Including the bill’s individual line items
Moreover, the recently updated functionality also allows you to include bill attachments and files and send them with the invoice.
Select those you want to include in this invoice and click the Add button.
You will see that the markup has been automatically applied to the bills.
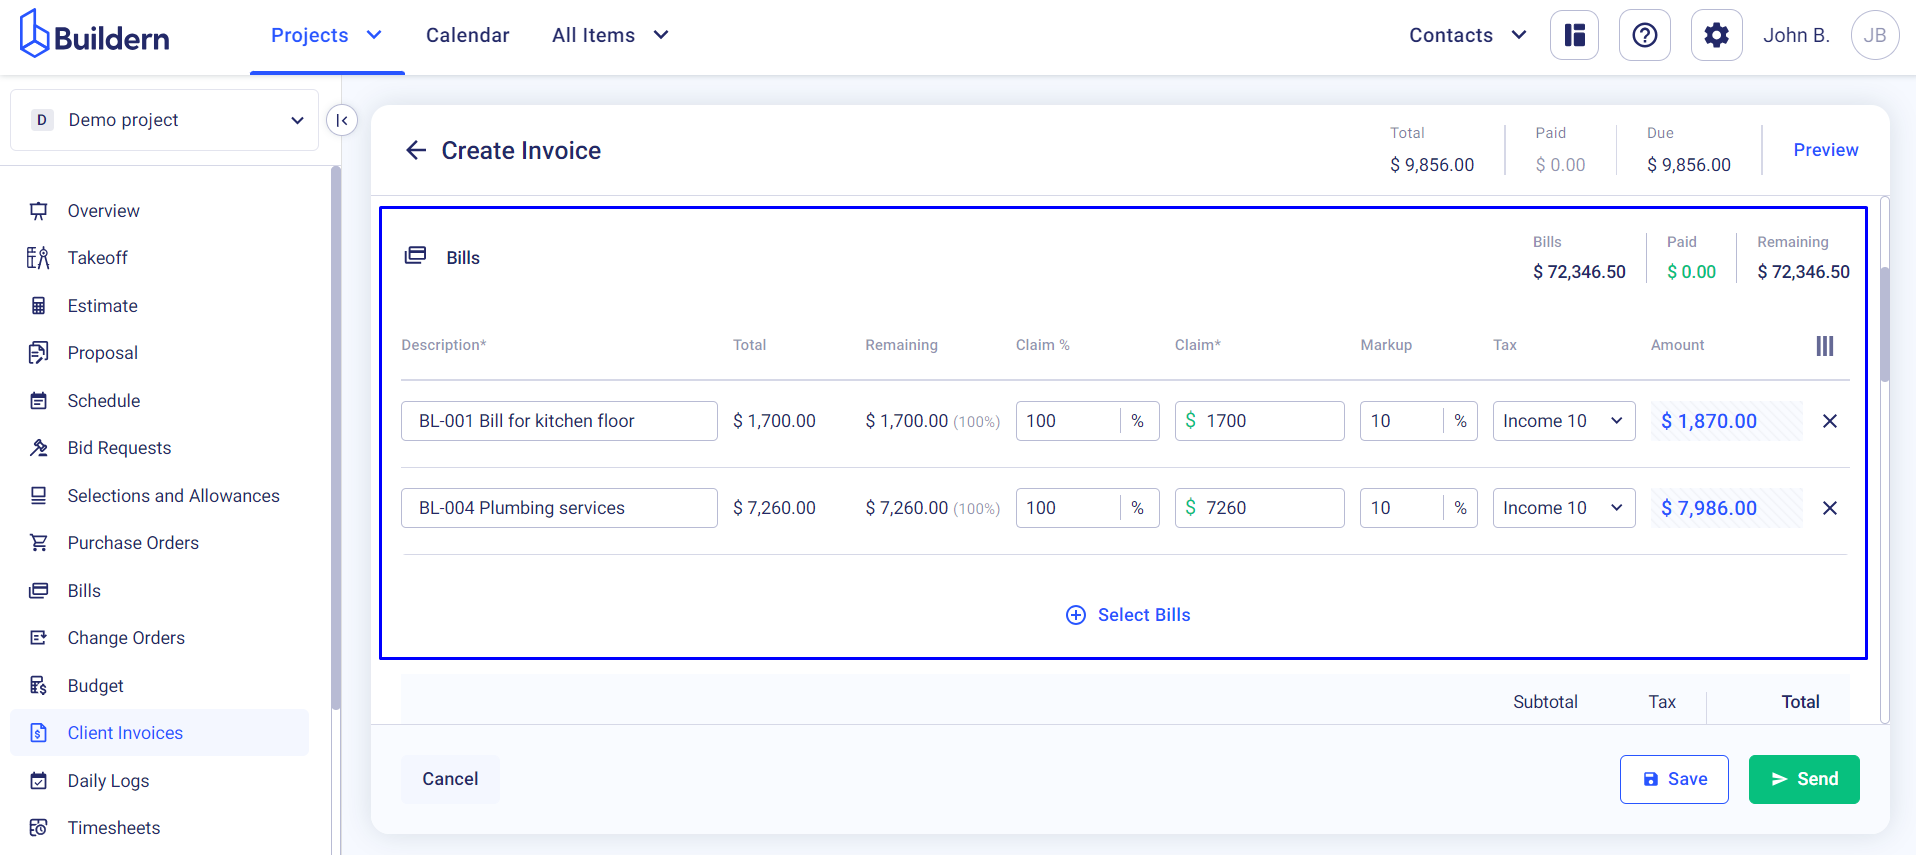
While working with cost plus invoicing type and invoicing bills, you will see the following information displayed:
-
Description - the bill ID and its name
-
Total - the total bill amount
-
Remaining - the remaining amount pending to be paid
-
Claim % - the percentage of the total amount you with to invoice at this stage which can be different from the remaining amount
-
Claim - the amount that is automatically calculated based on the percentage you provide
-
Markup - the percentage of markup applied to this invoice line
-
Tax - if you have your taxes enabled through the settings, it will be calculated automatically based on the rate you provide (if you don’t have taxes, this column will be hidden from you)
-
Amount - the final total invoiced amount
After determining the above, you can begin entering the percentages you wish to bill for this specific invoice into the Claim % column.
Create a Cost Plus Invoice for Timesheets
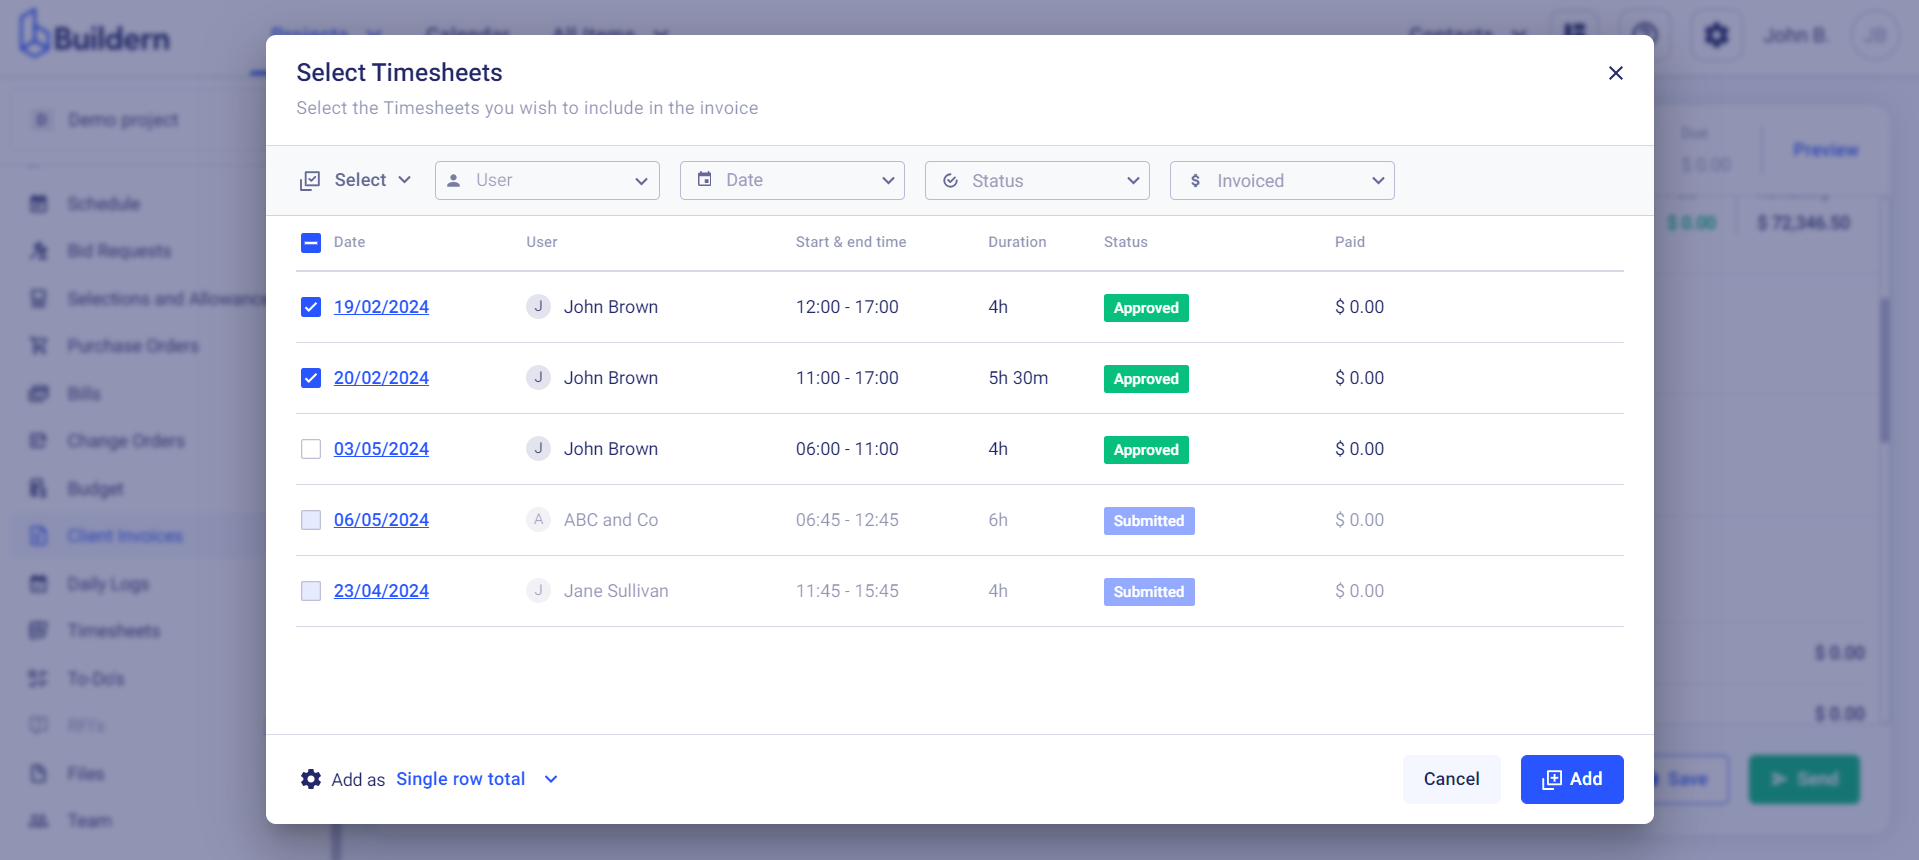
Now, let’s see how you issue an invoice for timesheets
Filter the data according to the timesheet statuses and invoiced/not invoiced statuses to include the timesheets in this invoice.
Once you've selected all the desired timesheets, you can also group the data and decide what your client will see once they receive the invoice.
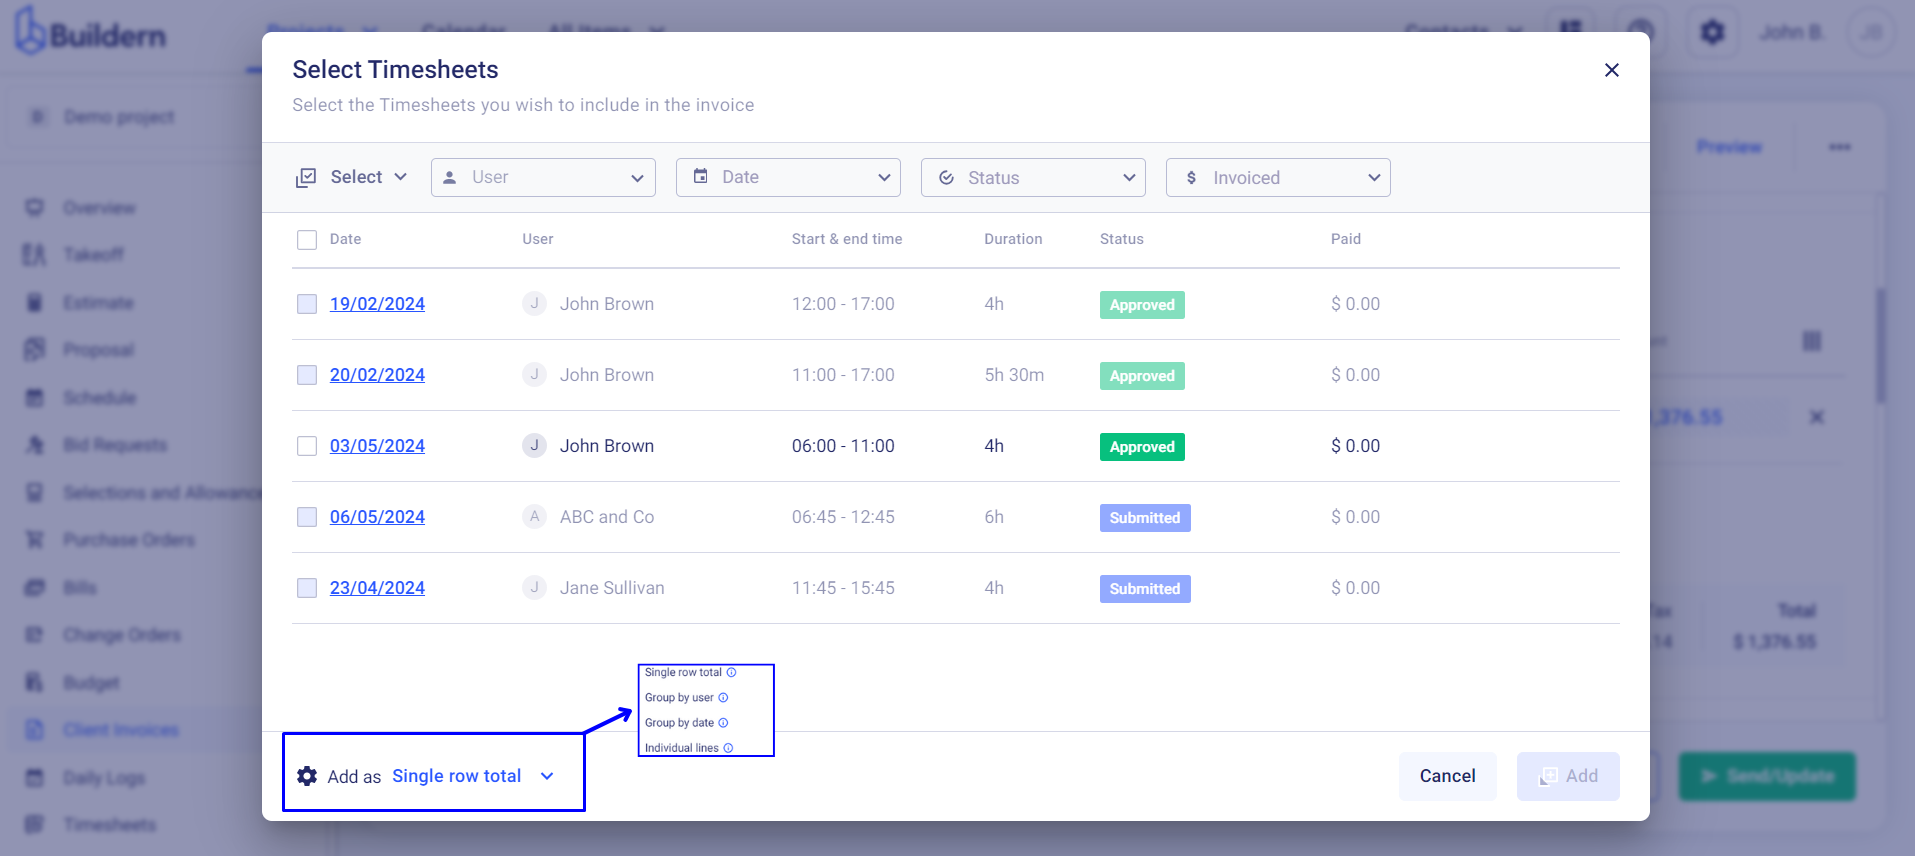
Here are the settings to choose from:
-
Single row total, i.e. add all the timesheets in a single line with the total hours
-
Group by user, i.e. have a separate line for each user with their corresponding total hours
-
Group by date, i.e. have a separate line for each day, with the total hours
-
Individual lines, i.e. add all the timesheets in separate lines
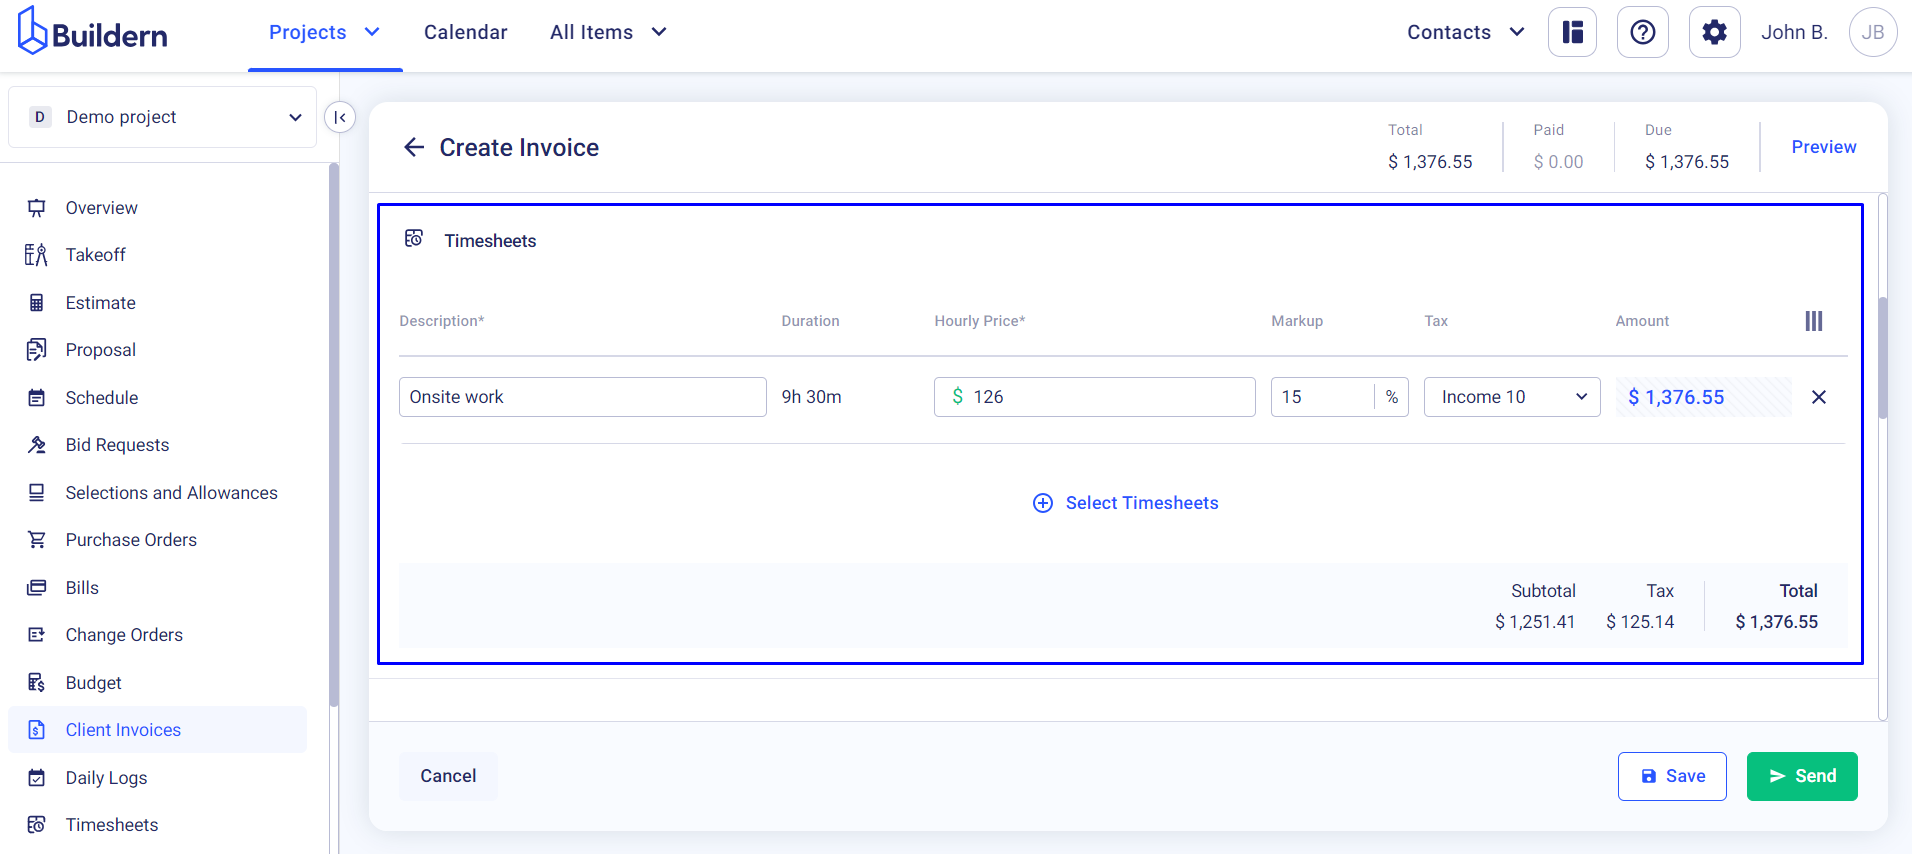
Once you configure the settings, click the Add button. Now, set the final hourly rate and the total amount will be calculated automatically based on the markup percentage and tax rate (if applicable).
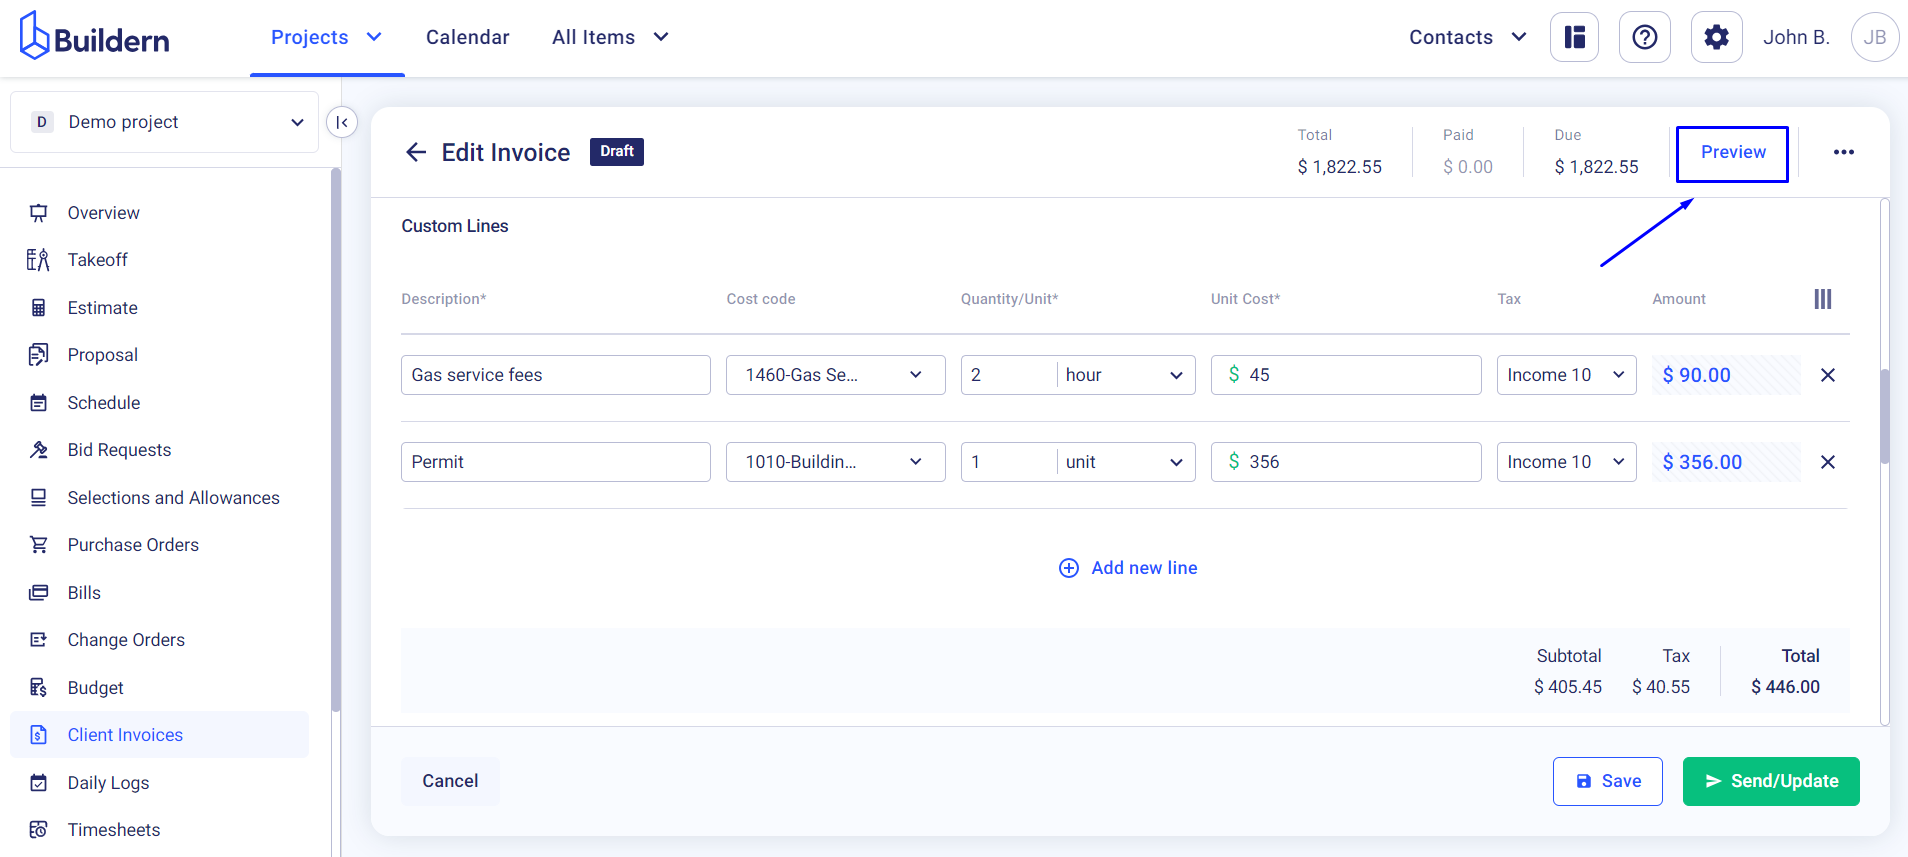
Add Custom Lines to the Cost Plus Invoice
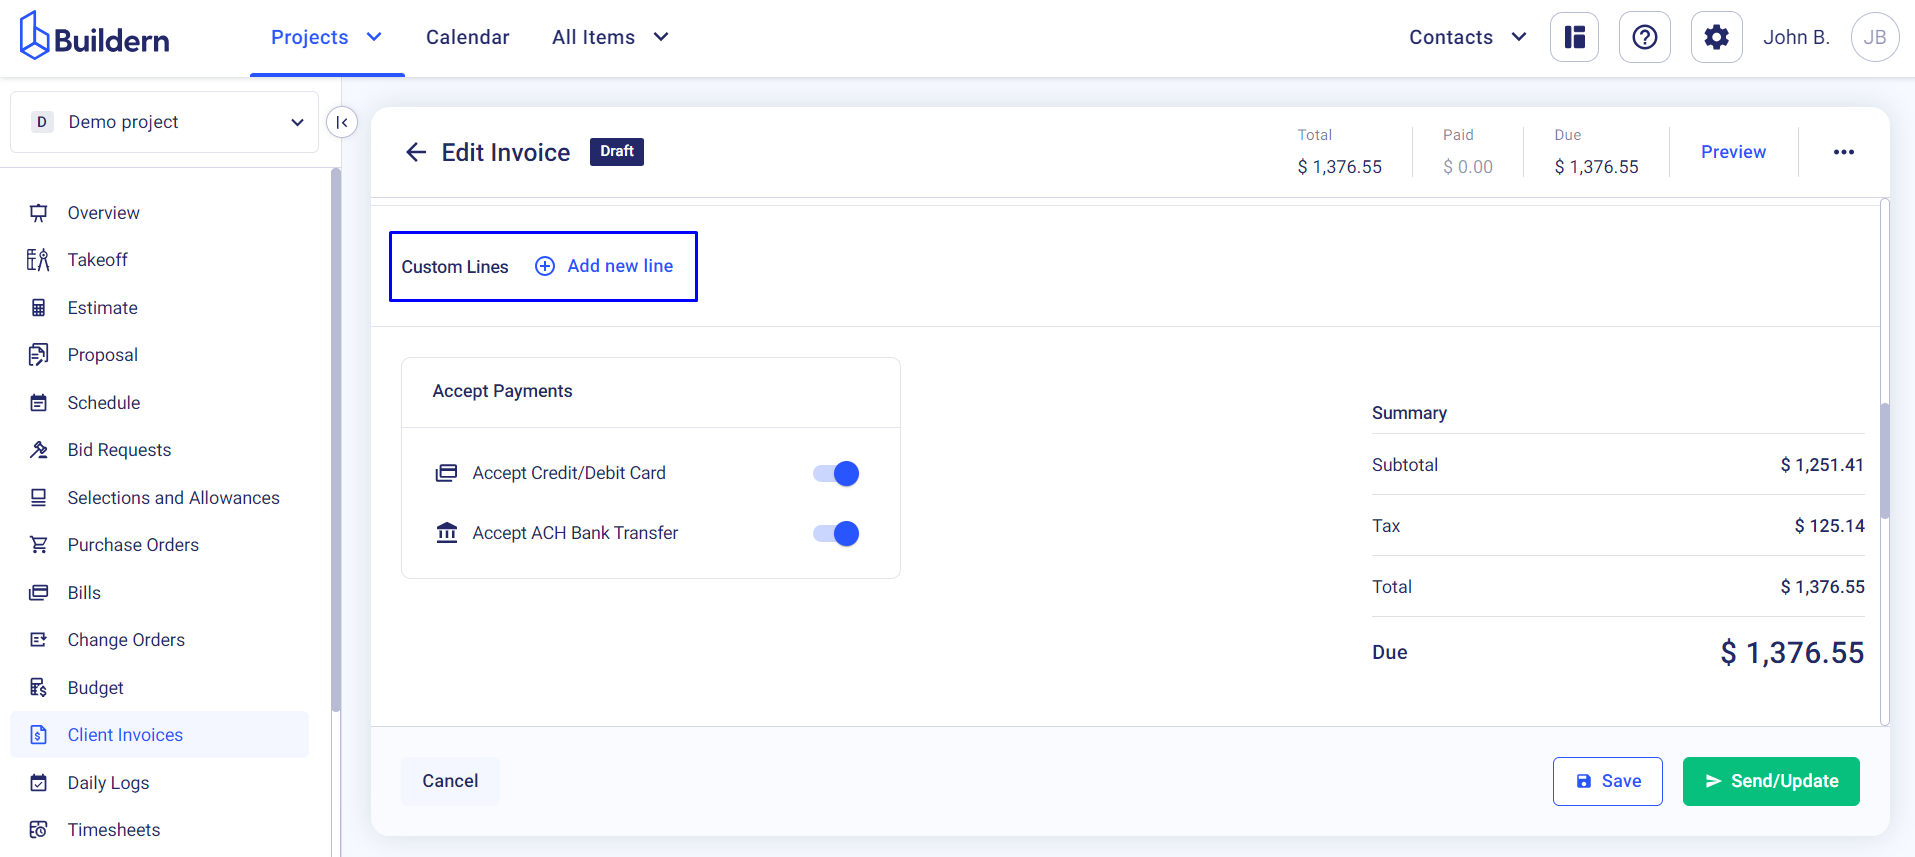
Custom lines in the invoice mainly refer to the one-time payments with no bills and timesheets. These charges can be anything, like equipment rental, travel expenses, or any other additional costs.
In the Cost Plus Invoice window, click the Add New Line button.
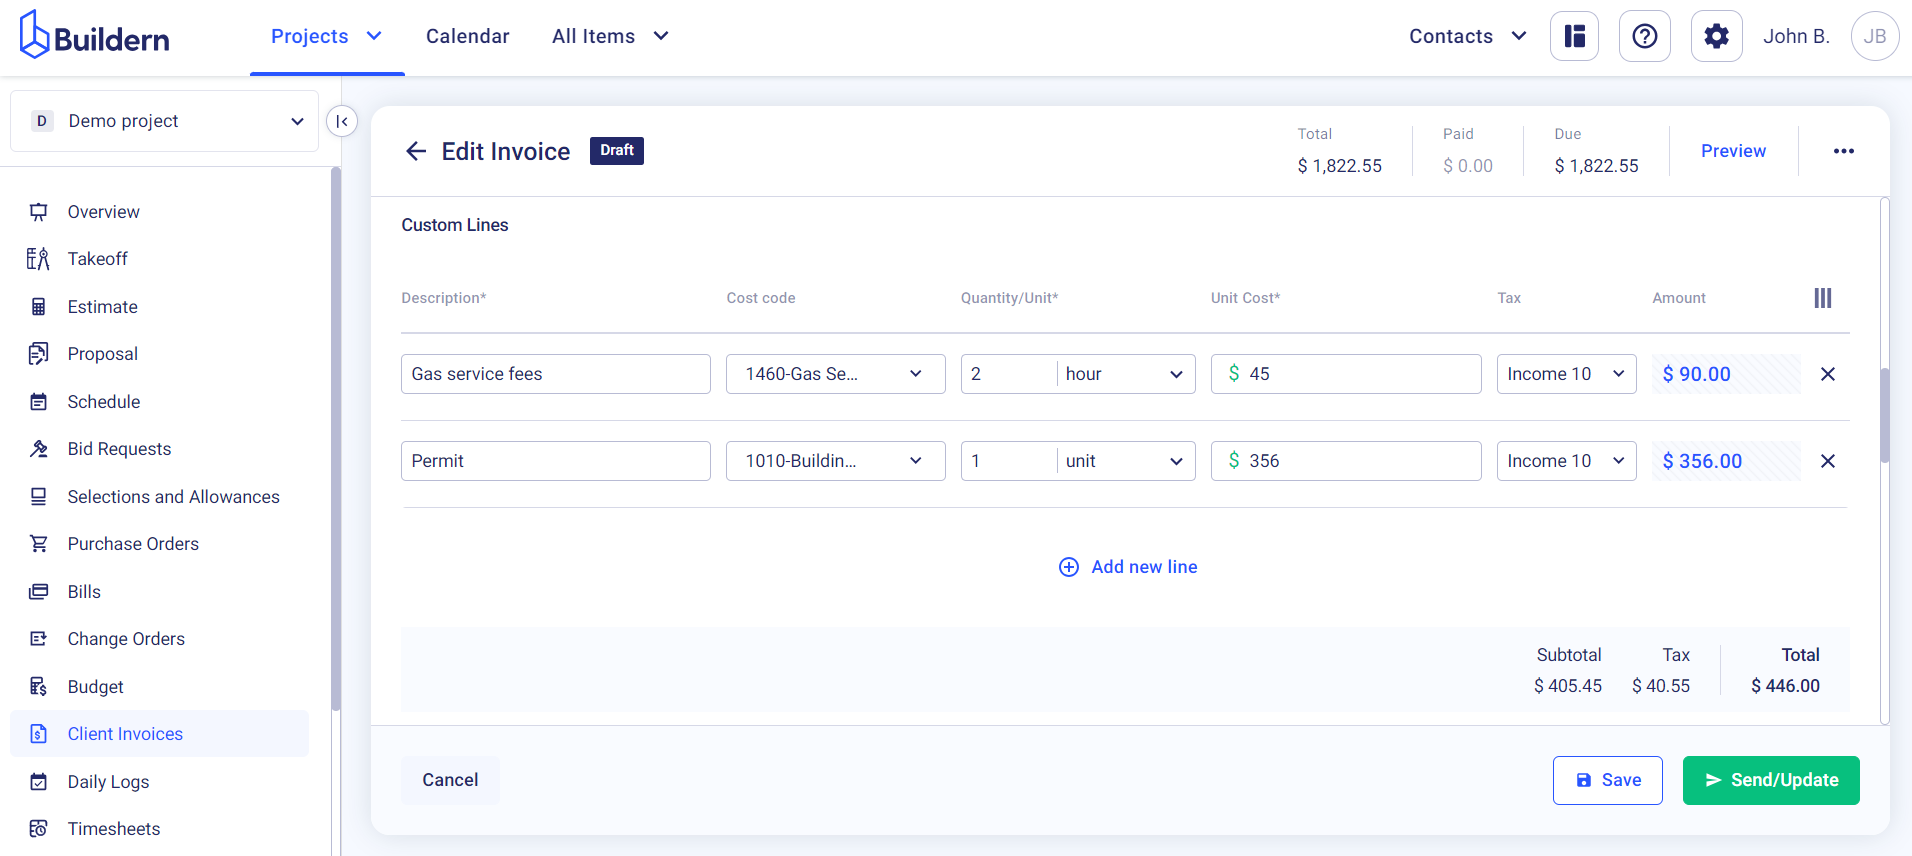
Fill in all the applicable fields and Buildern will calculate the final total amount based on the provided data.
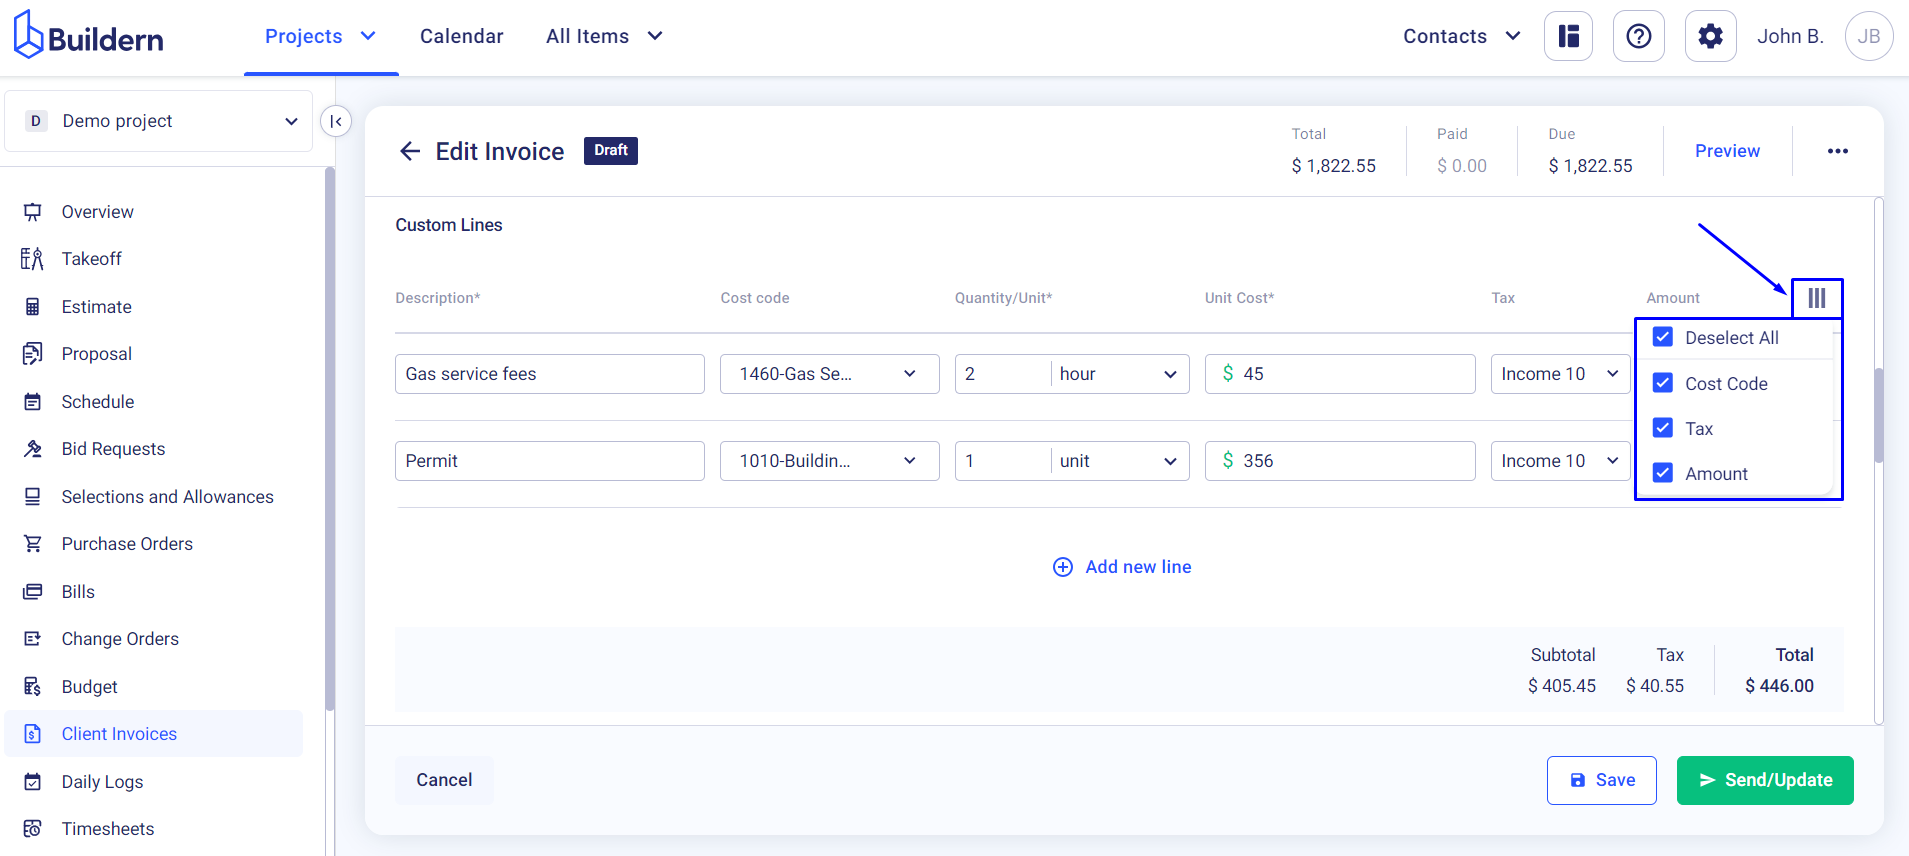
Note that you can also customize the custom lines columns by hiding/showing only the relevant ones:
Step 4. Preview Your Invoice Before Sending It to the Client
Always measure twice, and cut once. The same principle applies to invoices: Review thoroughly before hitting send.
Preview your invoice to see how your client will see it.
Besides previewing the final invoice, you can also customize the layout to limit or expand the things you want to show your clients.
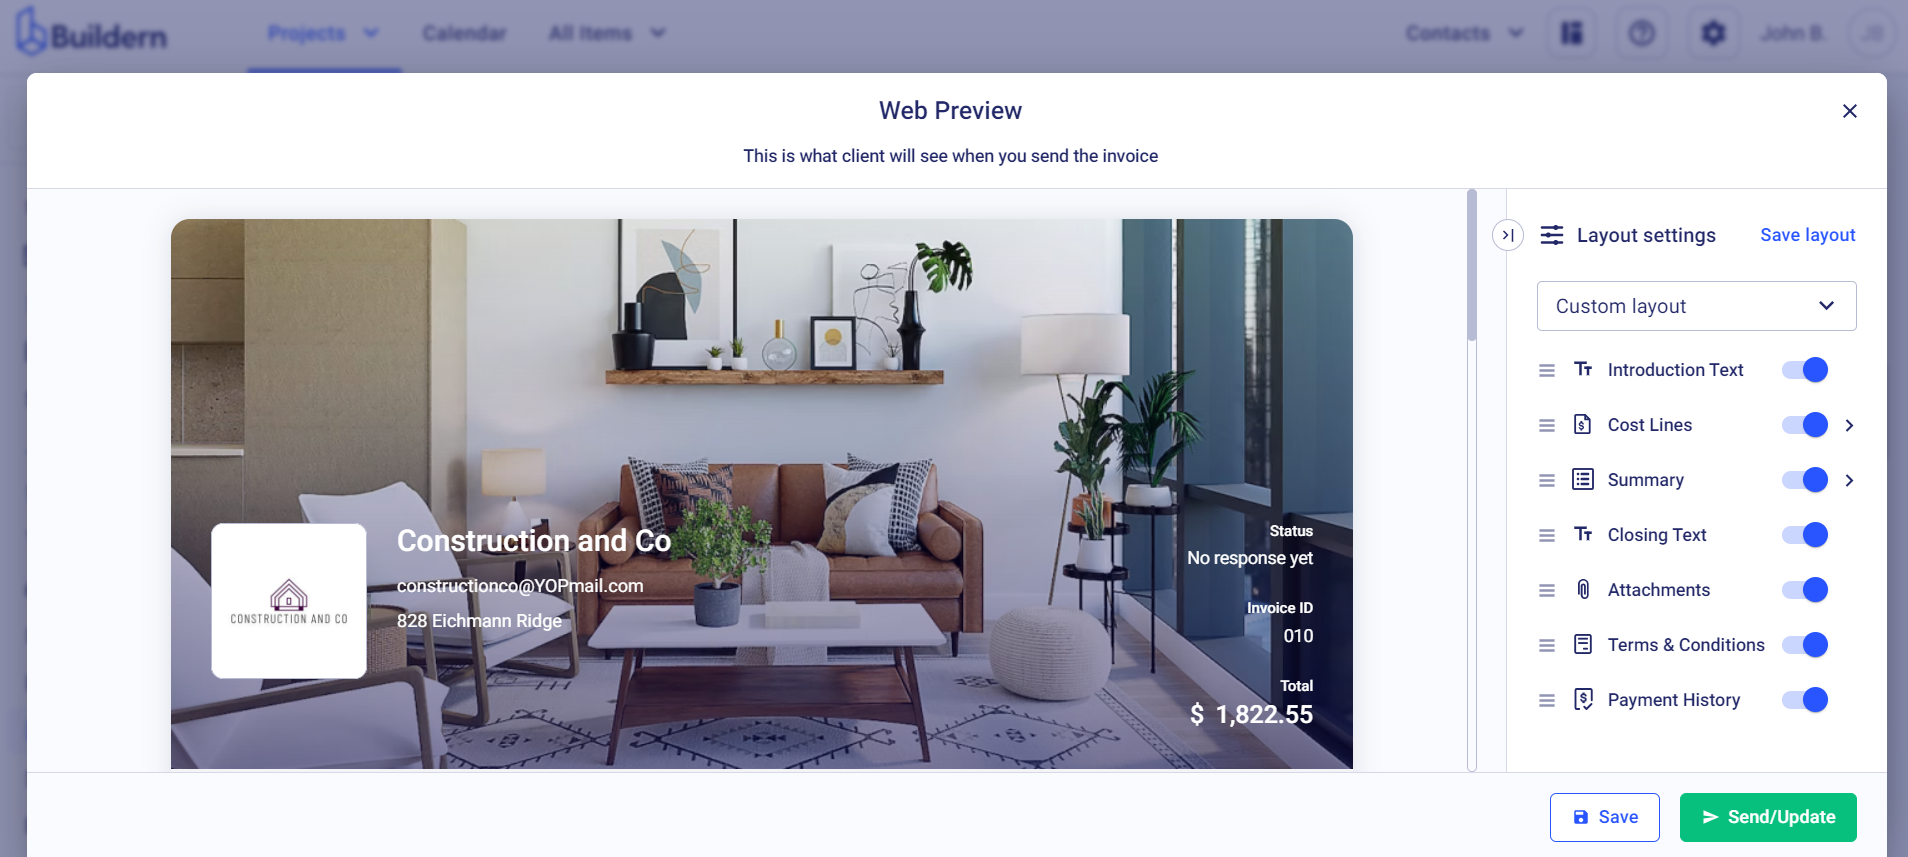
Suppose you’d like to customize the summary by hiding the taxes from your client. Here's how it would look:

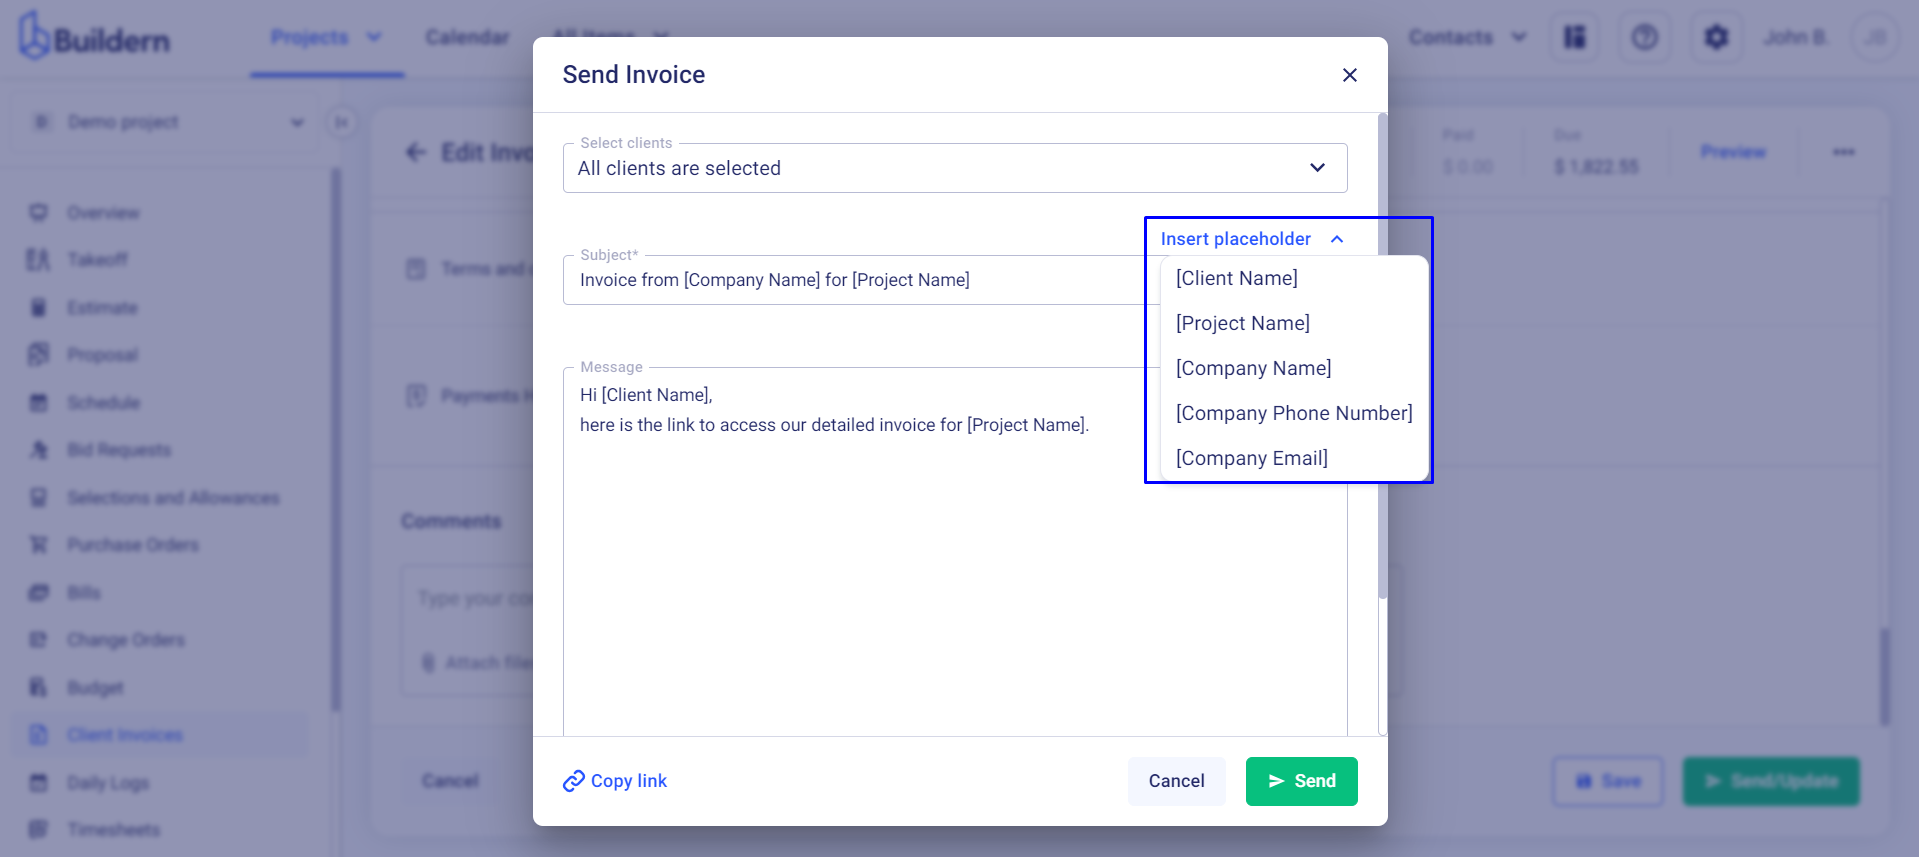
Step 5. Send the Invoice
Once you have finalized the invoice, you can easily send it to your client with just a few clicks.
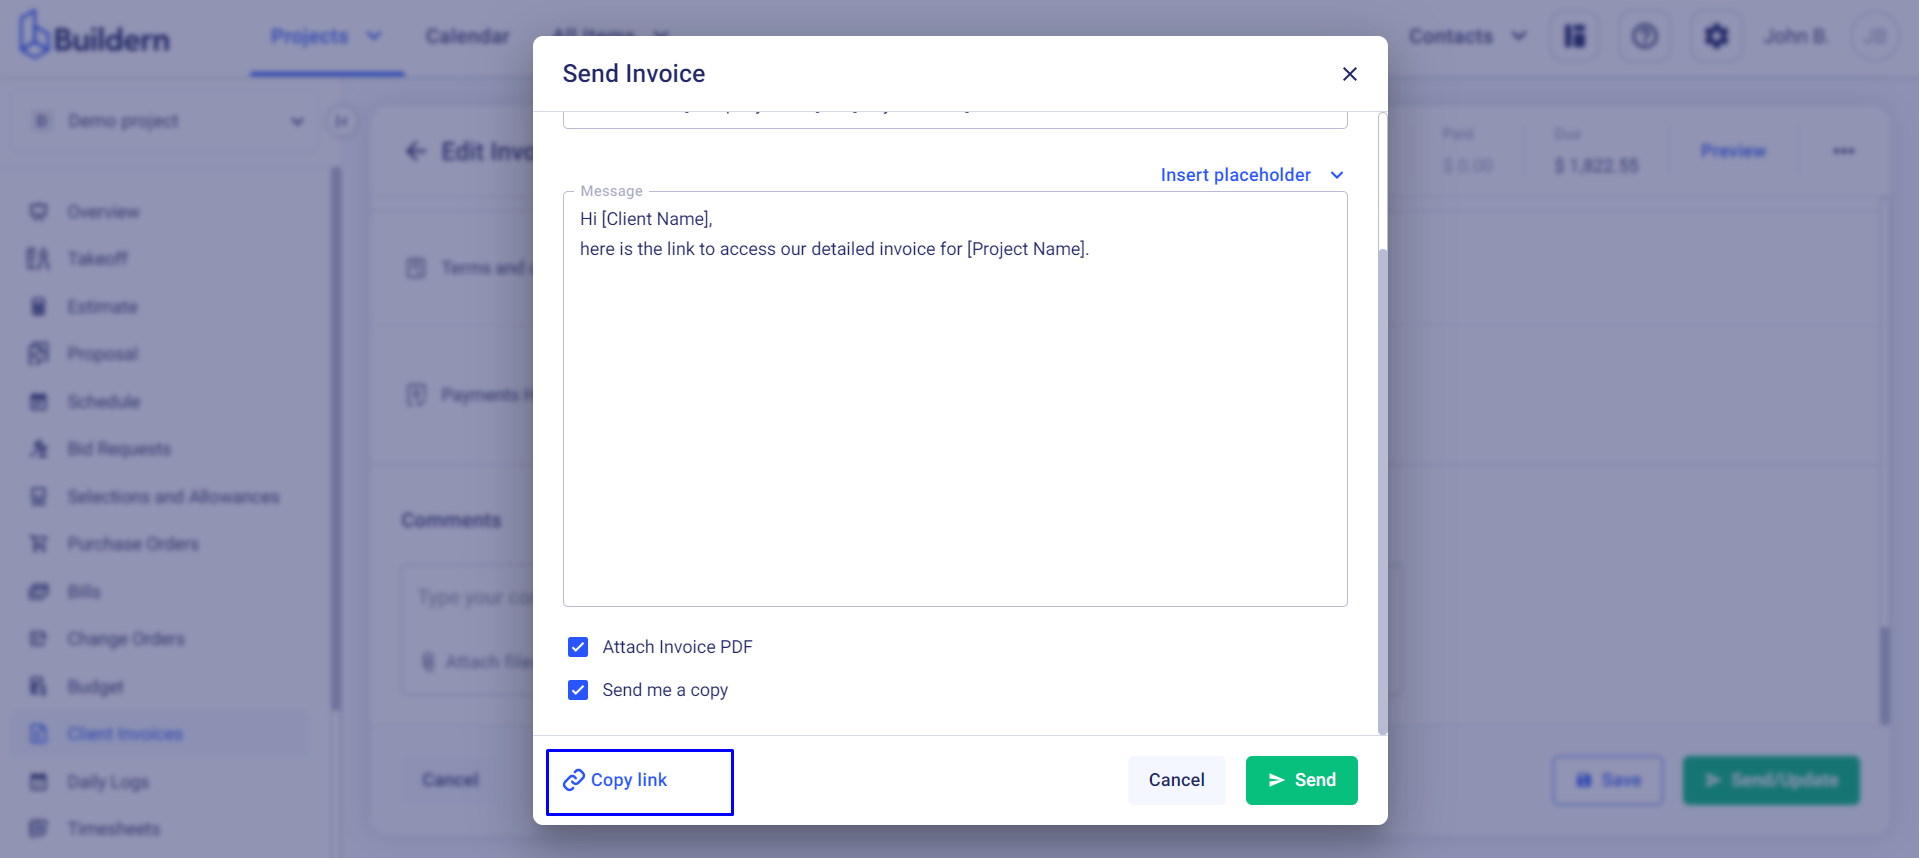
In the Send tab, you can select your clients and customize the subject line and the message with pre-made placeholders.
Moreover, Buildern allows you to attach a PDF version of your invoice to the email and also send a copy to yourself to ensure everything is correct before the client receives it.
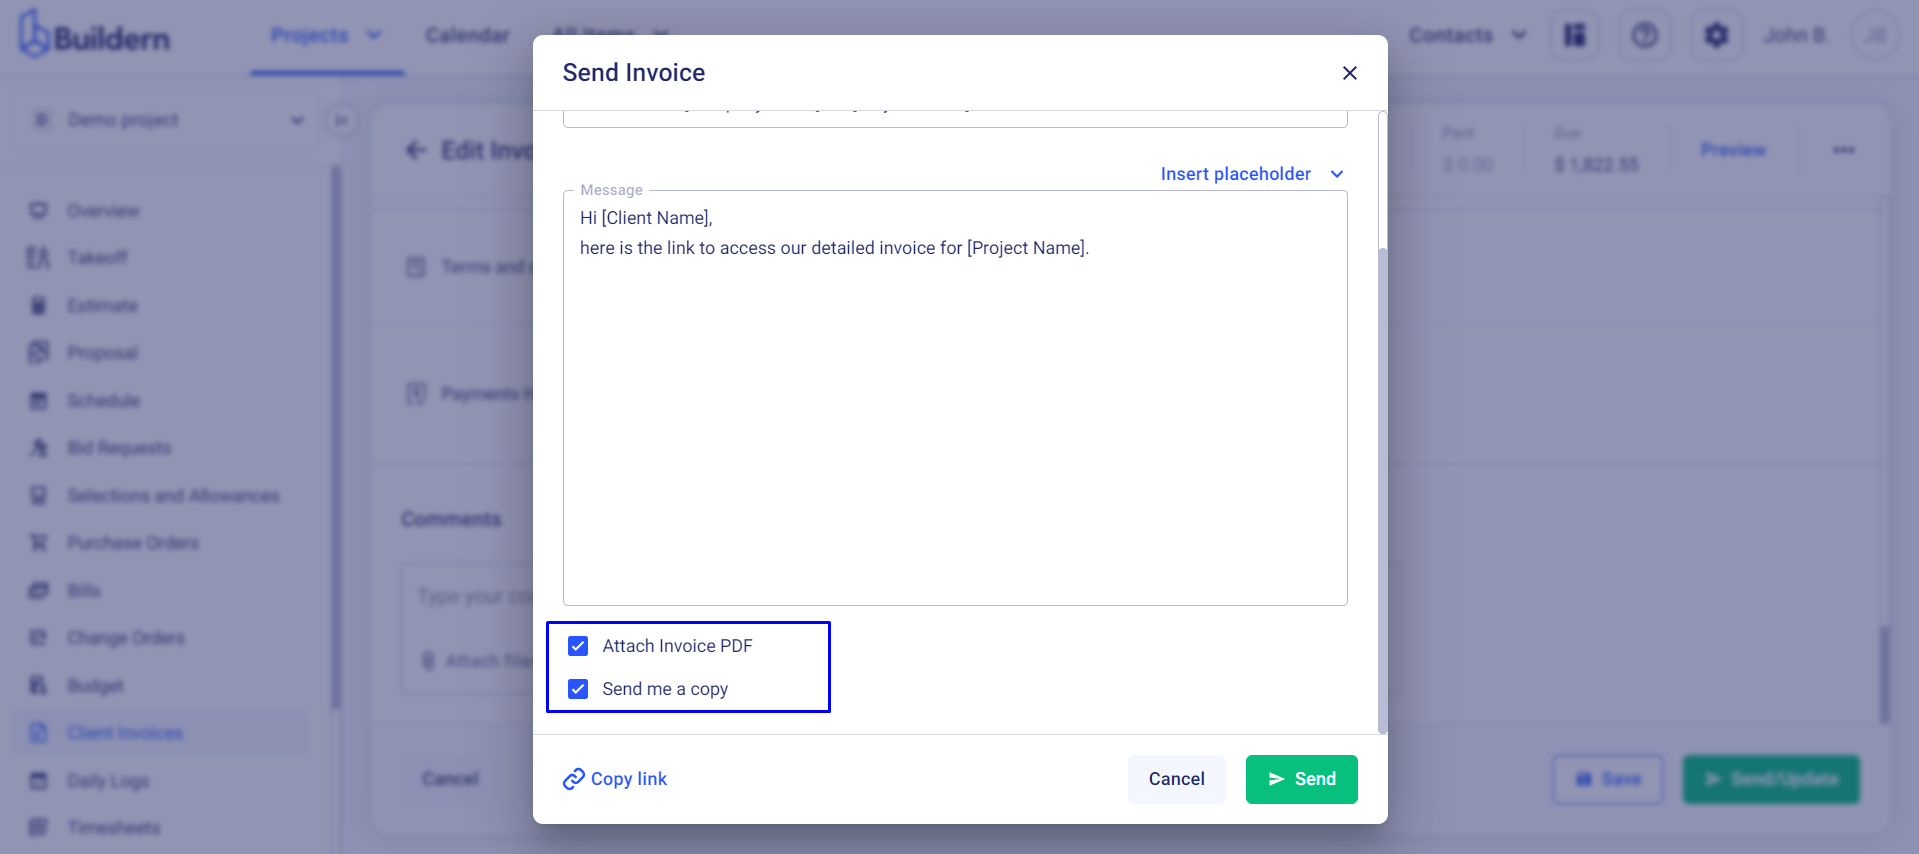
By clicking the Copy link button, you will get a sharable link and can send the invoice to anyone (but they can only view the invoice).
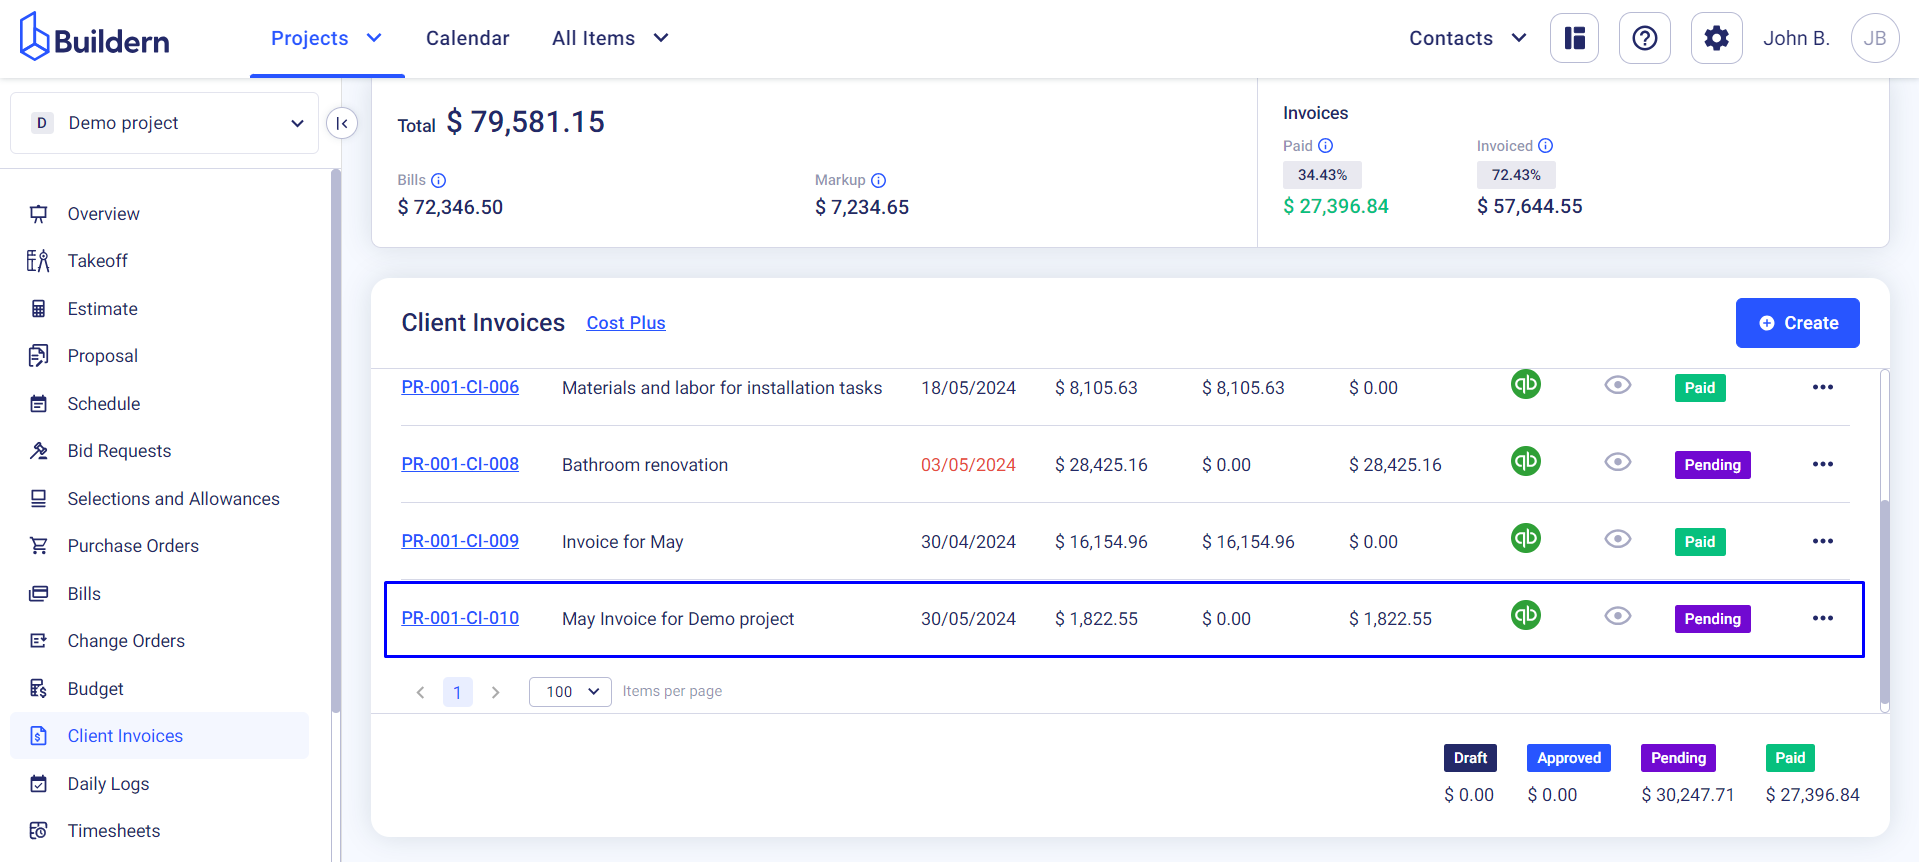
Once you send the invoice, it will appear among your other invoices with the Pending status.
💡Recommended Reading
How to Invoice Clients in Fixed Price Completion Percentage
How to Invoice Clients in Fixed Price Progress Payments Projects