Email templates in Buildern allow you to streamline your ongoing communication and documents:
-
Proposals
-
Bid Requests (Requests for Quotes)
-
Purchase Orders
-
Change Orders (Variations)
-
Client Invoices
By using customizable placeholders and setting default templates, you can save time while ensuring every email is professional and personalized.
Step 1. Create a New Email Template
Go to your Company Settings > Email Messages to find all the templates and create new ones.
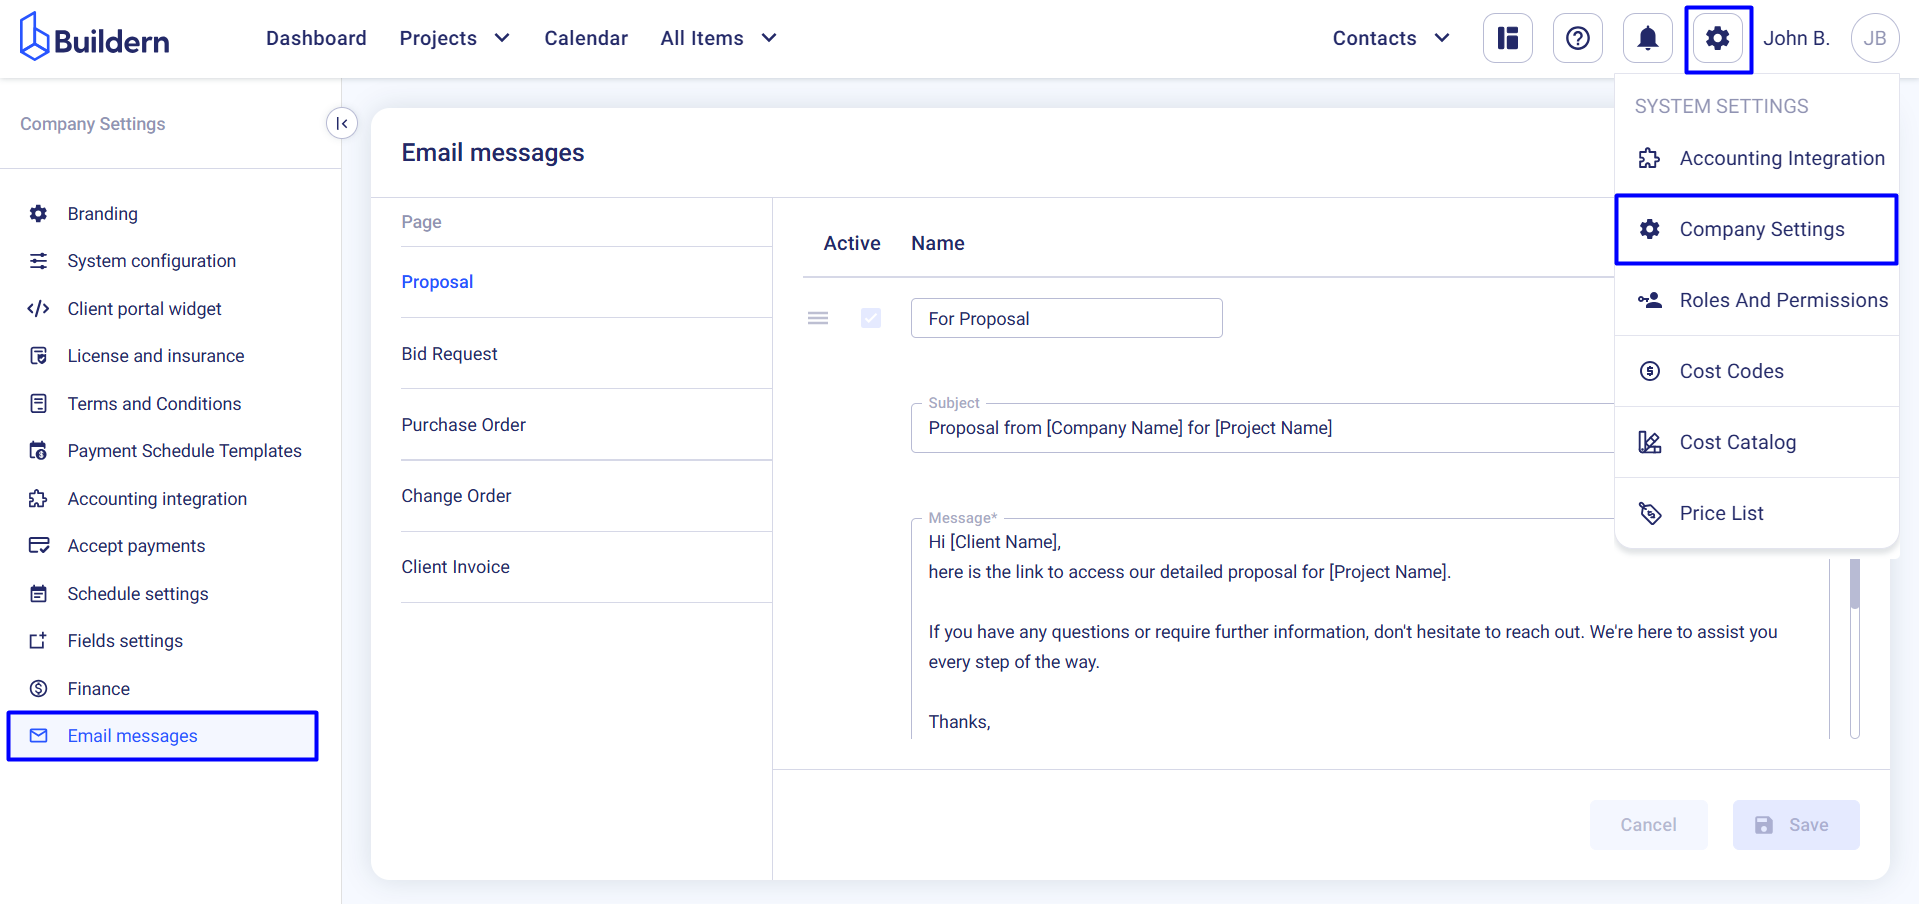
Choose the document for which you want to create an email template. Suppose it’s for the proposals. Click the Add new option button.
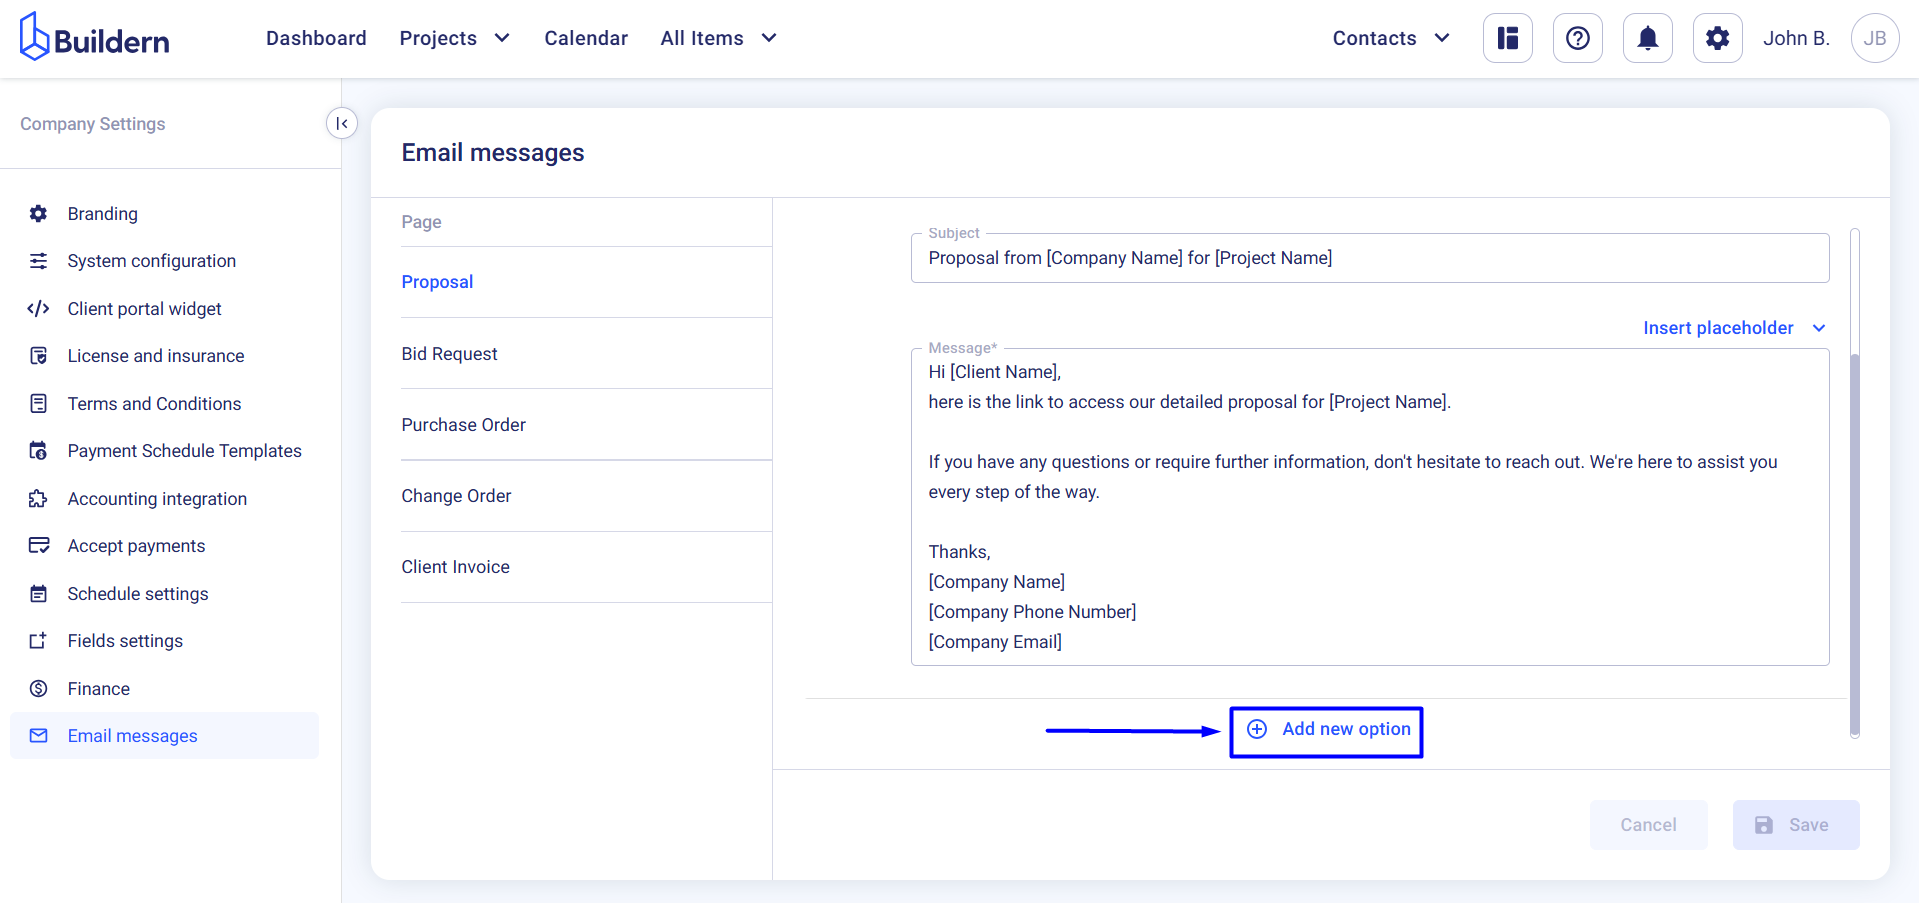
Enter the template name (e.g., “Custom Home Proposal”), then add a subject line to match the email’s purpose. Your email body and subject line can contain various placeholders for dynamic email personalization.
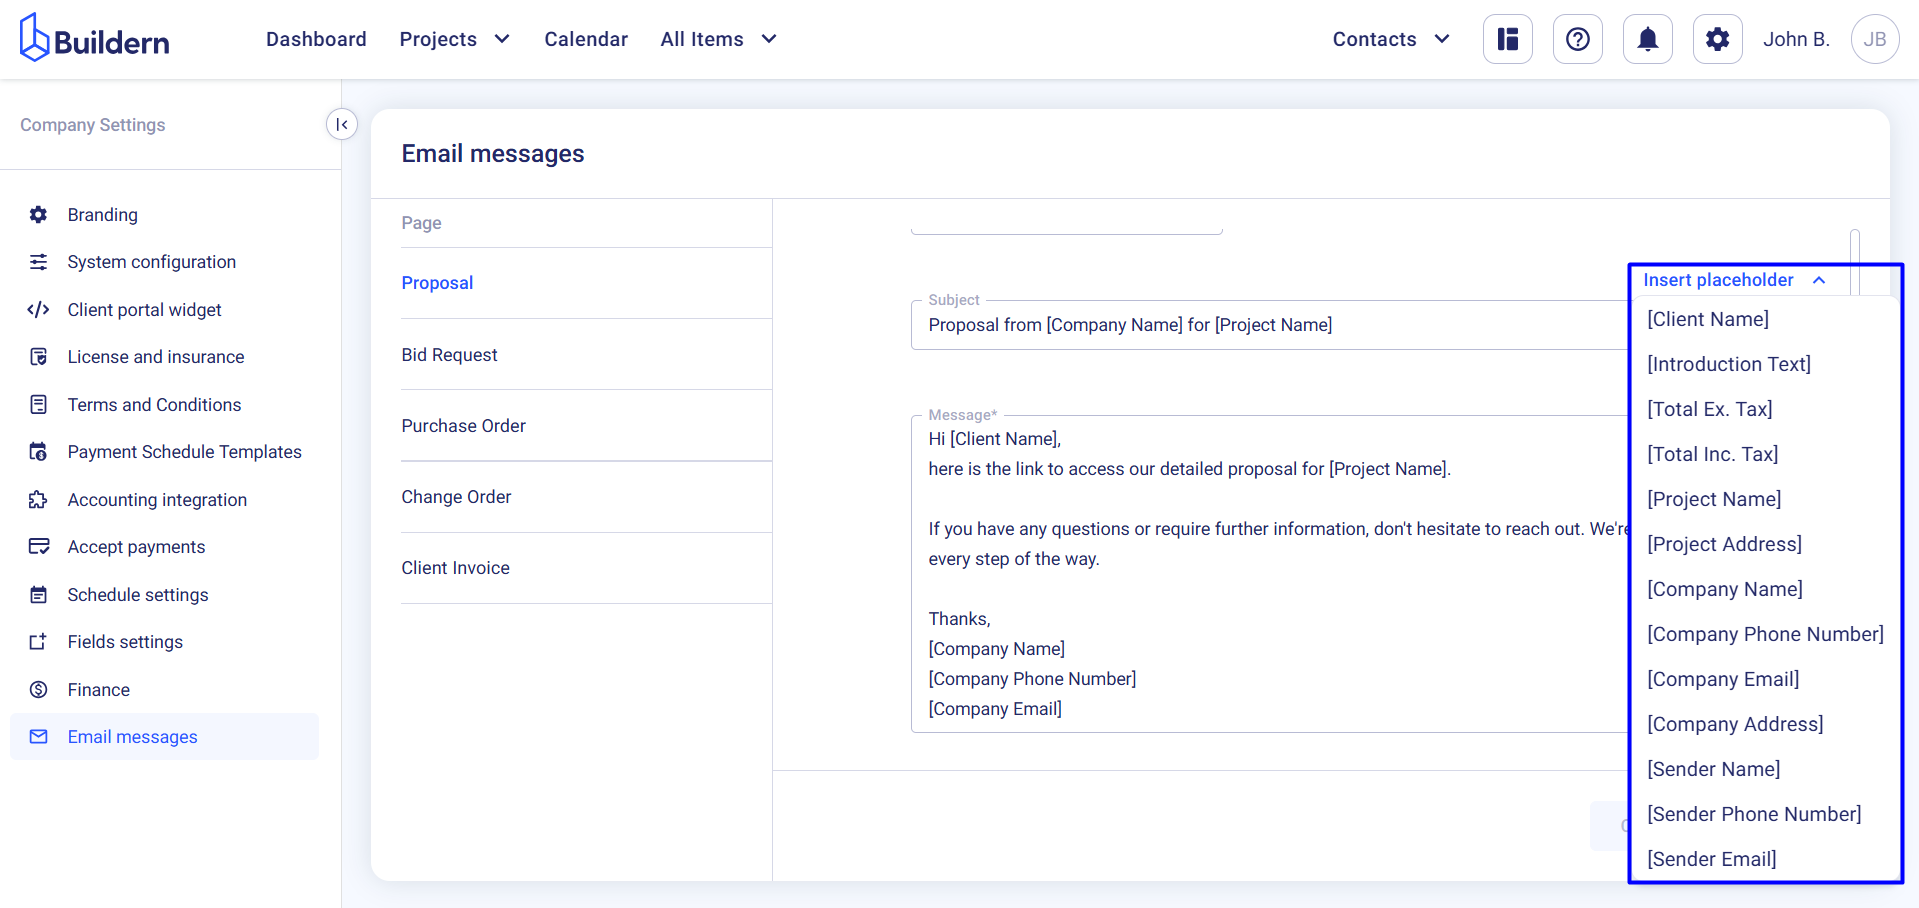
For instance, placeholders like {Client Name} and {Project Name} ensure your email feels personal, even when sent to multiple recipients. Buildern will automatically replace these placeholders with the relevant information when the email is sent.
Step 2. Set Default Email Templates
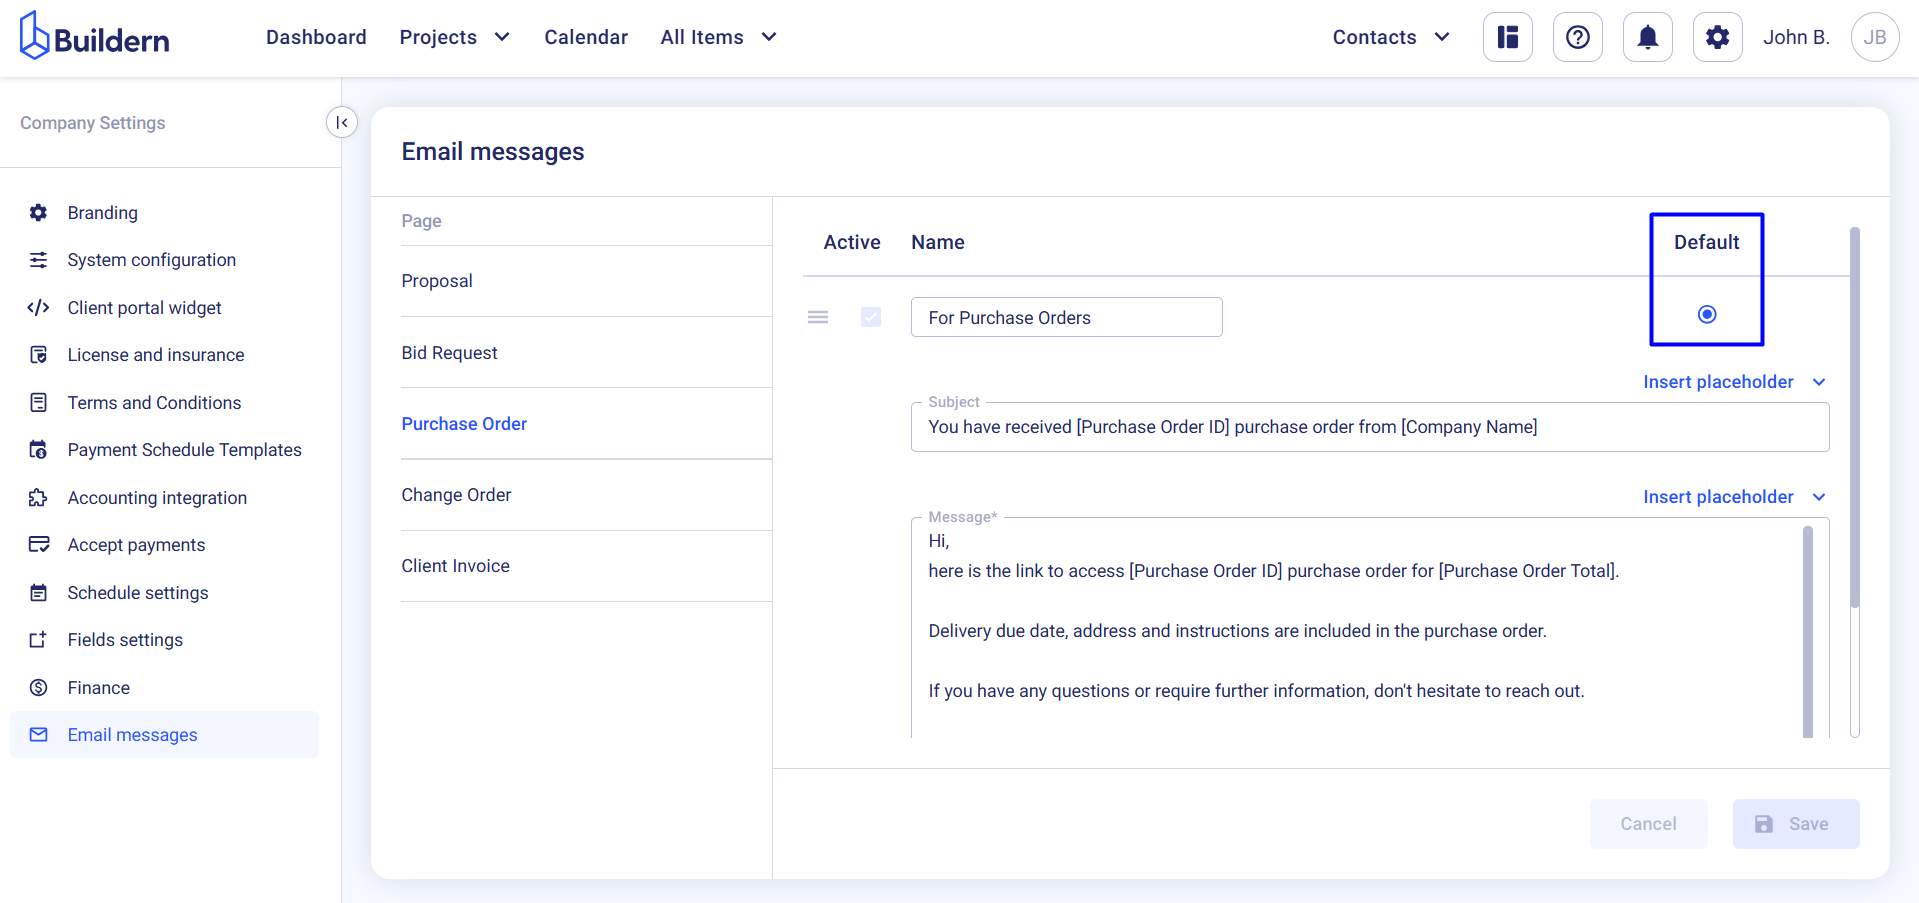
Once your templates are ready, you can choose the ones that will be the default. Setting a default template ensures that it is automatically selected for specific types of emails. This saves time and keeps your communication consistent.
To do this, just mark the corresponding template name as the default.
Your selected template will now be automatically applied whenever you create the corresponding document, but you can still make changes if needed before sending it.
Step 3. Send Emails Using the Premade Templates
When creating a proposal, you’ll have the option to select an email template.
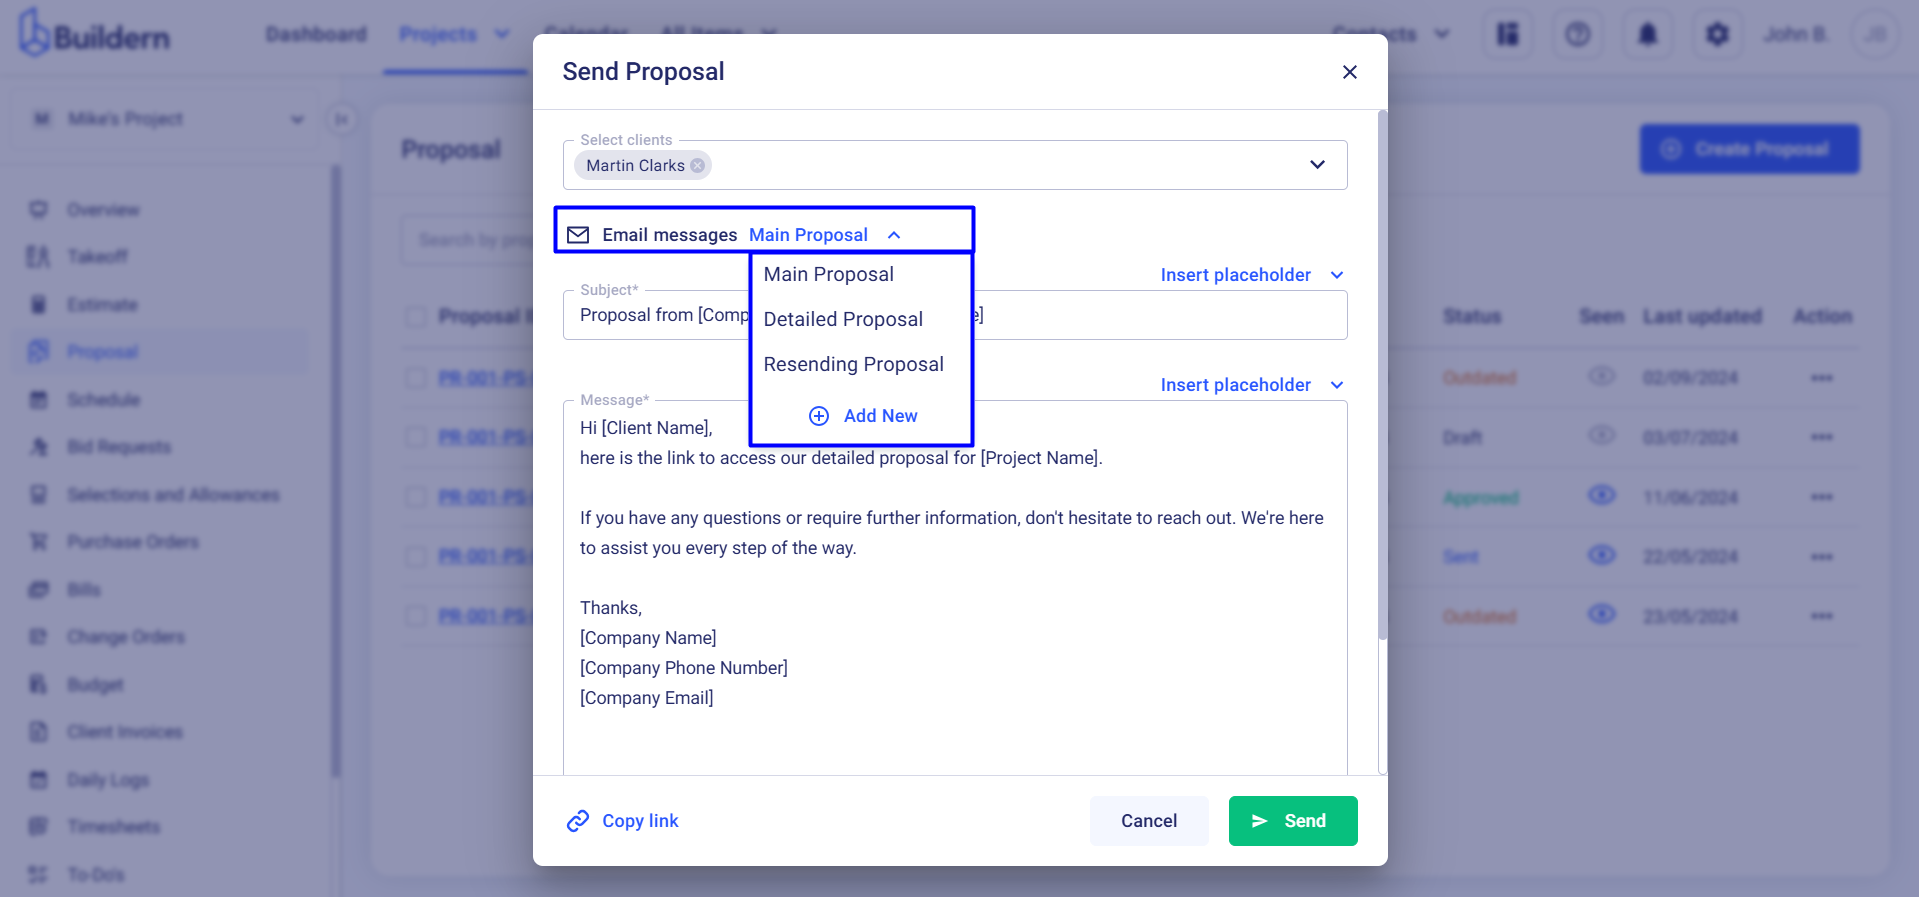
Simply choose one that suits your needs, preview the email, and make any necessary changes before hitting send. You can also create a new template right from here.
💡Recommended Reading