Once you decide to sync Xero or QuickBooks with your Buildern account, consolidating all expenses in one place becomes paramount.
This is especially important if you:
-
Have card transactions in Xero
-
Have bank transactions in Xero
-
Use third-party software to capture your financial documents (Hubdoc, Dext, or Expensify)
The new feature allows you to pull existing transactions from Xero into Buildern, and review and approve them to avoid double entry.
What Is Expense in Xero?
In simple terms, an expense refers to any outgoing payment or monetary transaction incurred by a business in the course of its operations.
To find your construction expenses in Xero, go to “Accounting > Bank Accounts” section.
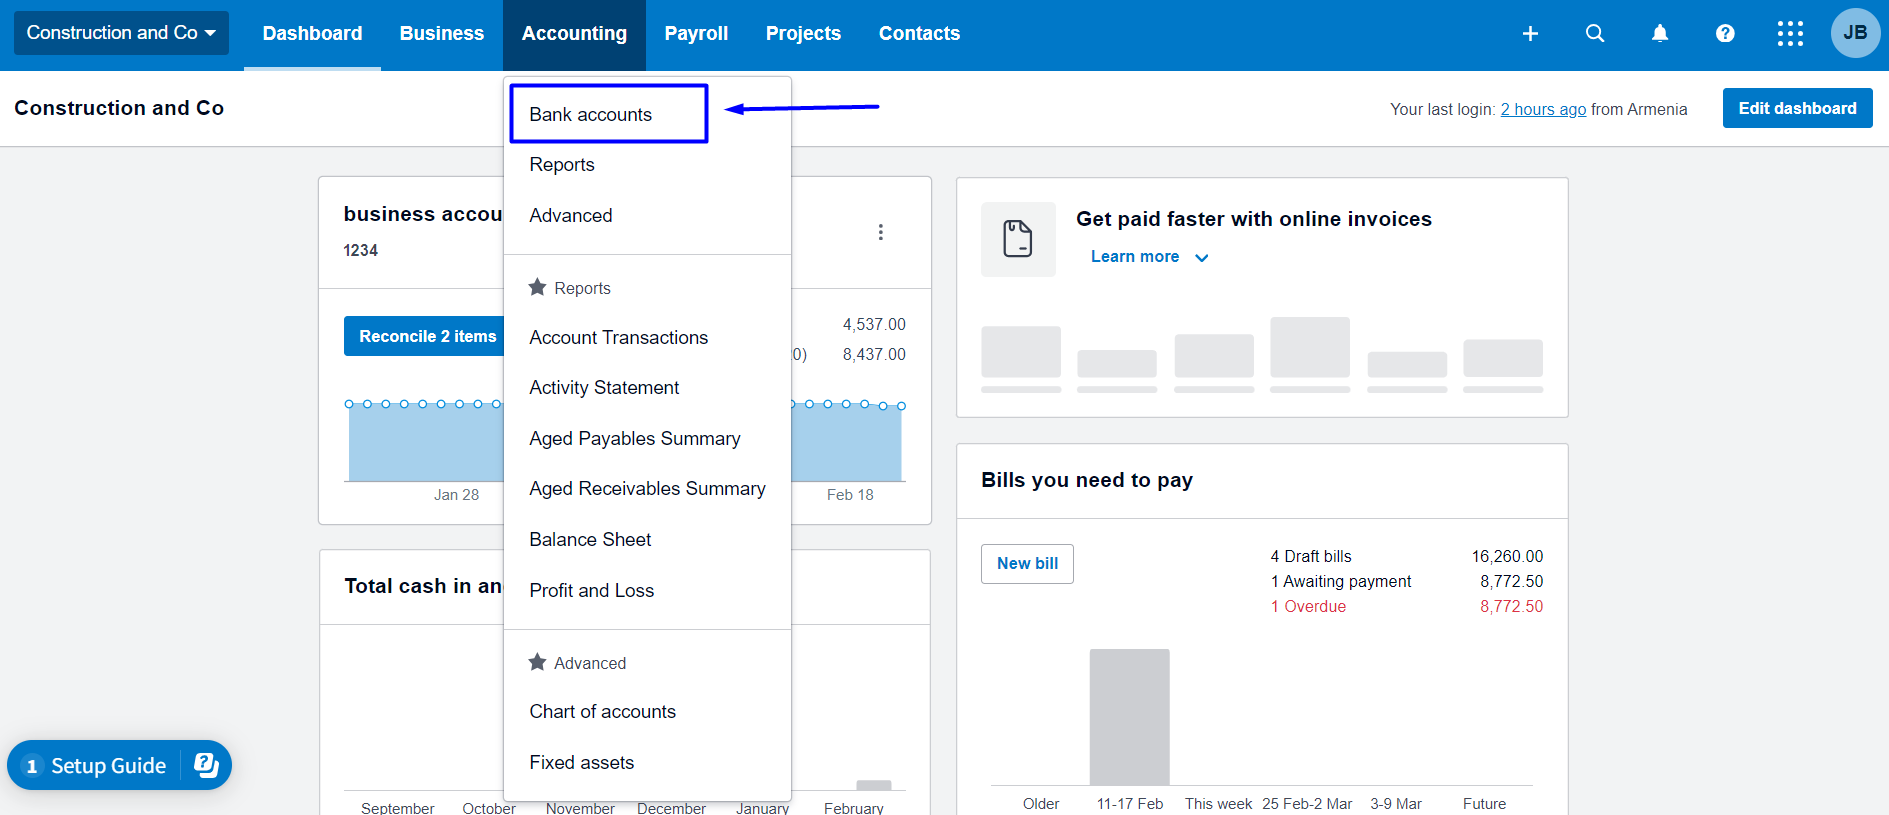
This is where you will see the Statement Balance and your Balance in Xero.
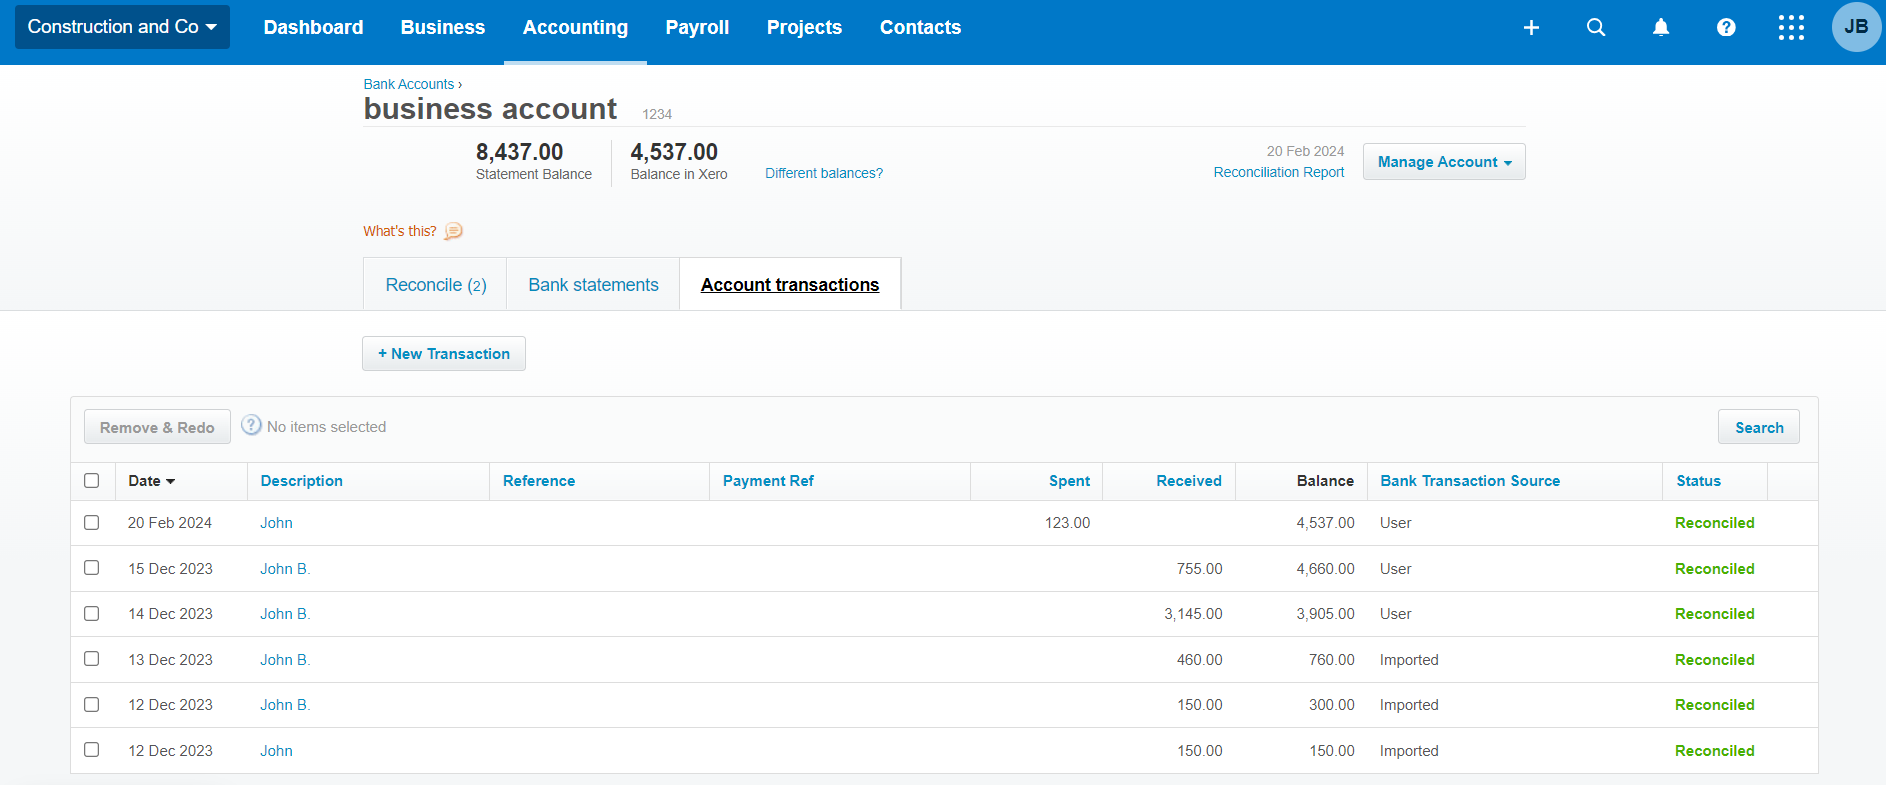
Click on the “Manage Account” then “Account Transactions” buttons to see the complete history of your Xero expenses.

Review your account’s expenses.
If this is the information you want to have in Buildern, follow the steps described below.
💡Now, let’s see the new feature in action.
Follow the “All Items > Bills” path from your Buildern dashboard.
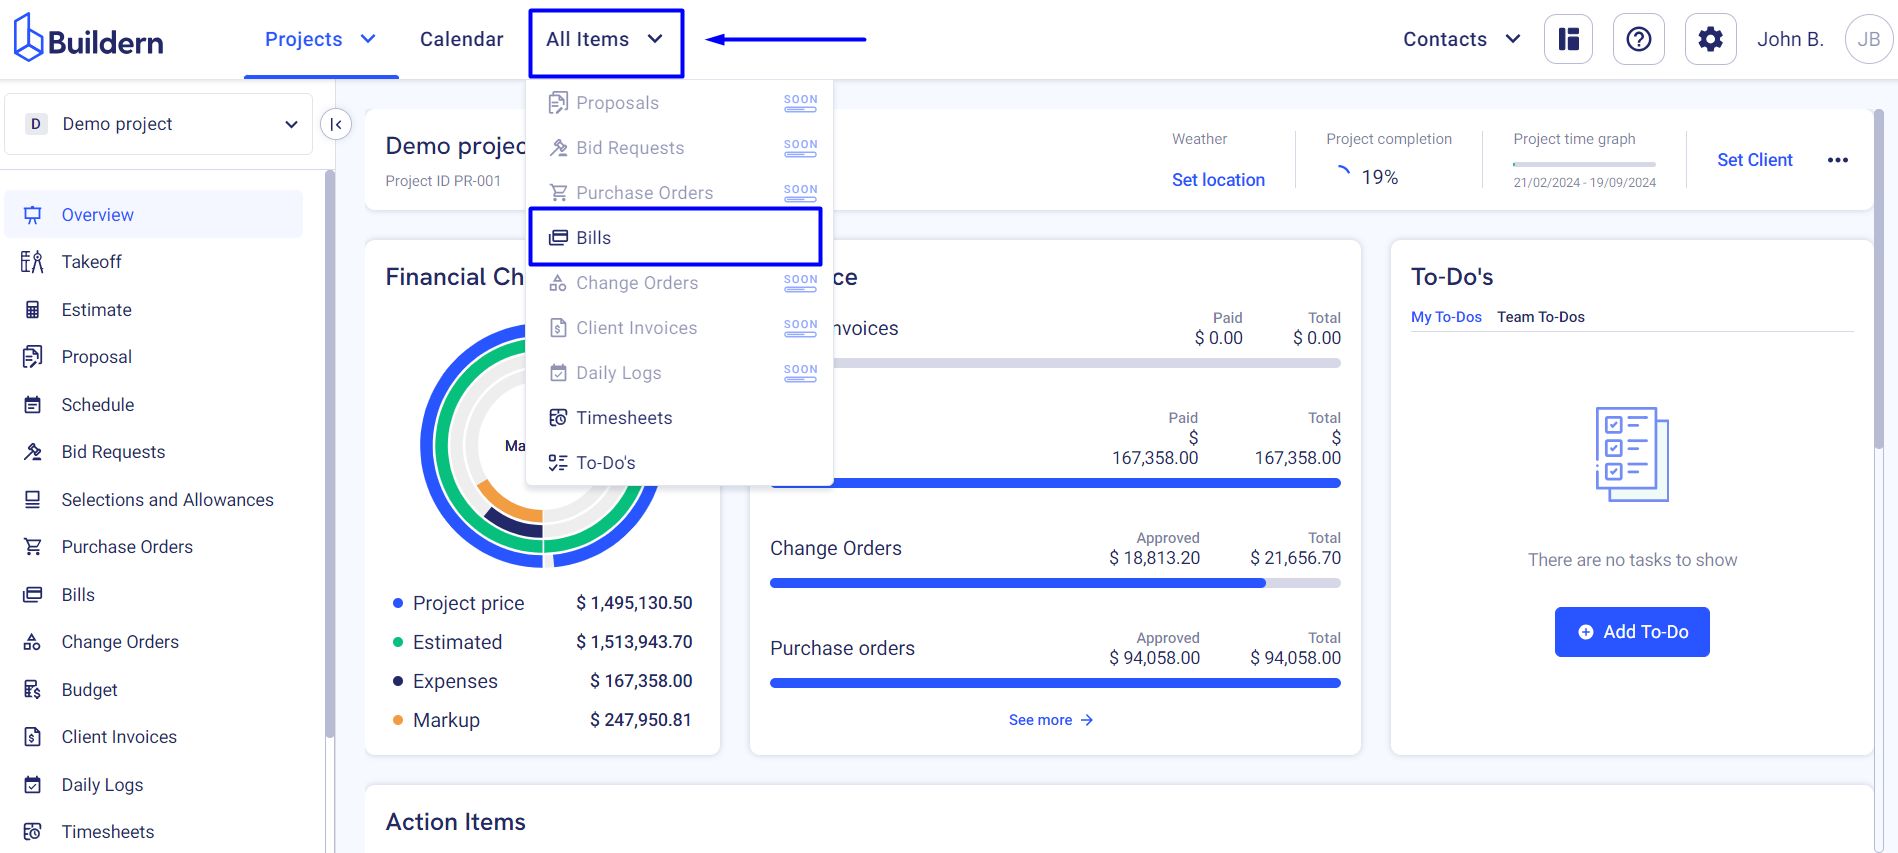
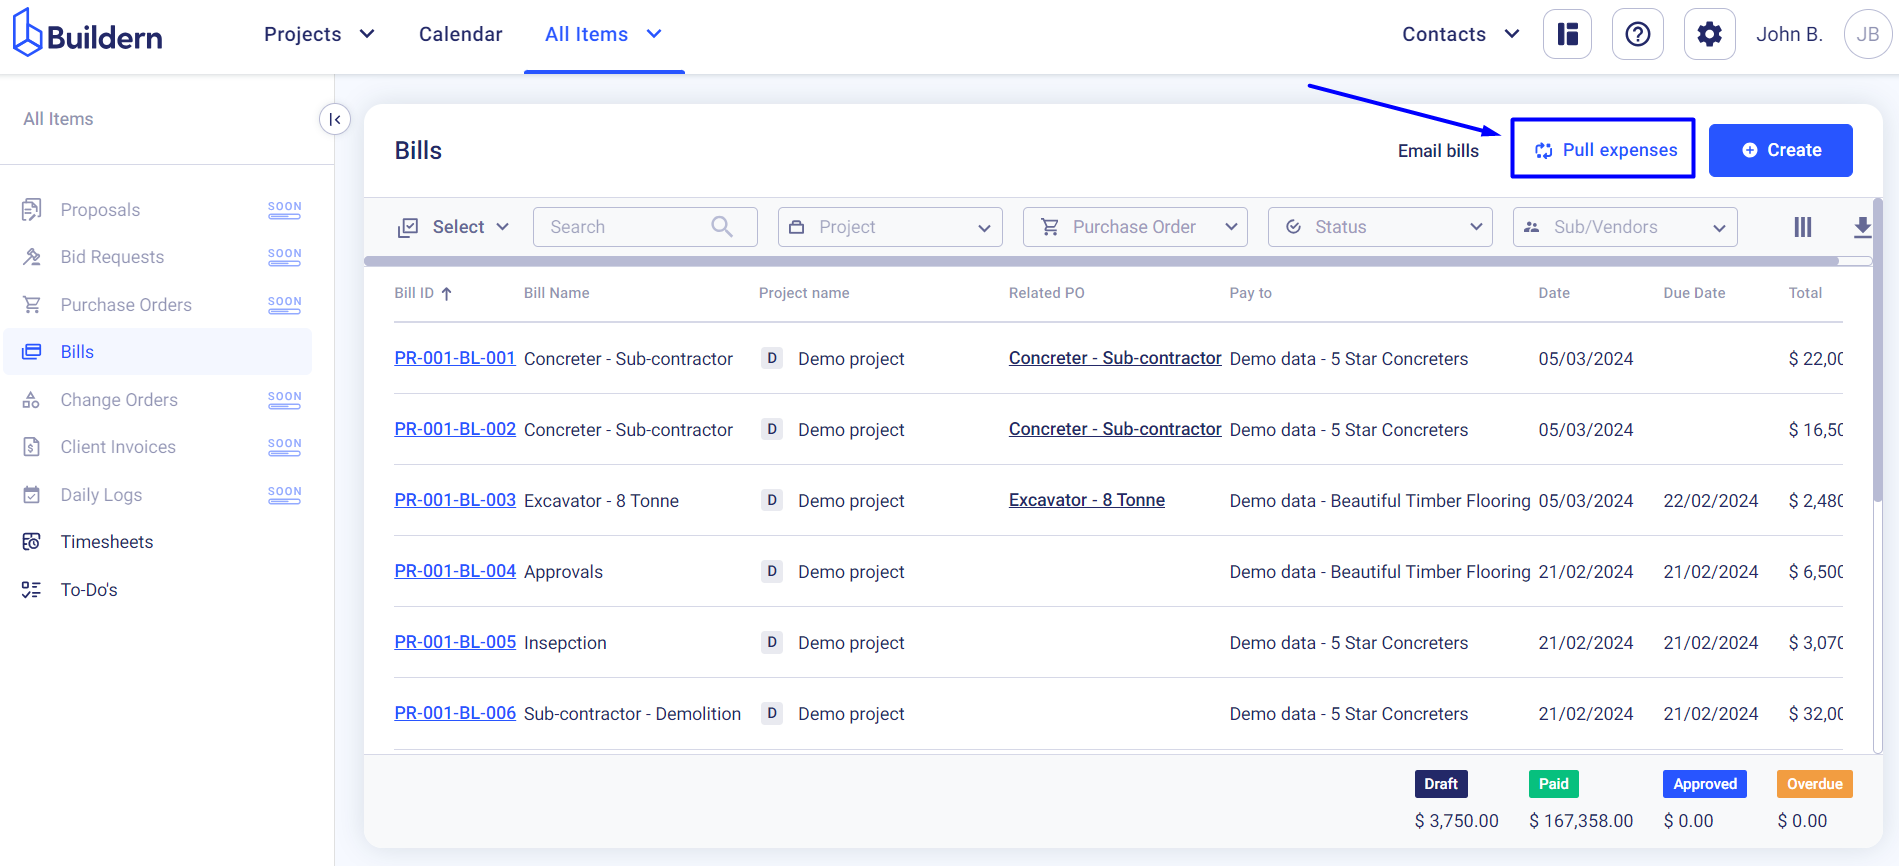
This is where you will find all your bills, regardless of project.
Click the “Pull expenses” button.
Our account has been connected to Xero, so let’s see how the process works with it.
First, choose the day starting from when you want the expenses in Xero to appear in Buildern.
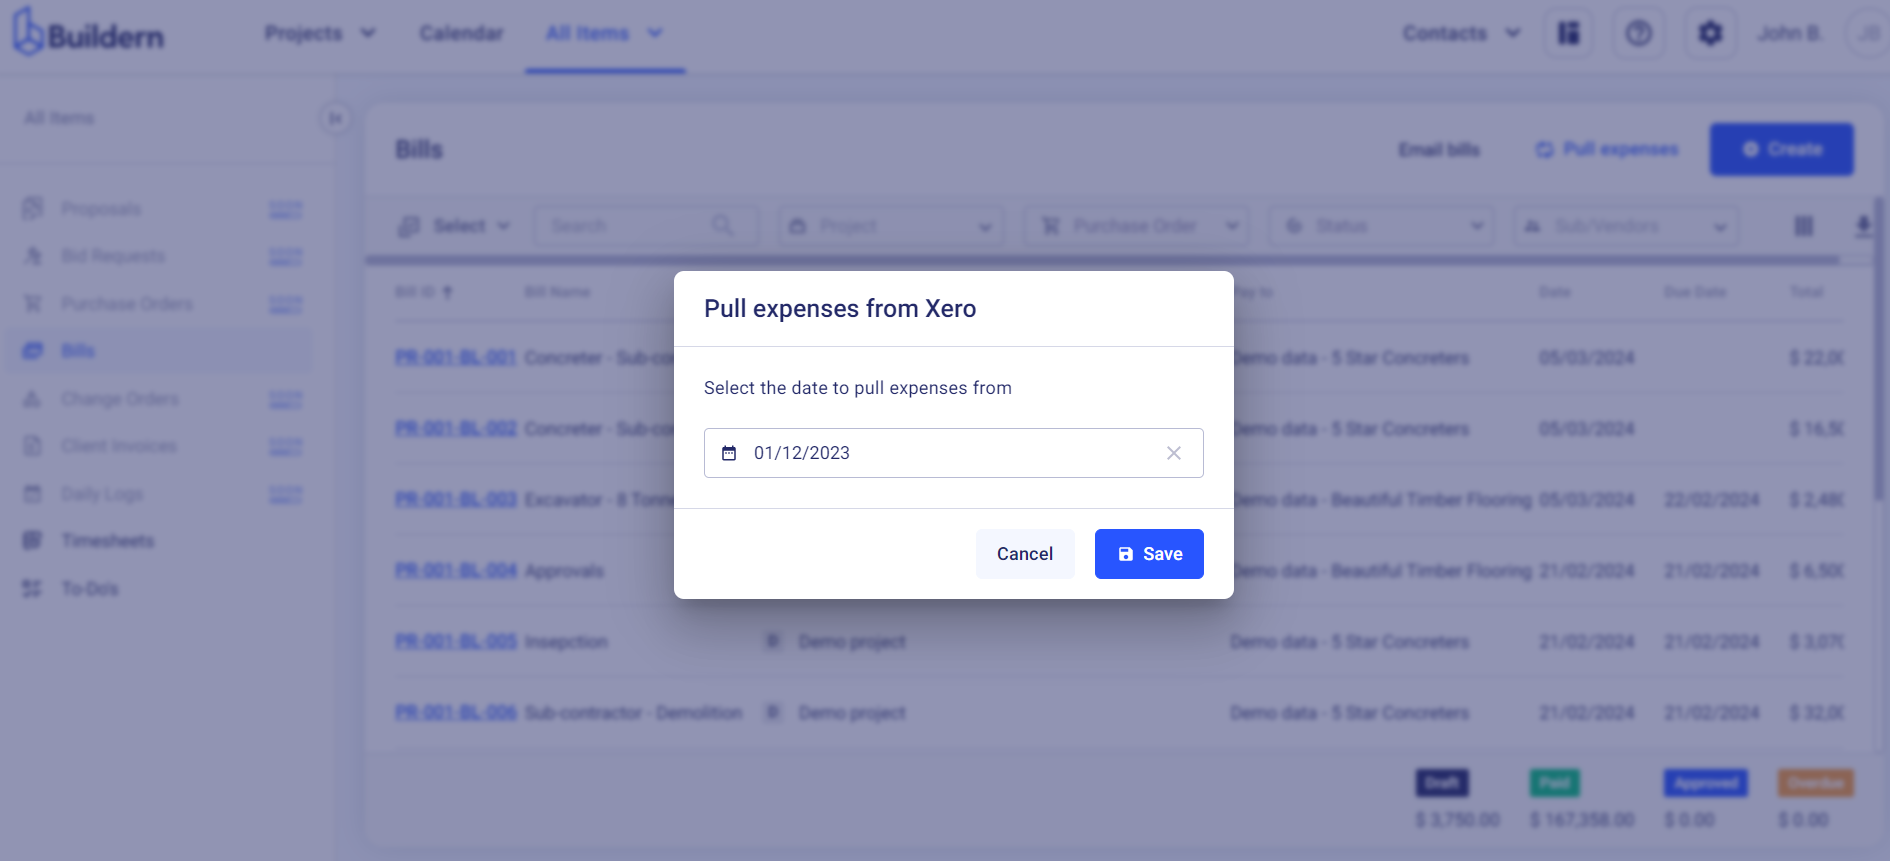
Click the “Save” button.
Now all your expenses should be added to Buildern. Find them in the Bills section.
You may find the new expenses by filtering the data according to the status. Simply choose “Expense needs review” to see the newly added expenses.
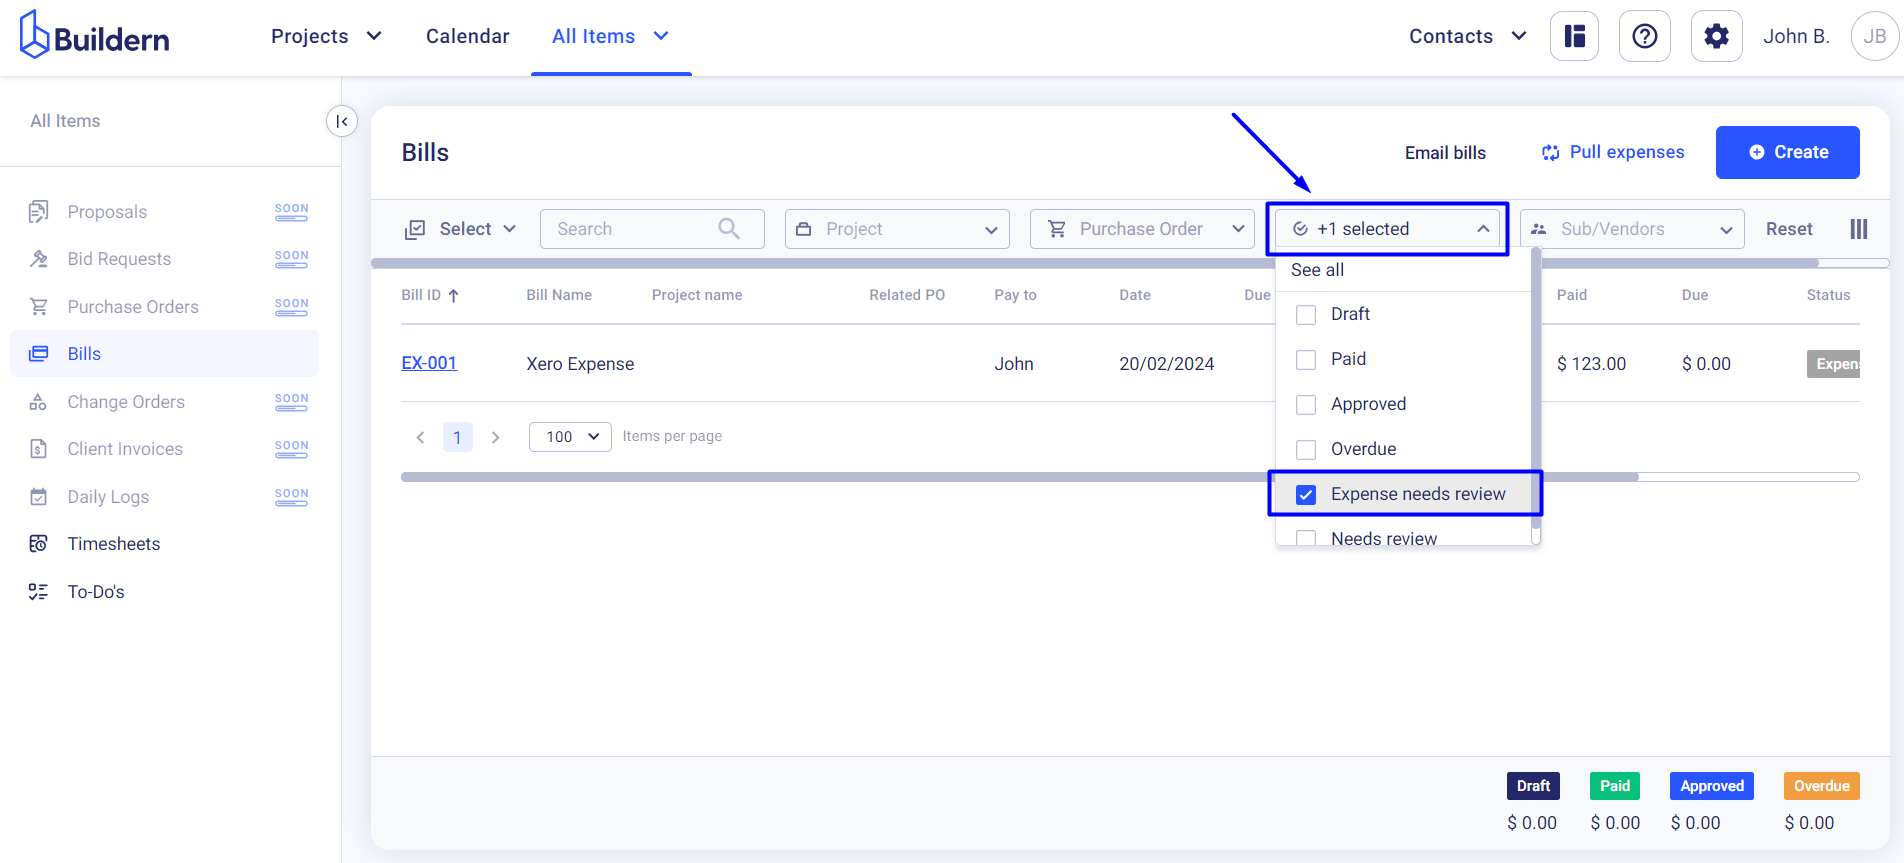
All the pulled expenses will be added to your Buildern account with the status “Expense needs review”, so consider going through each one to see if everything is accurately recorded and categorized.

As you review each expense, you have the flexibility to assign them to specific projects, allocate appropriate cost codes, and make any other adjustments as needed.
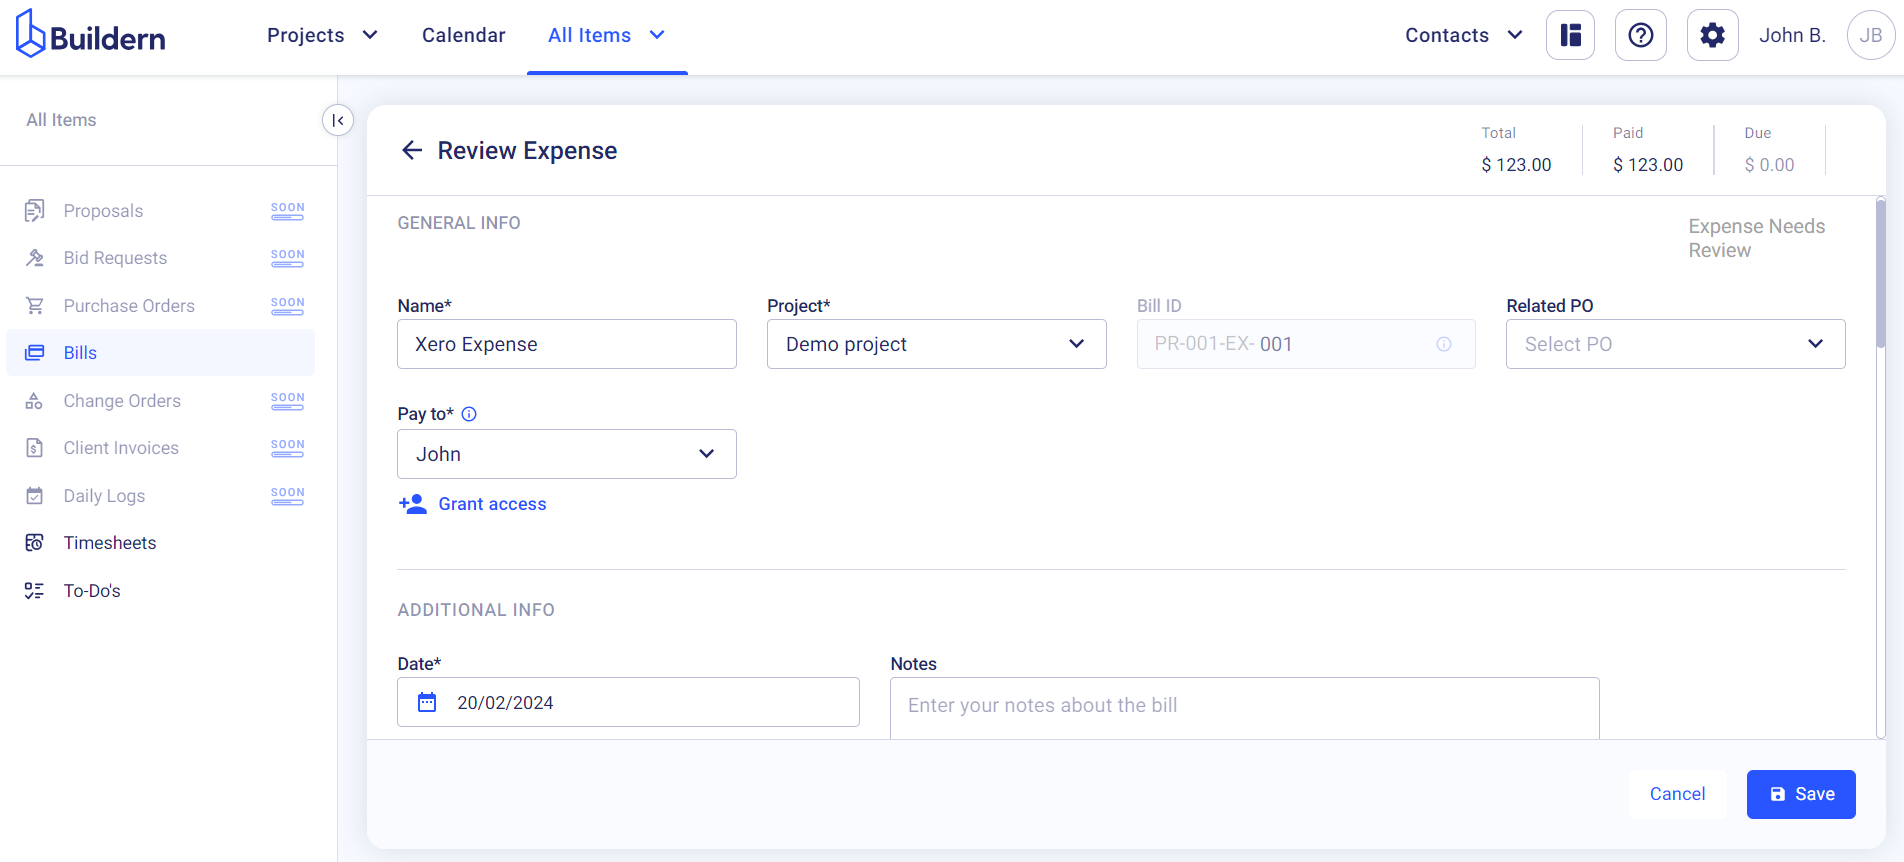
Once you review and save the changes, the pulled expense will change its status to “Paid”.

💡Recommended Reading