To get started, you need to log in to your Buildern account and select the project you want to work on. Once you have accessed the project, follow these simple steps:
Step 1
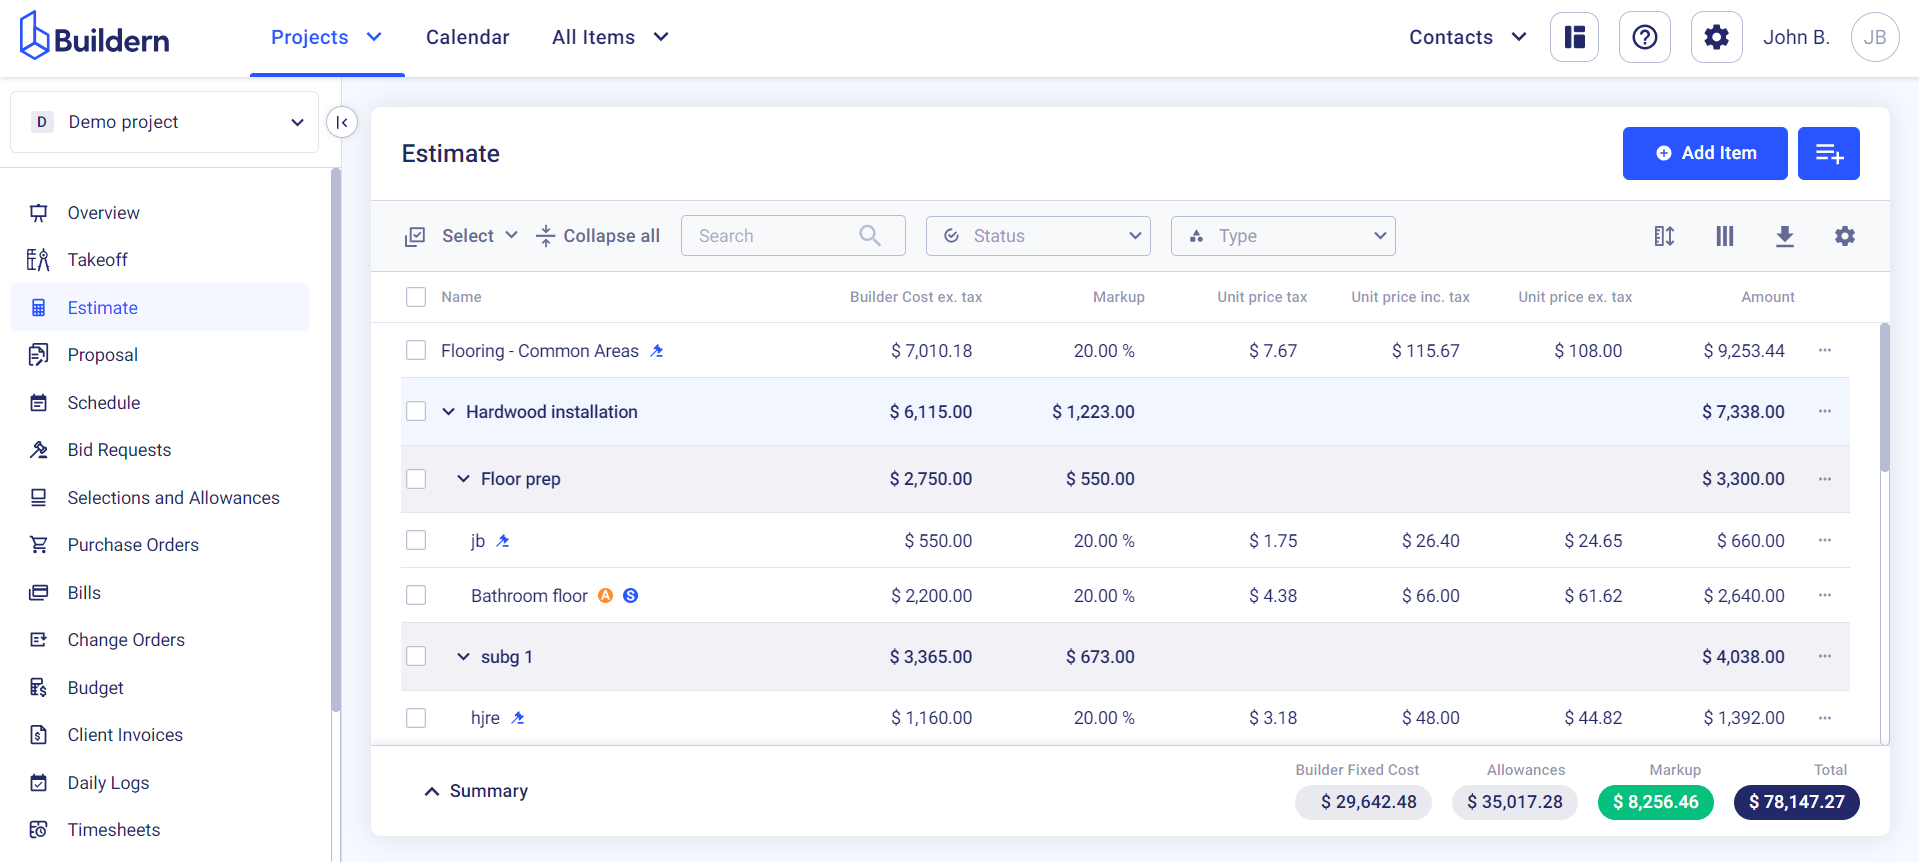
From the main navigation menu, click on "Estimates"
Step 2
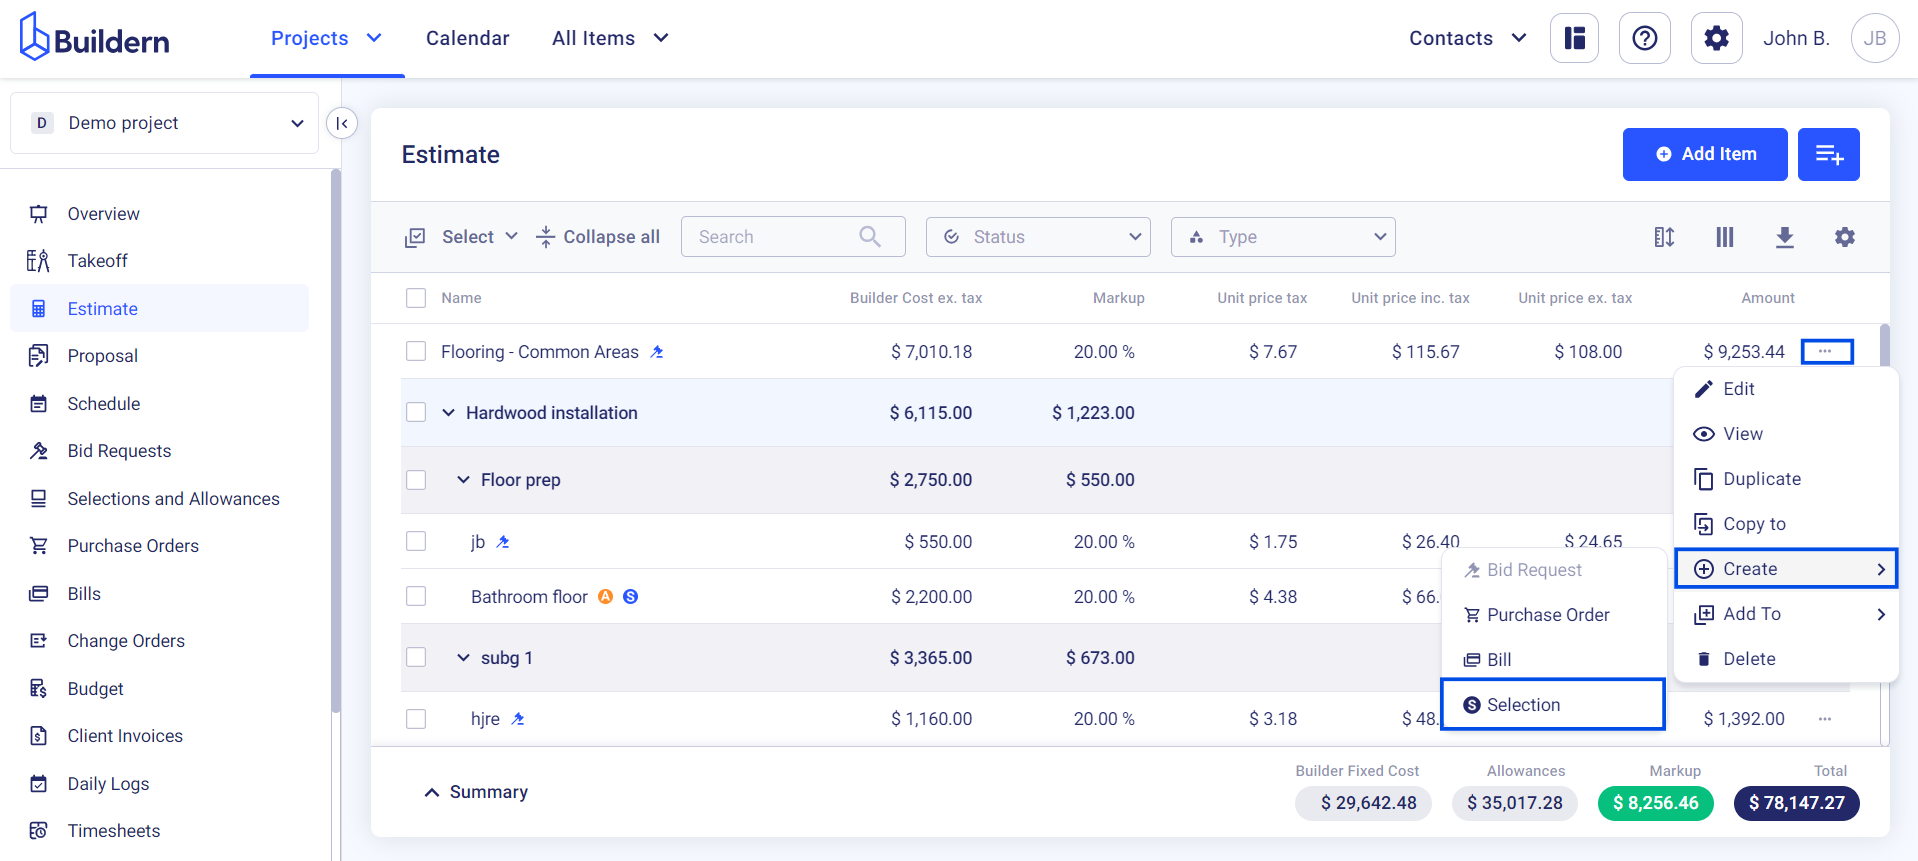
Click on the three dots at the end of the estimate line. Choose Create > Selection.
Step 3
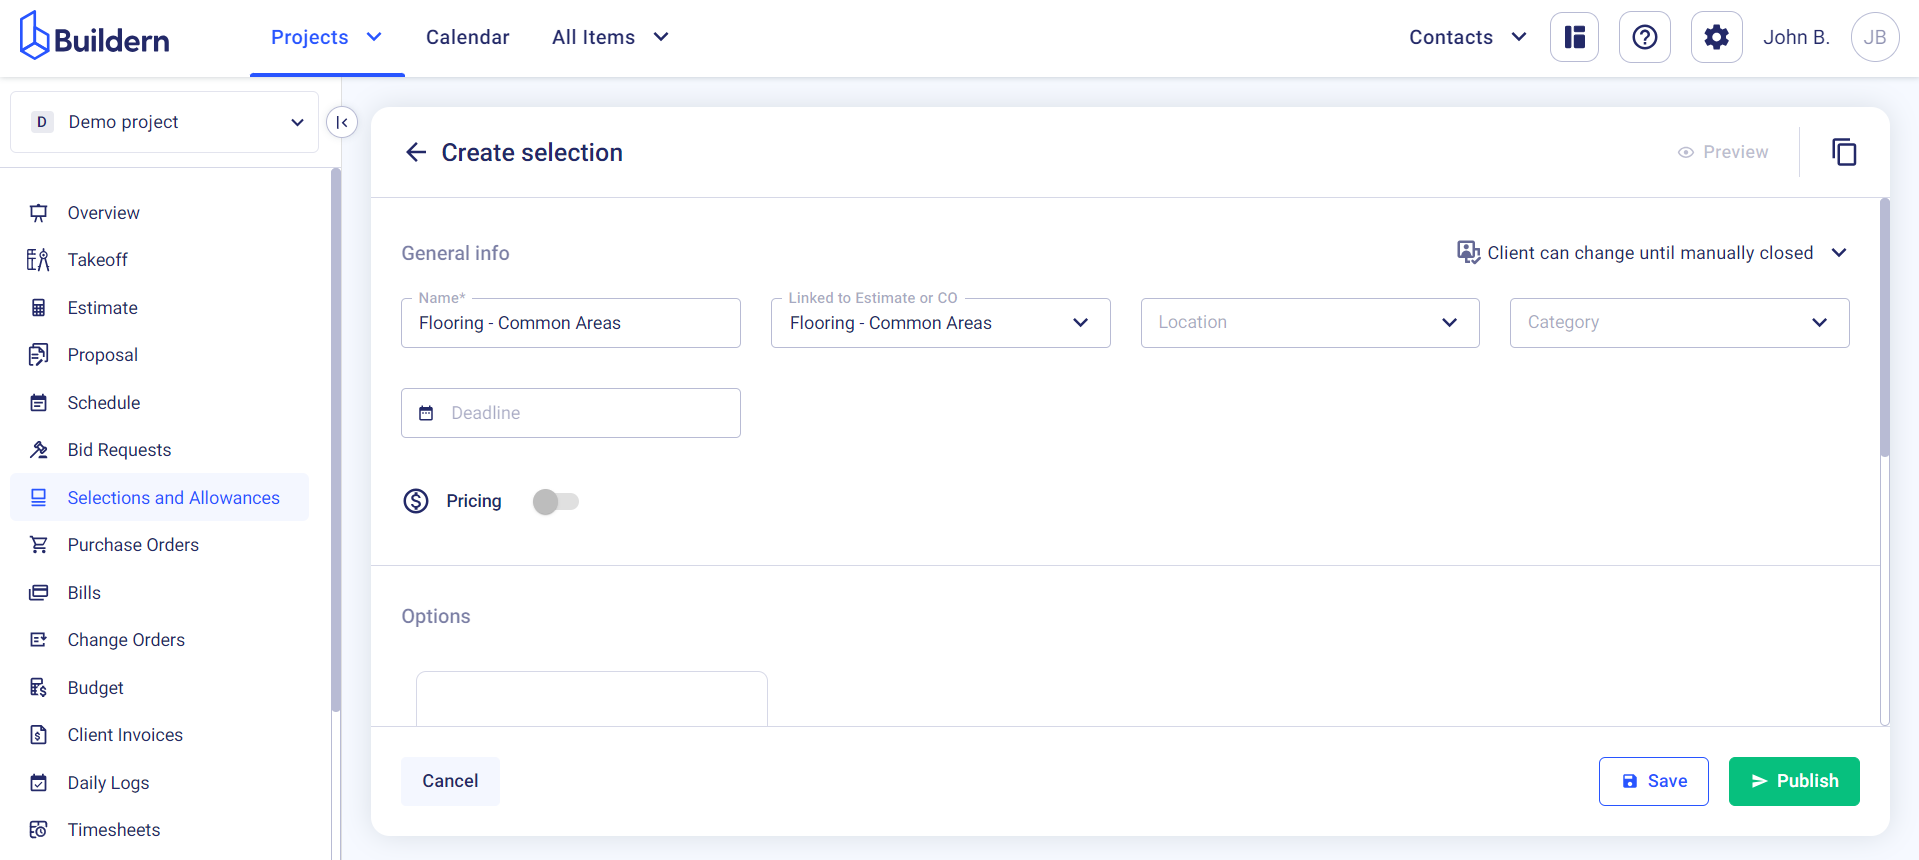
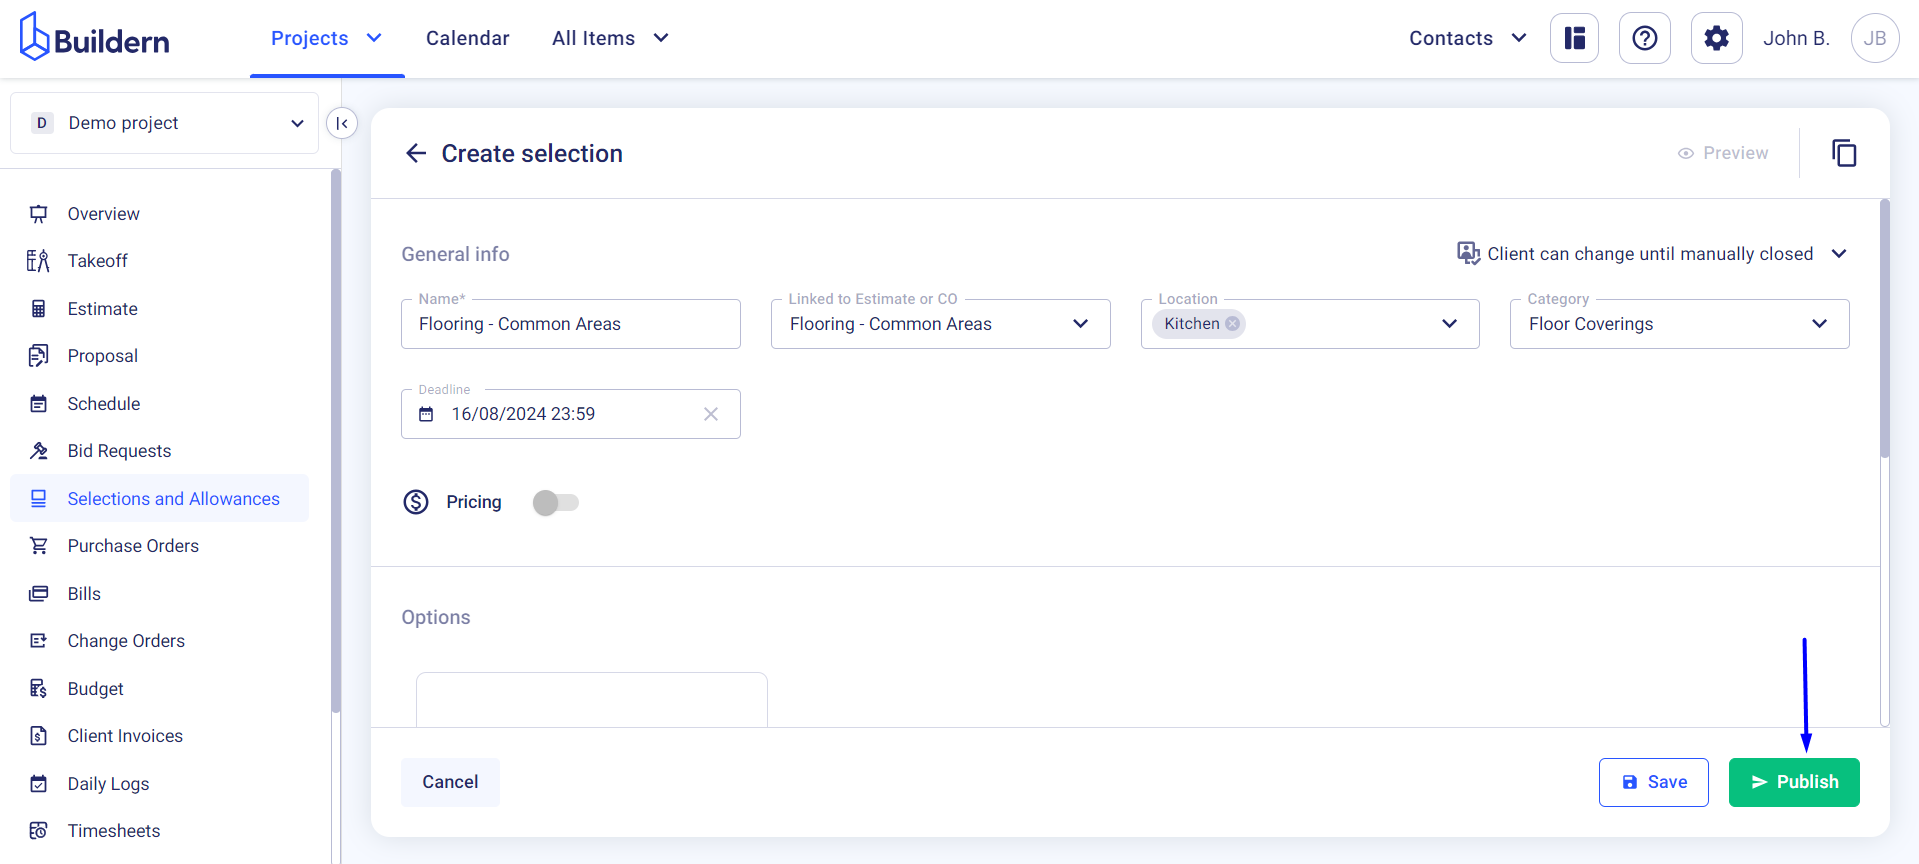
The software will transform you to the "Selections and Allowances" section. Here, you are free to customize your selection by adding a name, location, category, and optional notes.
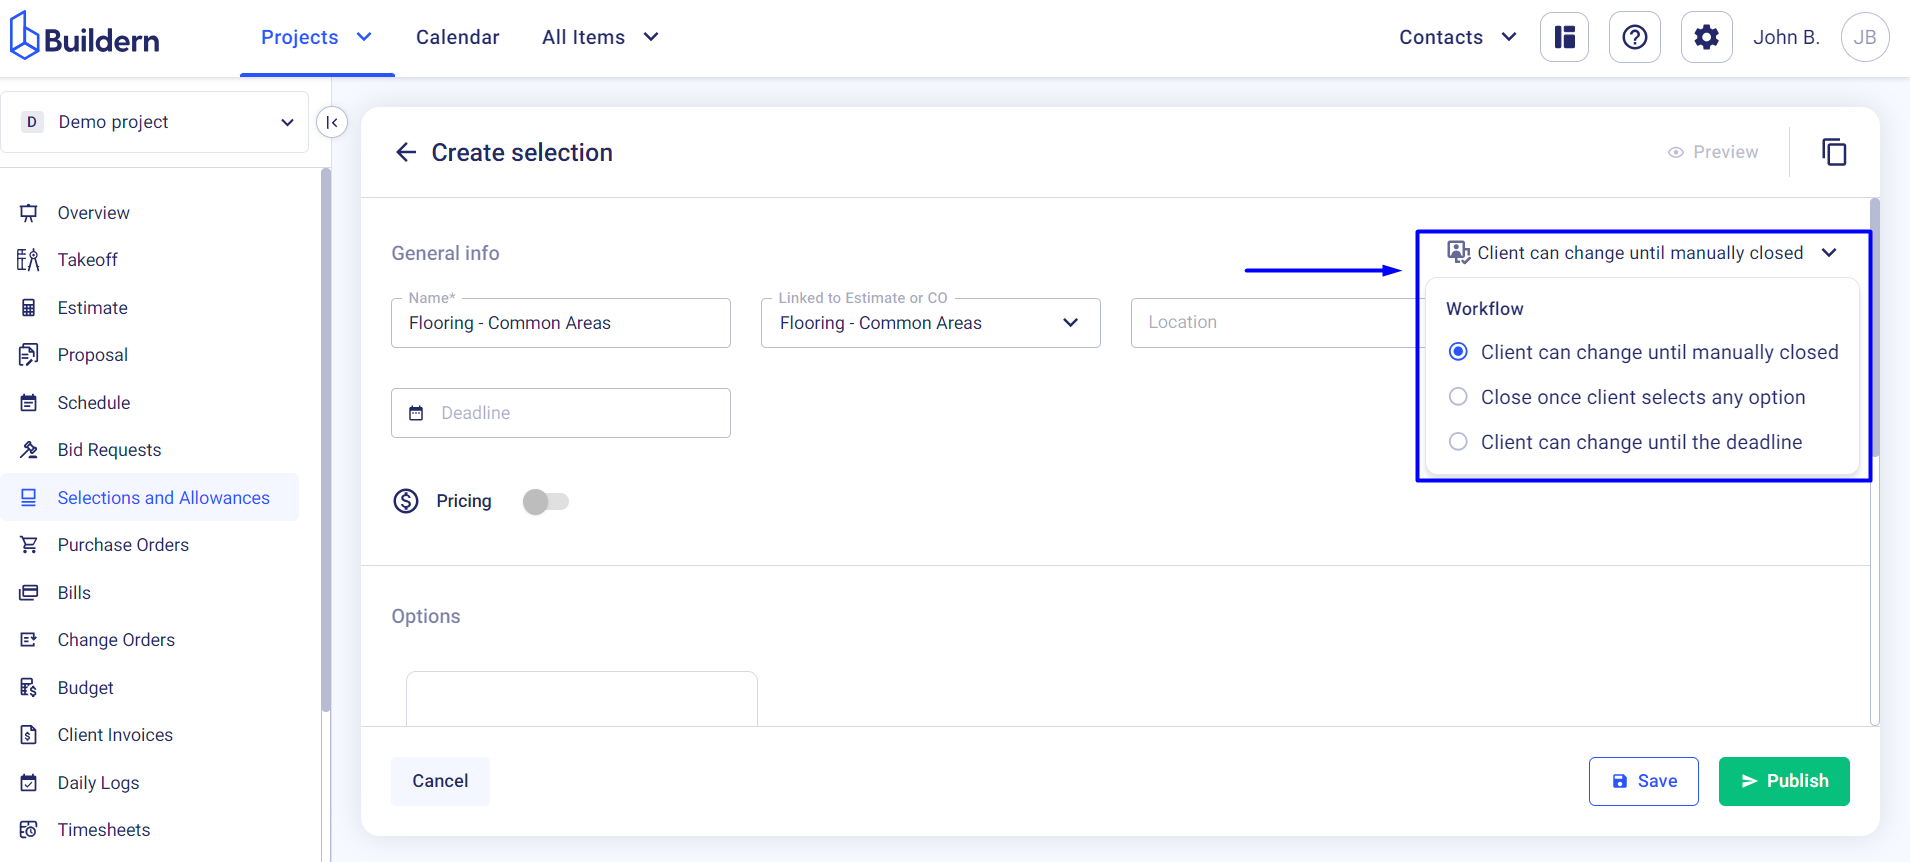
You can also change the workflow for you and the client through the following options:
-
The client can change until manually closed
-
Close once the client selects an option
-
The client can change until the deadline
Step 4
Once you have completed all the necessary steps, click on the "Publish" button to finalize the process of transforming a line item into a selection. This will make your new selection visible to the clients.
![]()
💡 Recommended Reading