Buildern allows you to forward invoices from your sub/vendors via email directly to your projects.
But what about those bills or receipts that are not sent via email? How can you upload them to Buildern and make sure they are organized and easily accessible?
Let's see how you can do this in a few simple steps.
Option 1. Upload Bills to a Specific Project
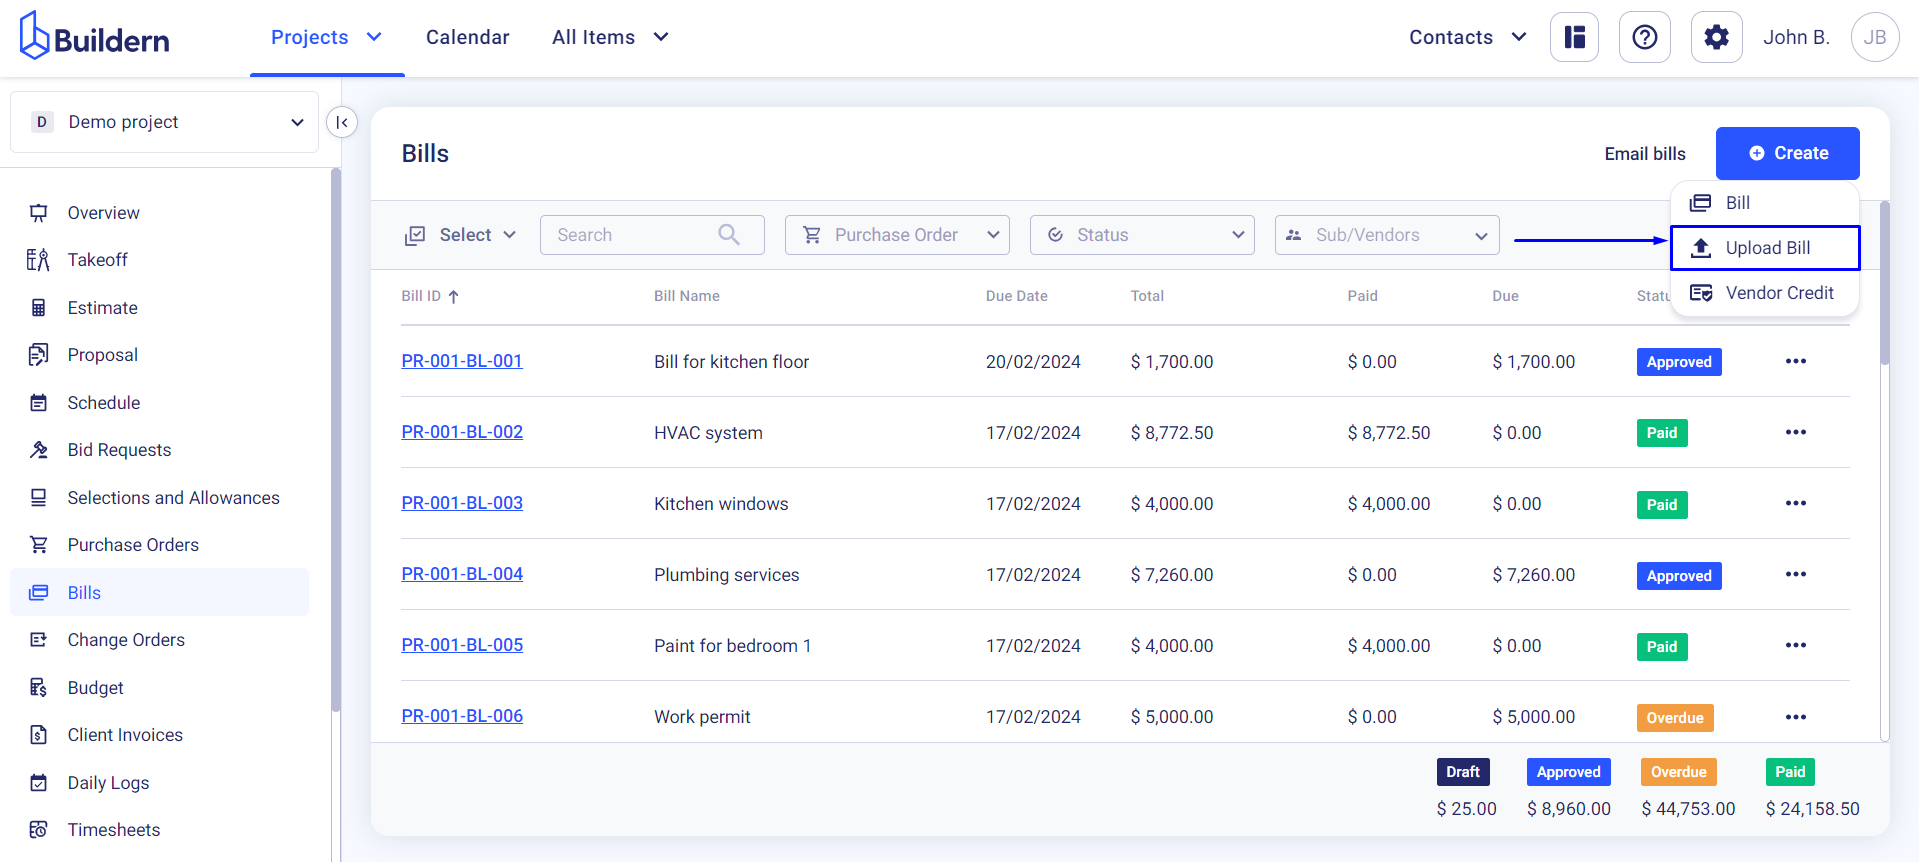
Choose the project and go to its Bills section.
From there click Create > Upload Bill as shown in the image below.
Buildern supports multiple file formats, meaning you can upload PDF, JPG, PNG, or other files.
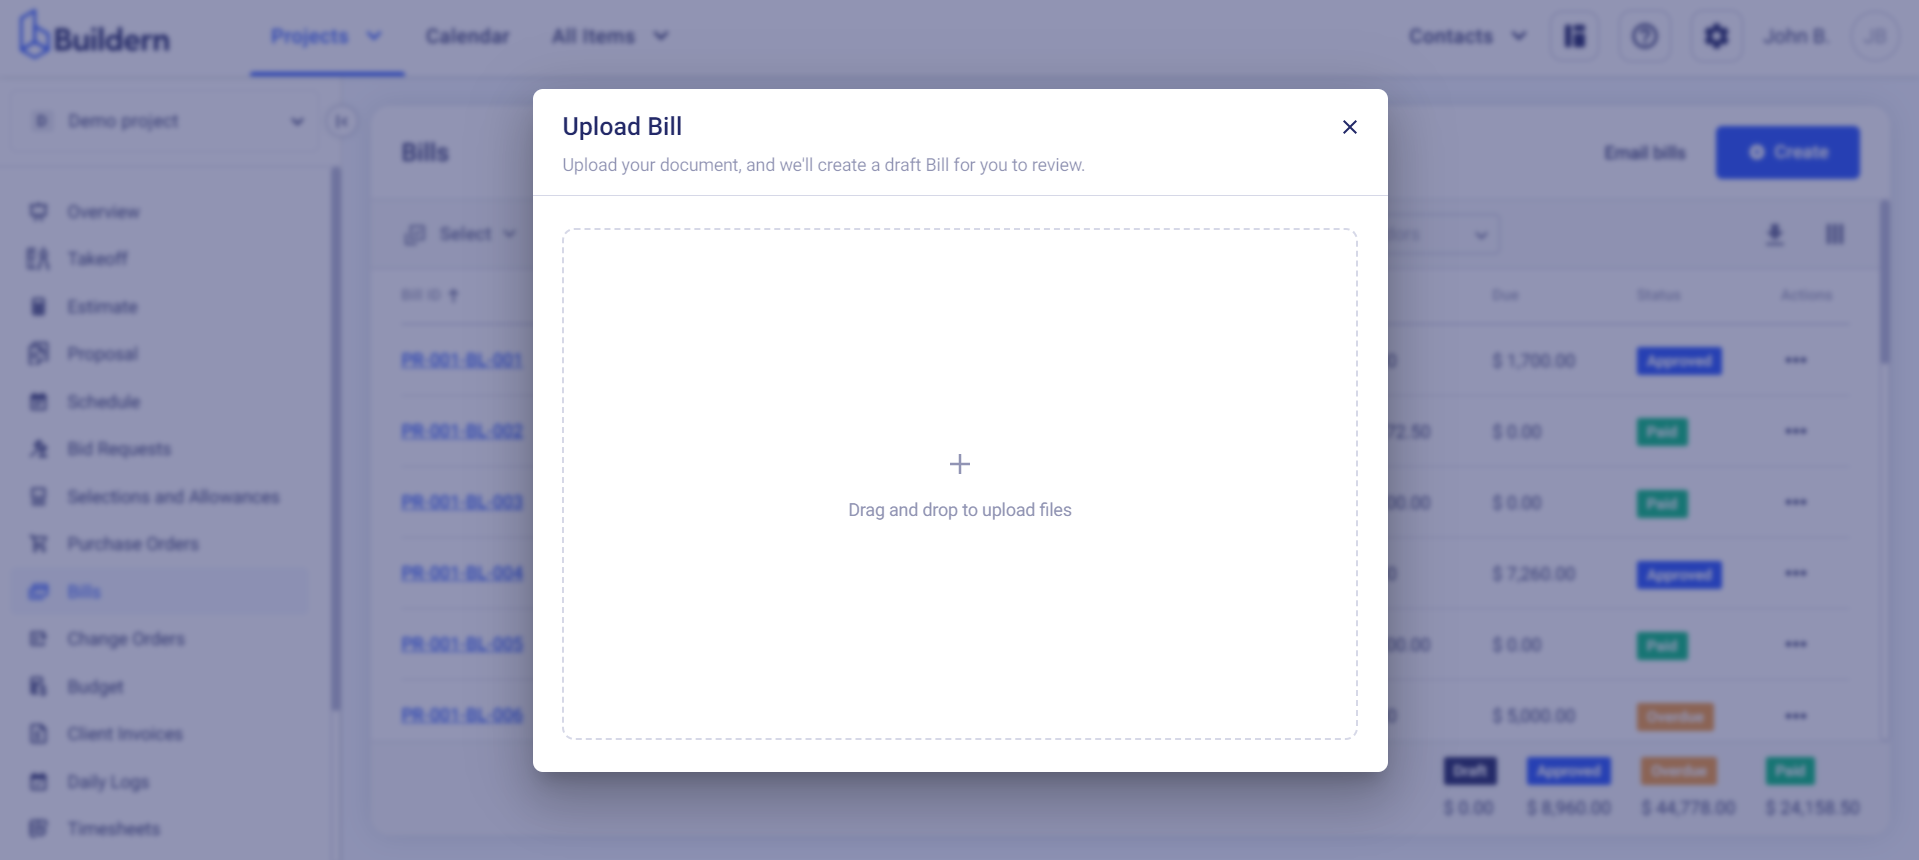
Once you have selected the file, drag and drop it in the window for Buildern to start reading it.
You will be then taken to the bill edit page to confirm the auto-filled details like cost lines, sub/vendor information, reference numbers, dates, etc.
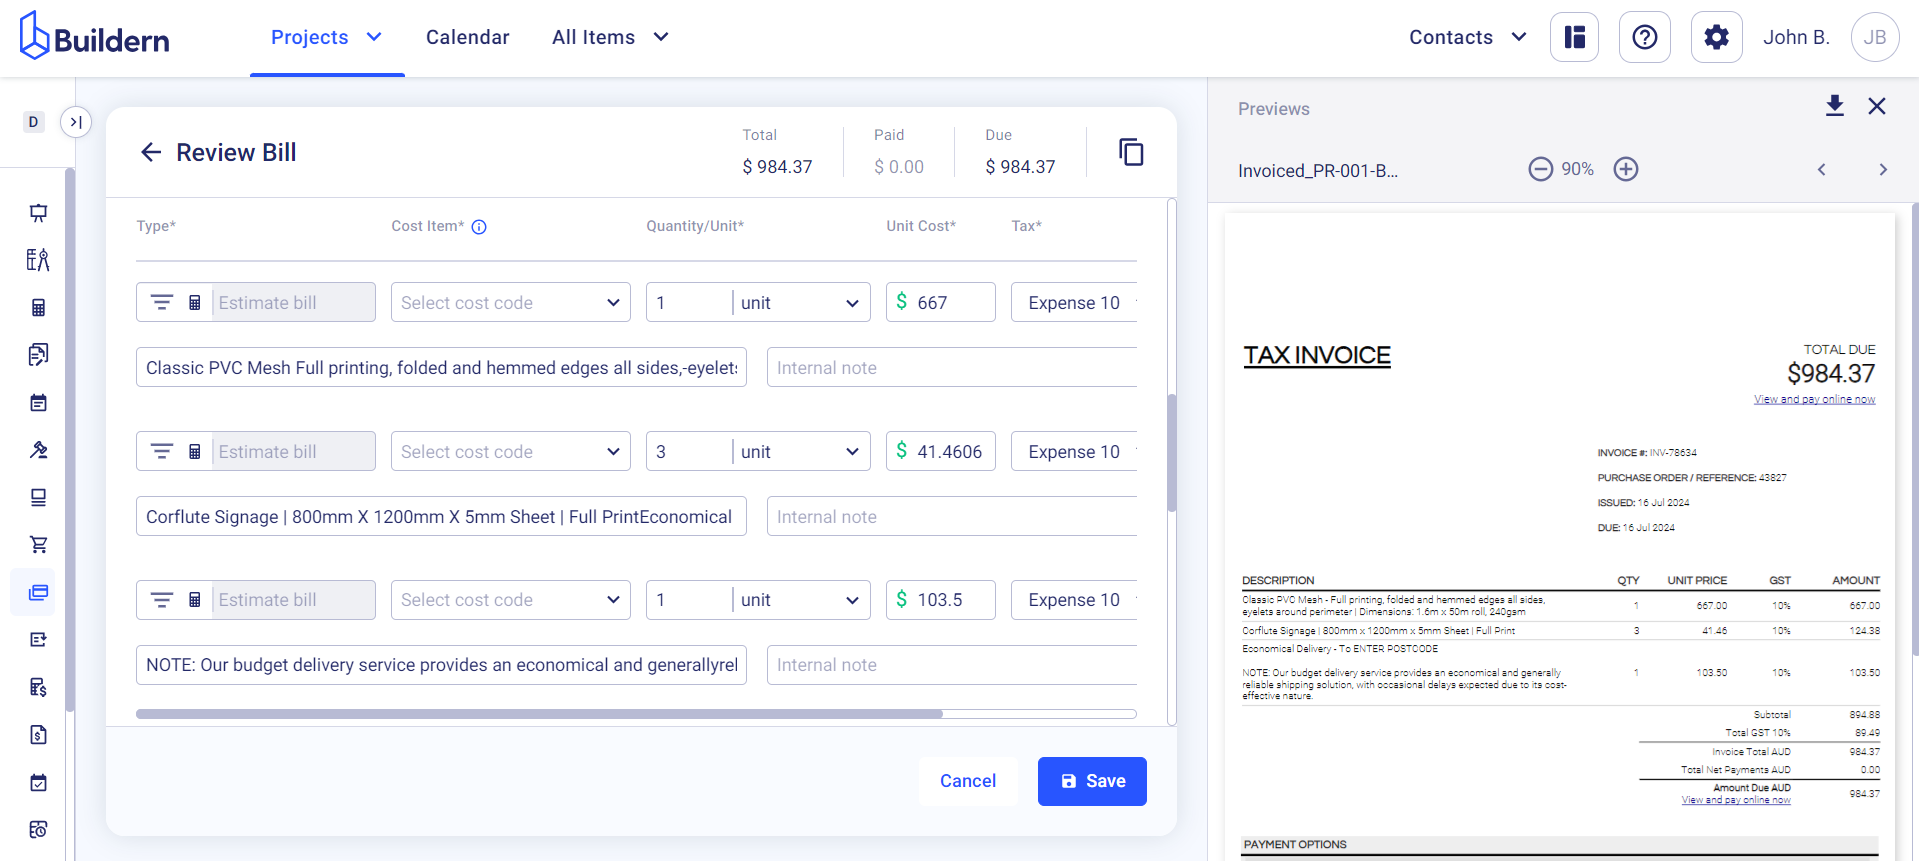
If any of these are missing, you can add them manually.
Once all the information is verified and confirmed, click the Save button to complete the process. Your bill will now be uploaded and saved under that specific project for easy access and management.
Option 2. Upload Bills to All Items > Bills
Another option to upload bills to Buildern is by going to the All Items > Bills section.
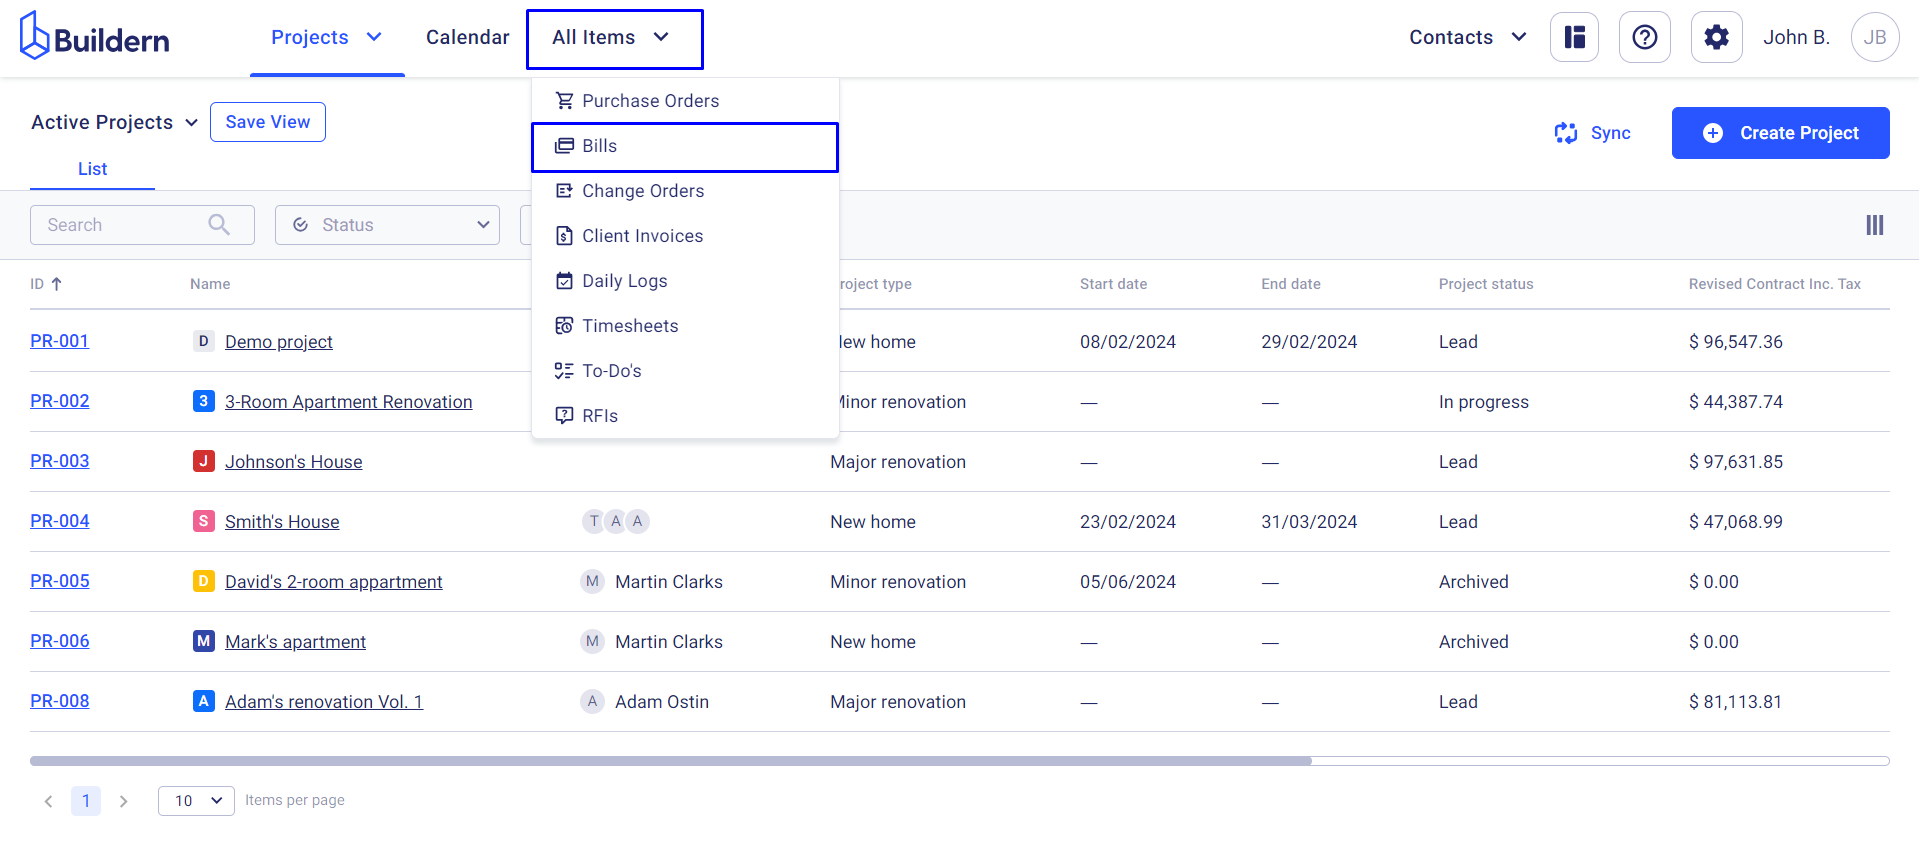
Click Create > Upload Bill to proceed.
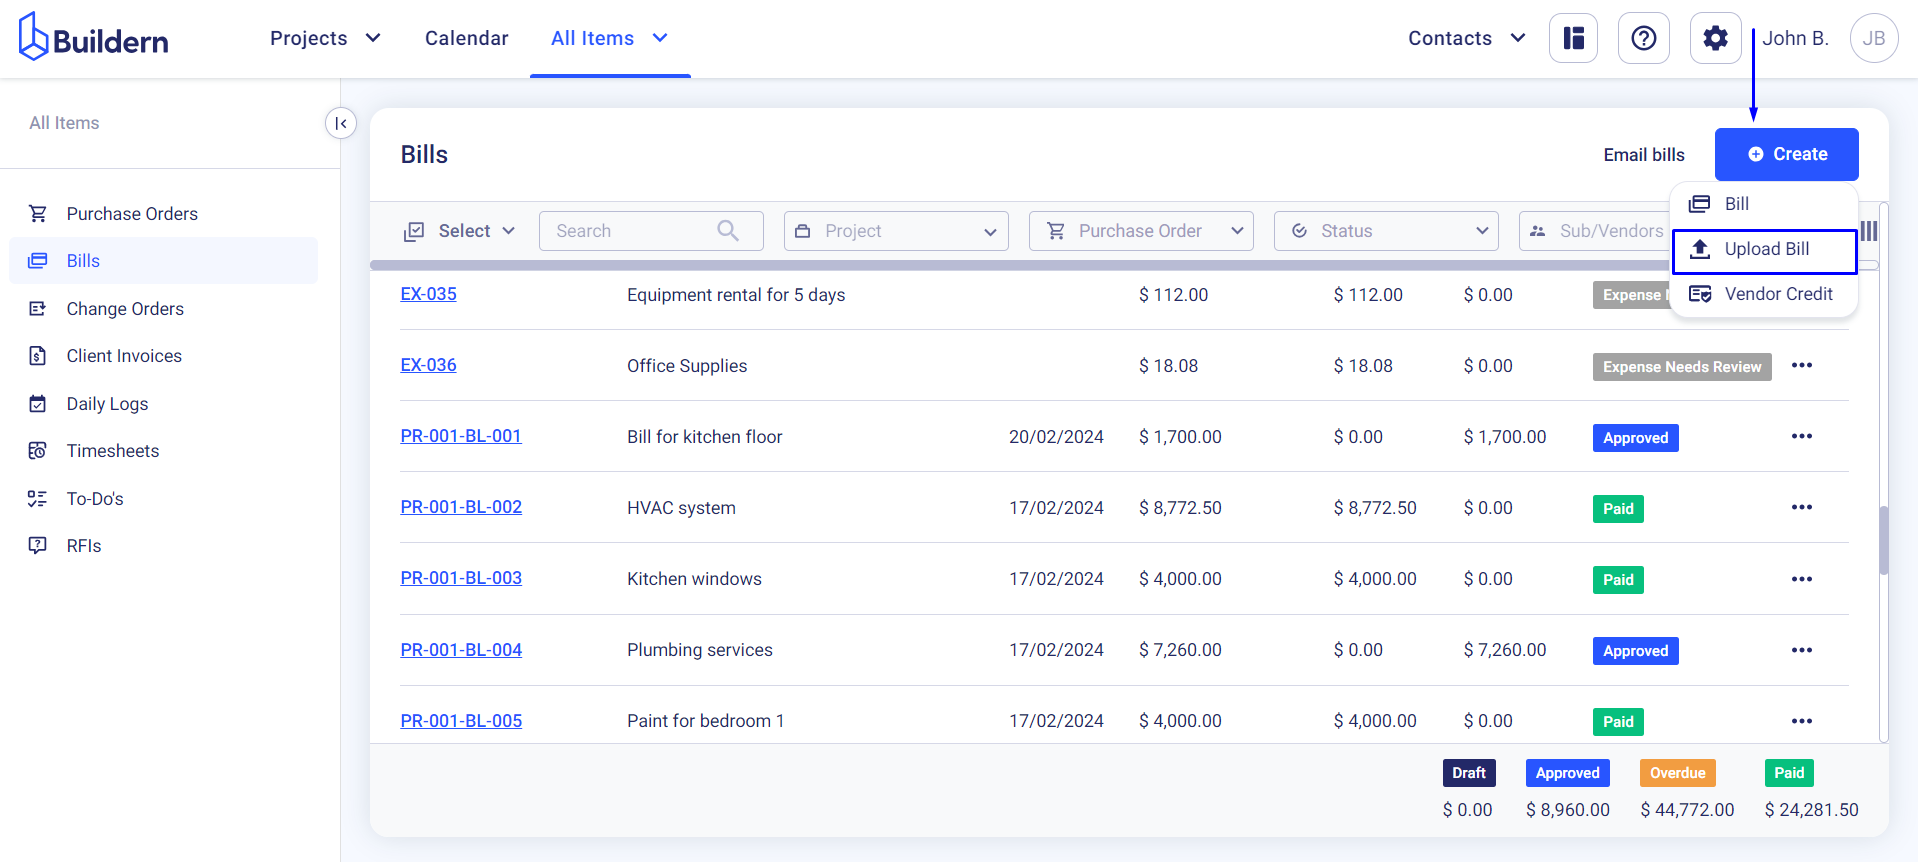
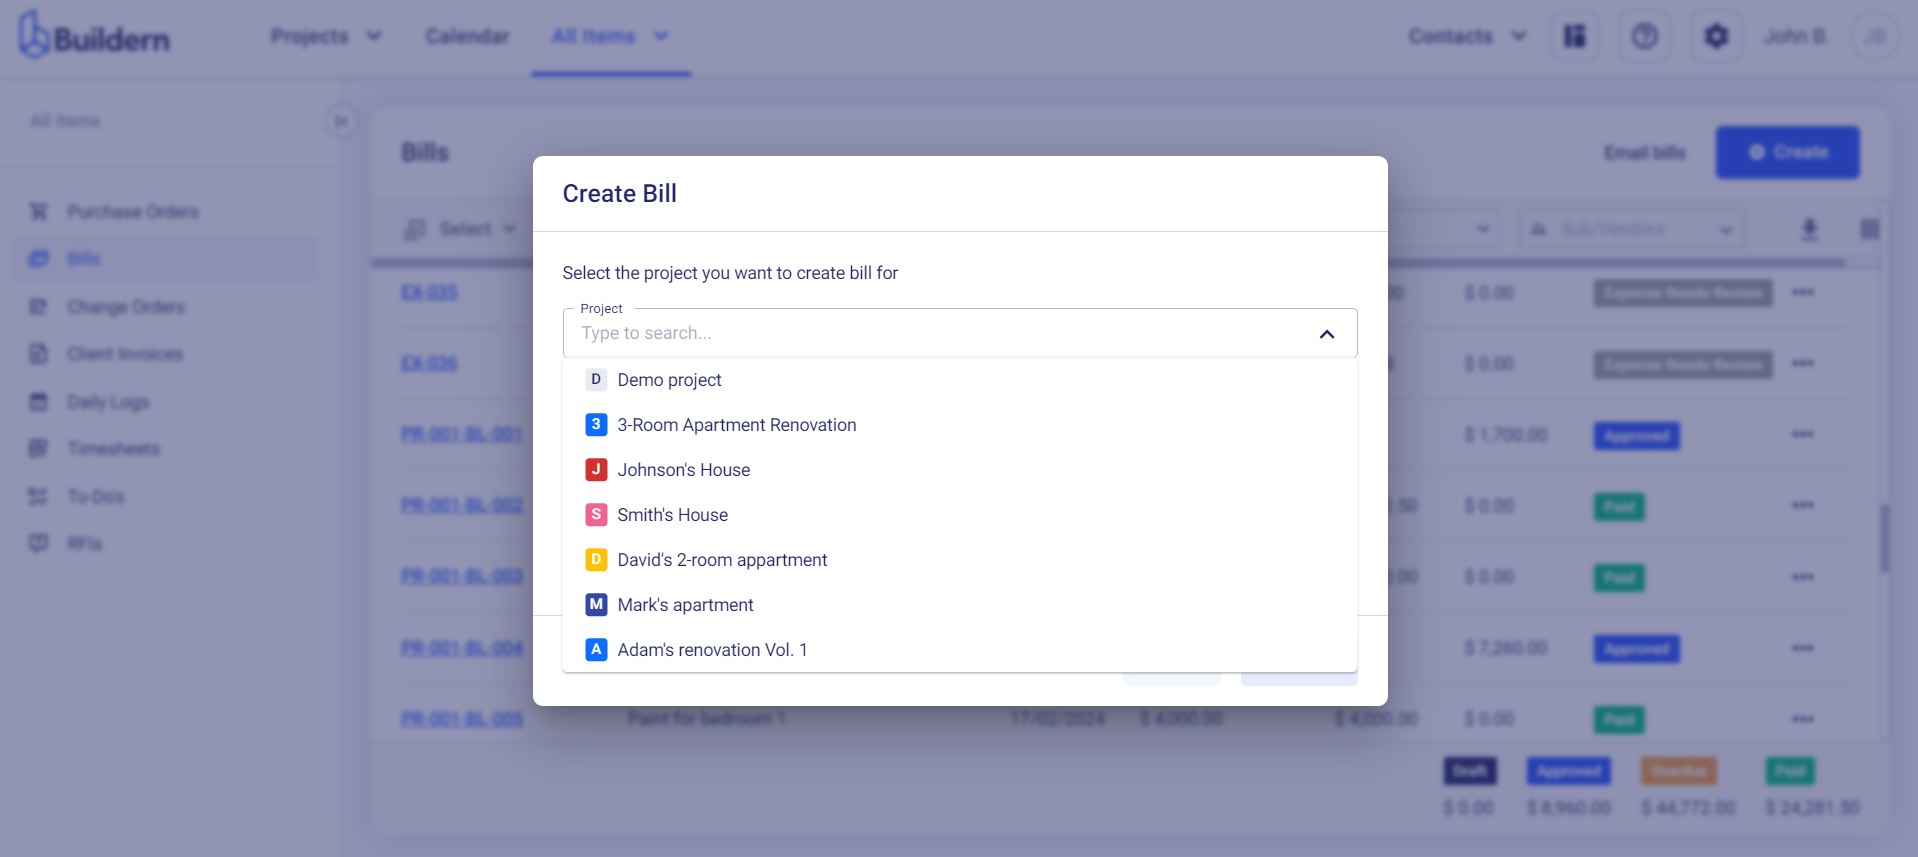
Uploading your files here means you need to select the project where it should be assigned.
After selecting the project, drop your file in the window.
You will be taken to the bill edit page where you can confirm and add any necessary details.
The uploaded bill will be saved as a draft waiting for your further actions.
💡Recommended Reading
How to Manage Bill Statuses and Actions?
How to Add a New Bill in Buildern and Configure The Bill Line Type?