💡First things first, add a selection. If you don’t know how to do this, check the following article: How to add a selection for allowances in Buildern?
You will see a field dedicated to the selection location right at the top of the display. Here you will find all locations created for this project through other modules.
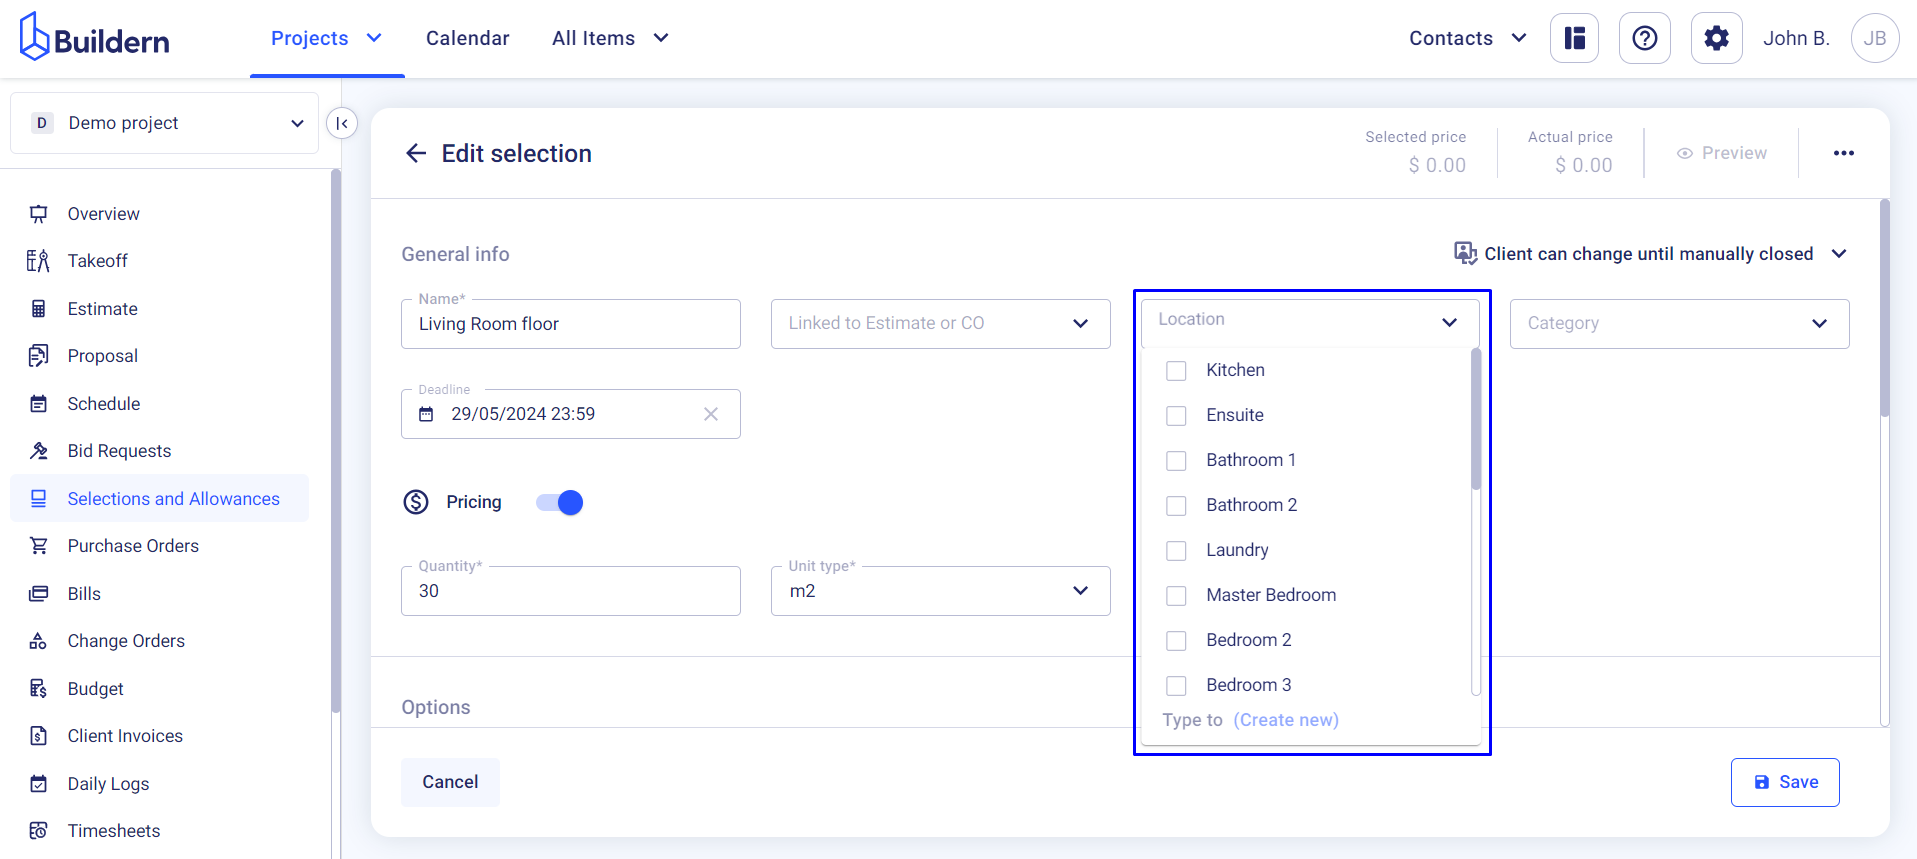
Choose a single or multiple options to assign the selection to those locations. You can also create a new location by typing the name + Enter button.
Provide details such as room names, floor levels, or any other relevant location identifiers.
Find the category field right next to the location.
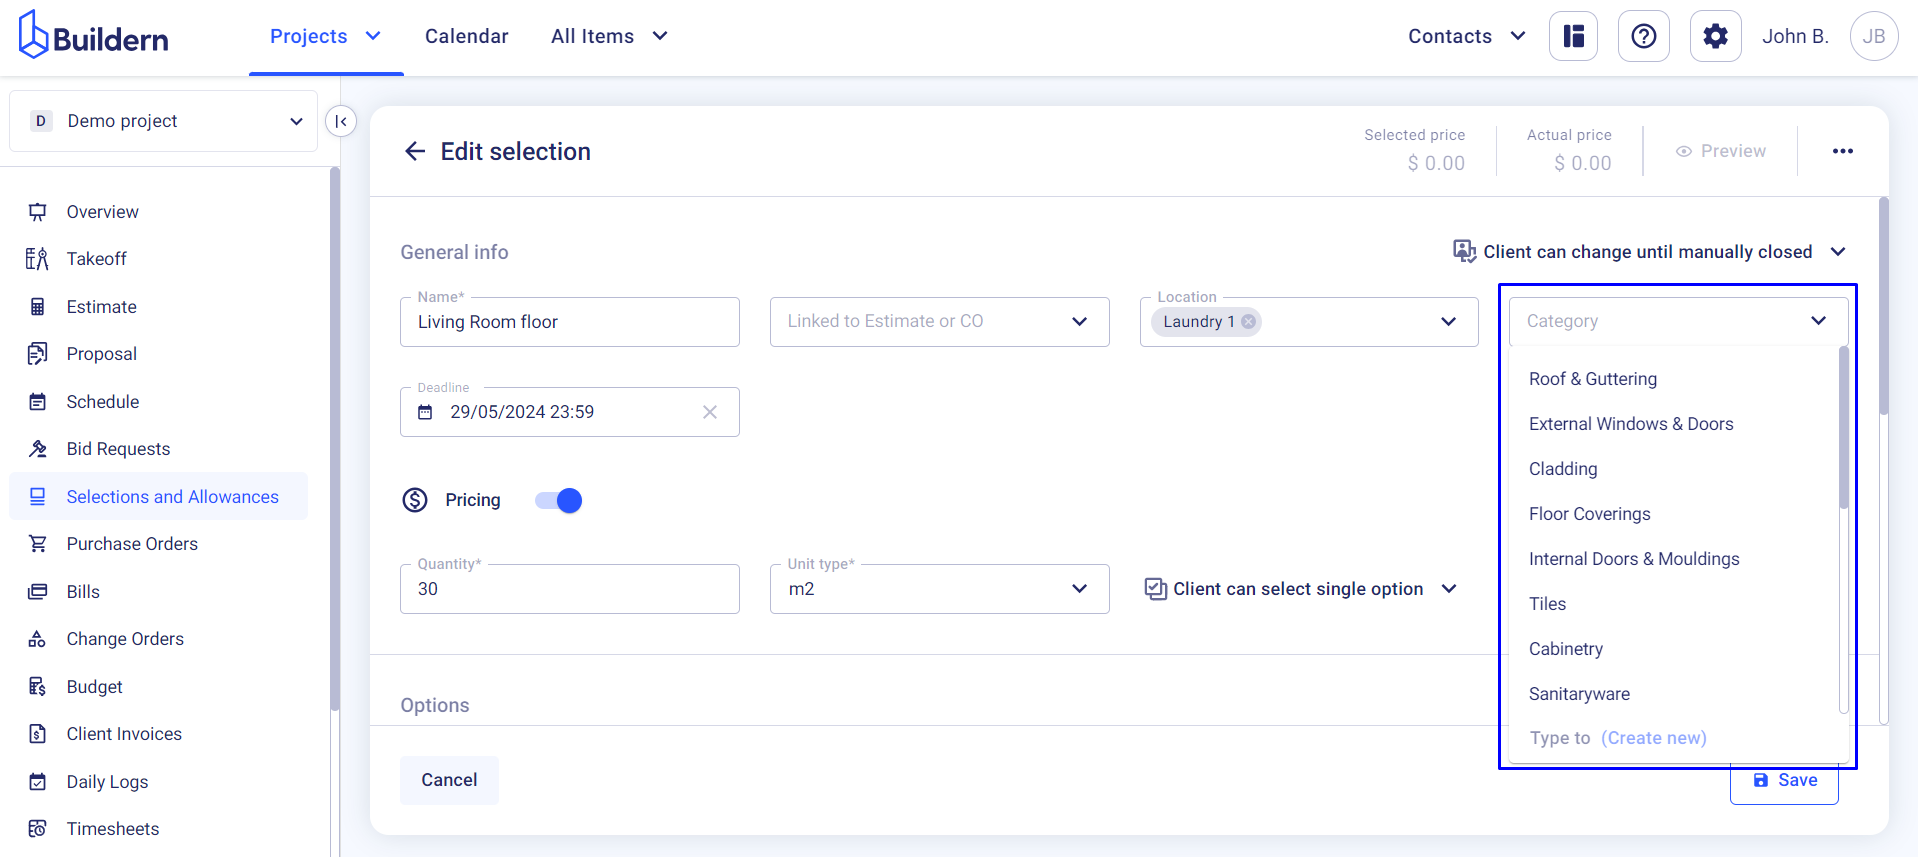
Name your category to reflect the type of selections it will contain (e.g., Flooring, Plumbing Fixtures, Electrical).
The logic is the same here. You can choose a category name or create a new one by typing its name. The only difference is that you can assign only one category to the selection.
That’s it!
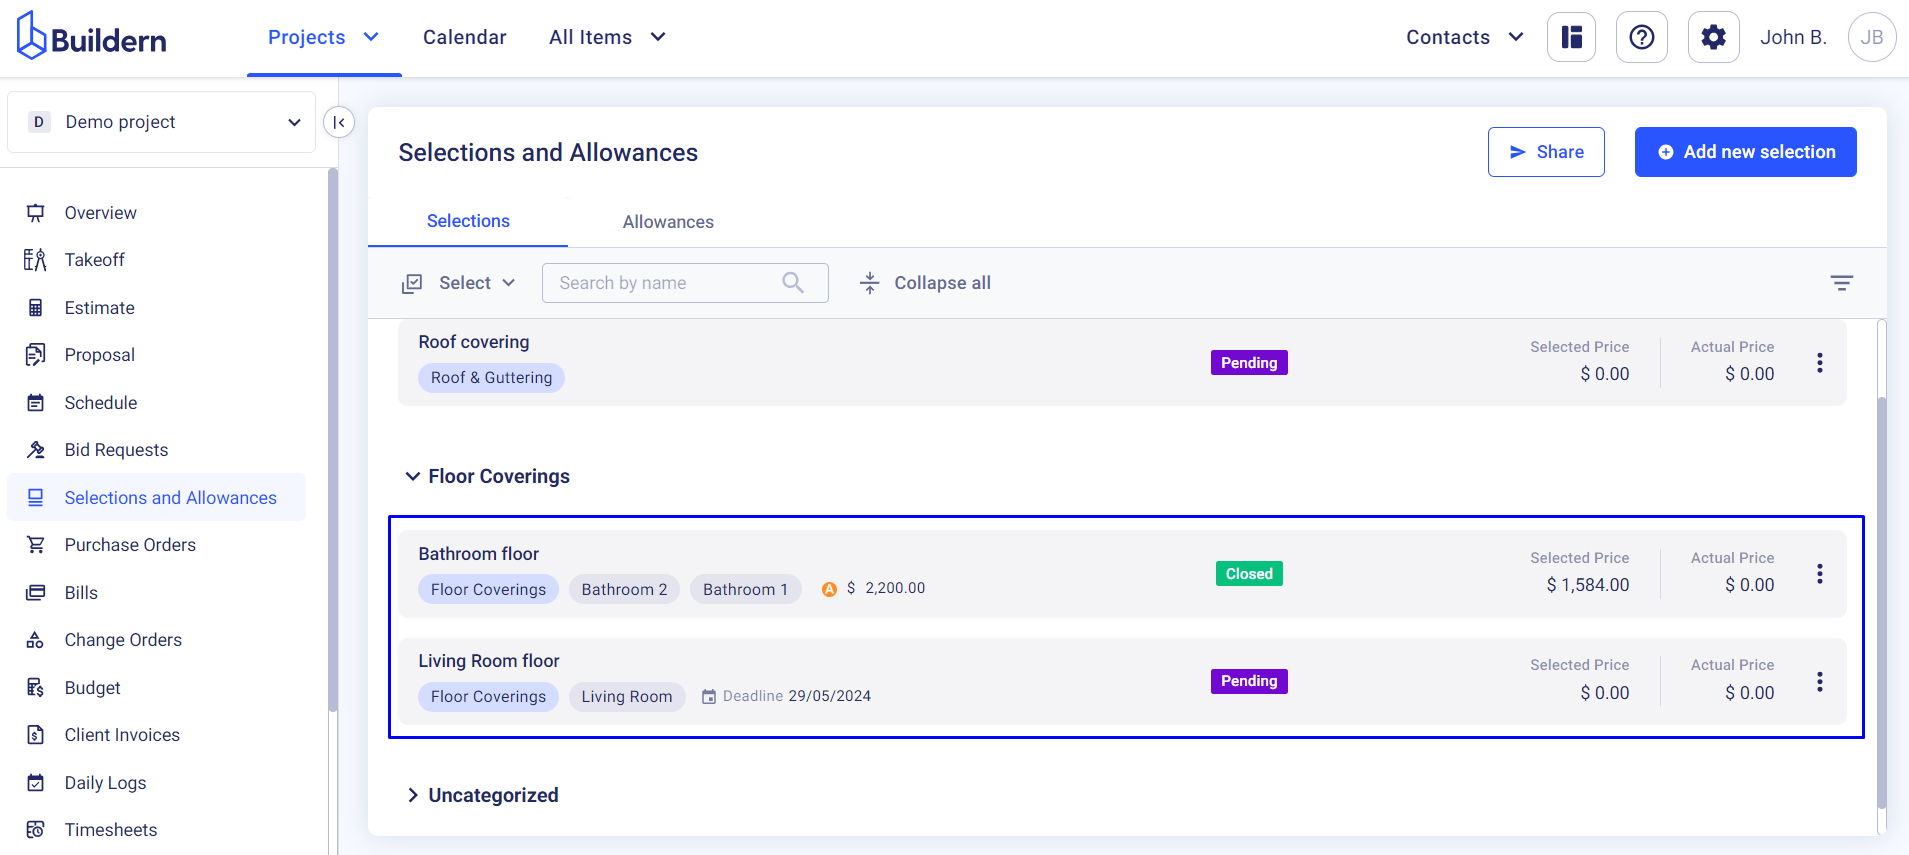
Organizing selections in this manner helps streamline project management and enhances overall efficiency.
💡Recommended Reading