Often selections are used with the allowances, so if you want to check how to add Allowance you can read this article.
Once you have your allowance added in Buildern, you can create a selection based on the allowance.
Check out our video tutorial to learn how to create selections step by step or follow the instructions below.
There are several ways to create selections in Buildern, and we will go through each in detail.
How to Create a Selection from Estimate?
Step 1. Go to your estimate and choose the allowance for which you want to create a selection.
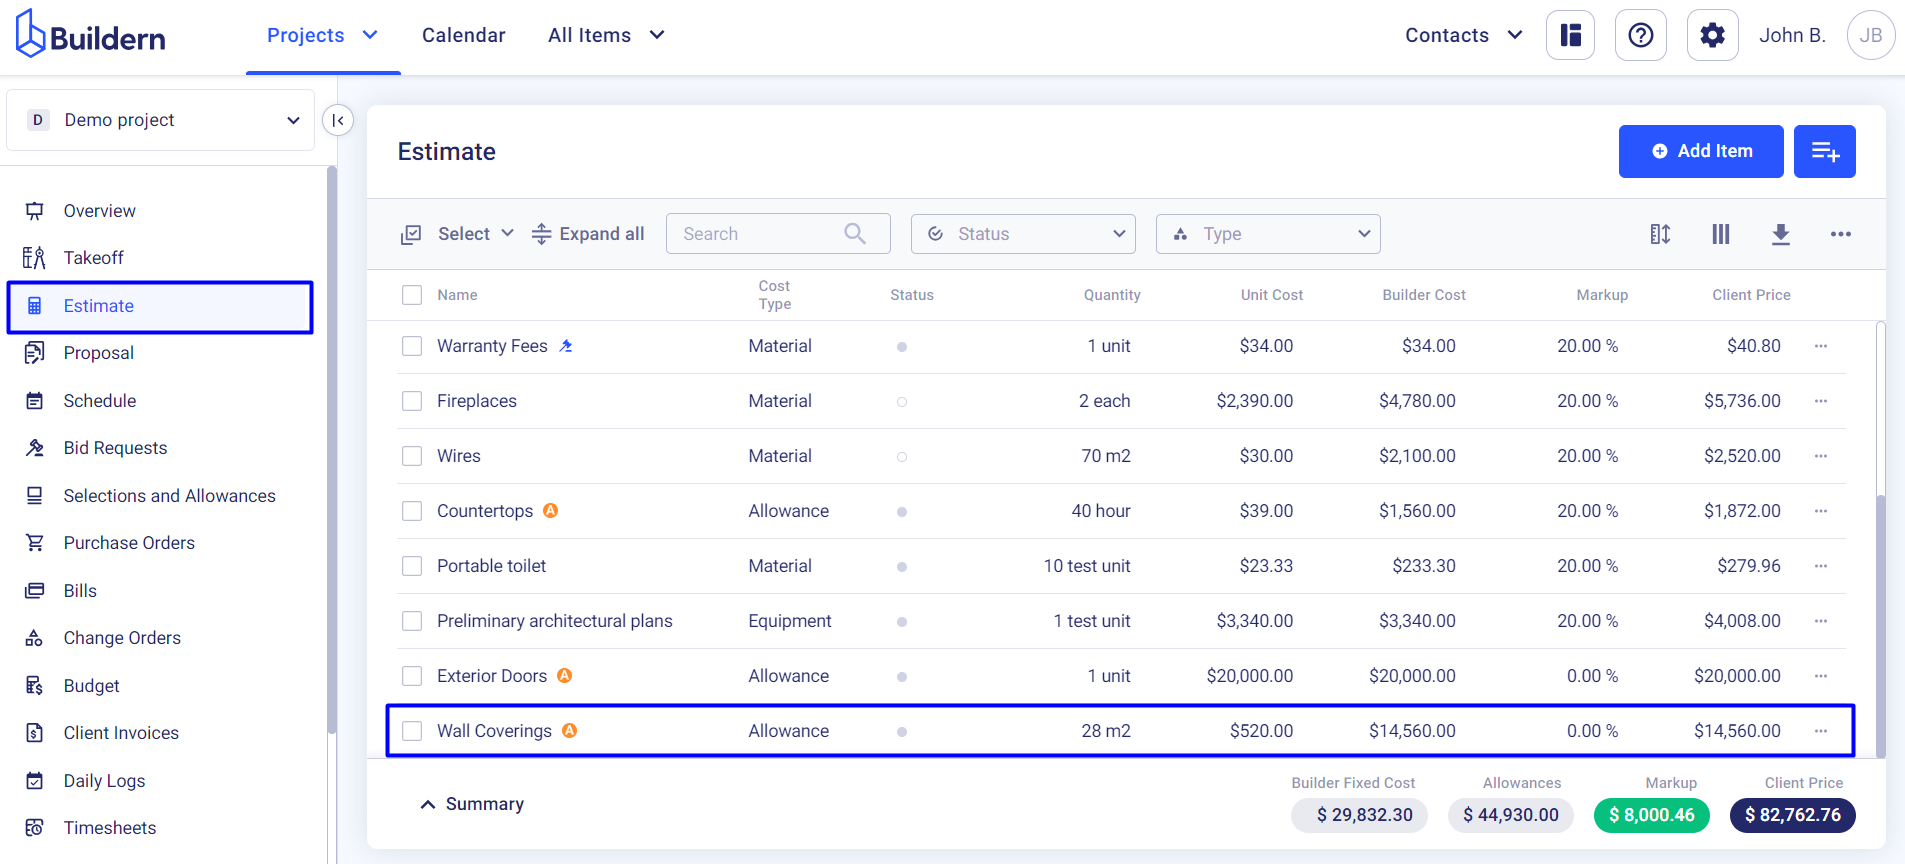
Now, let's put it straight. One selection can be tied only to a single allowance, but one allowance can have multiple selections.
To create your first selection, click on the three dots at the end of the allocated allowances and click Create > Selection.
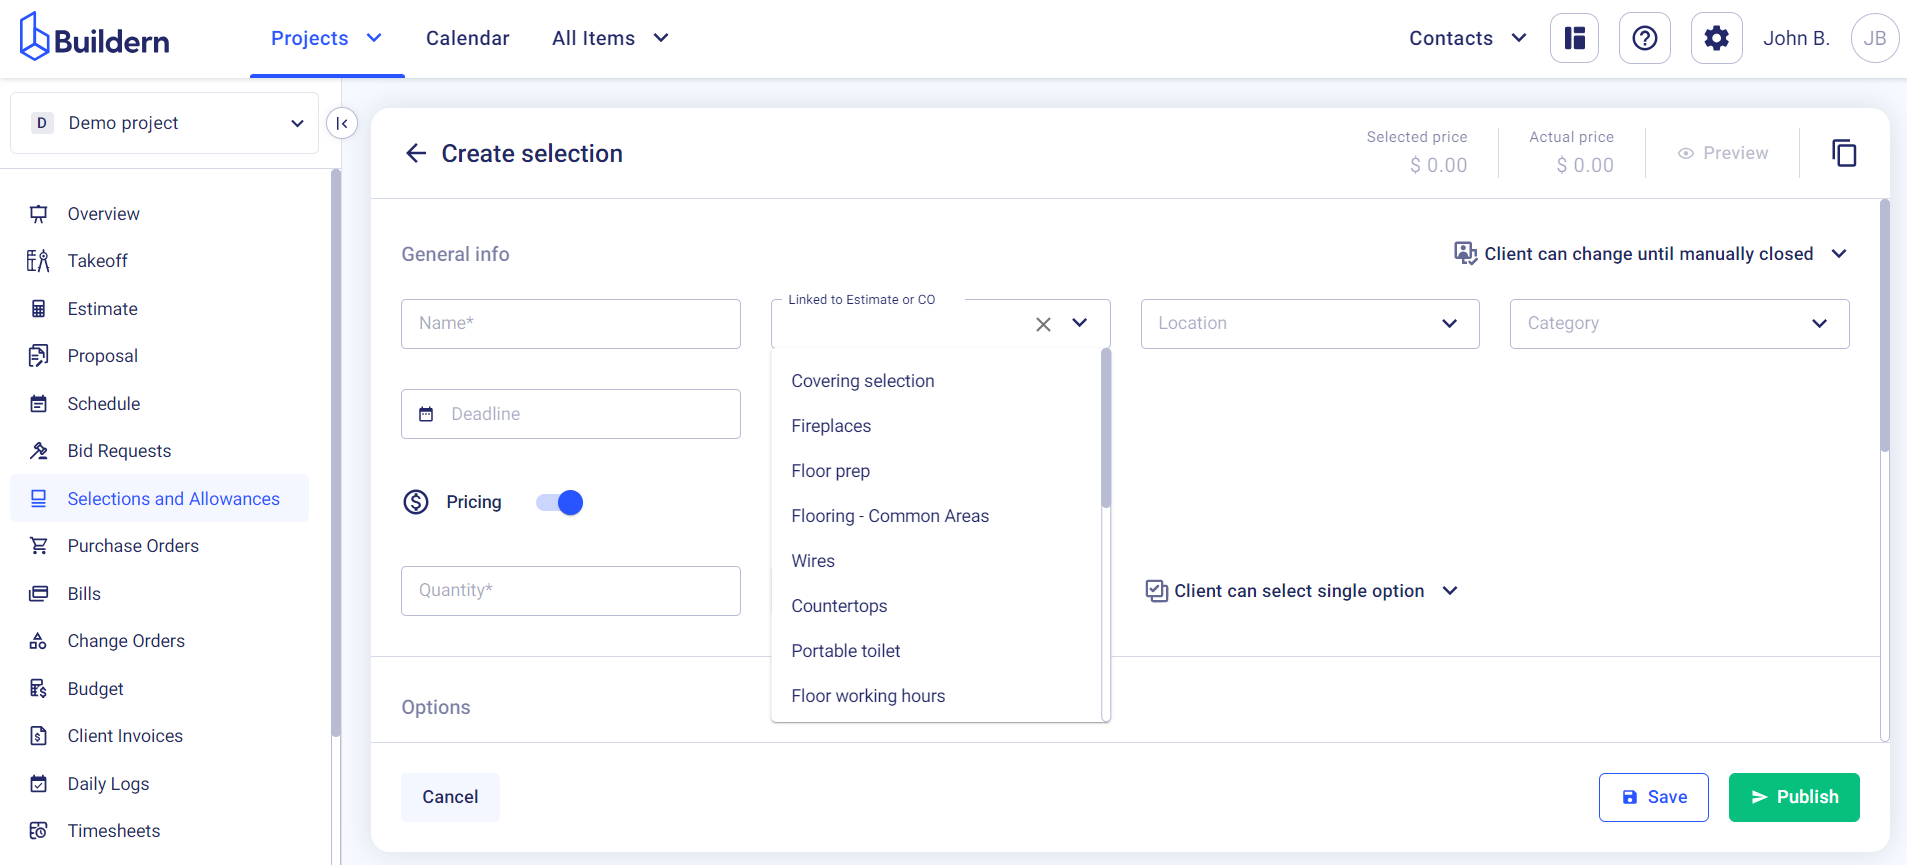
You’ll be moved to the Selections and Allowances module, and a new window will open where you can customize the selection.

Step 2. Start the Customization
First, define the settings for the client creating a rule for their response to the selection.
In Buildern, builders have the flexibility to set specific settings and rules for clients to follow when making selections:
-
The client can change until manually closed (i.e., until the builder manually closes the selection)
-
Close once the client selects an option (i.e., the selection will change its status automatically to closed)
-
The client can change until the deadline (i.e., the client can edit their selection before the due date arrives)
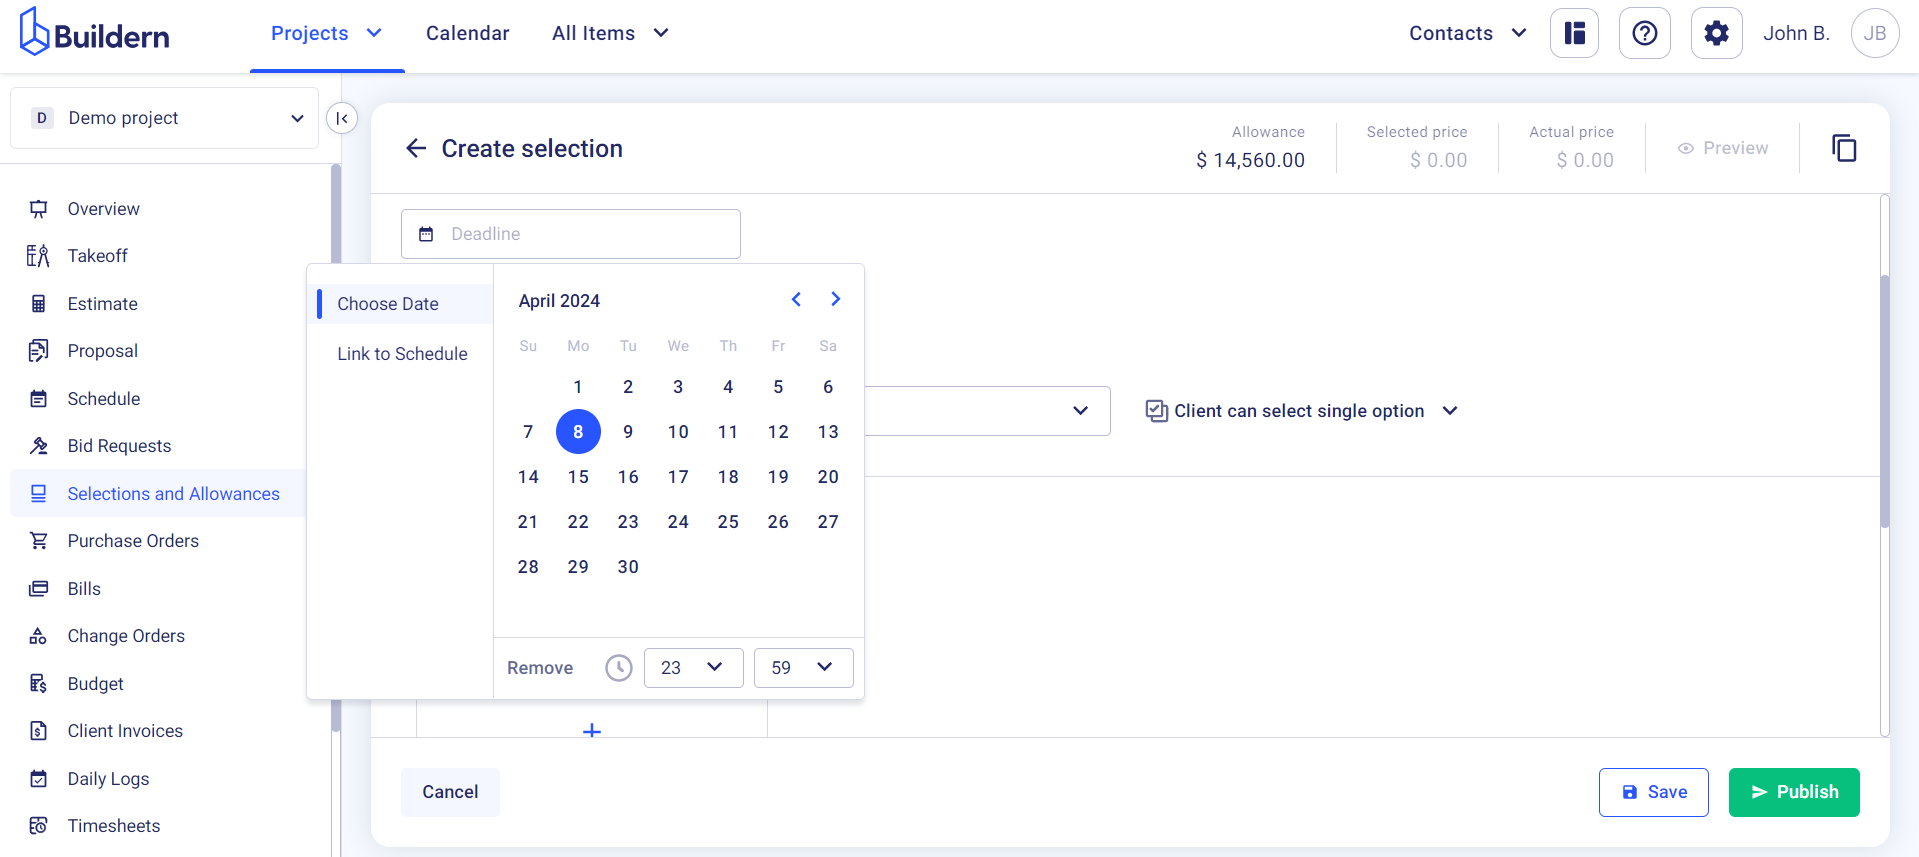
Now, let's dig into setting a deadline for the selection process.
Buildern offers maximum flexibility to its users, and creating selections is not an exception.
There 2 ways of creating a deadline.
First, you can set a fixed date and time for the client to make their selection.
Alternatively, you can link the selection to a scheduled item within the project schedule. The second option allows more flexibility, ensuring builders have the answers before starting a particular work.
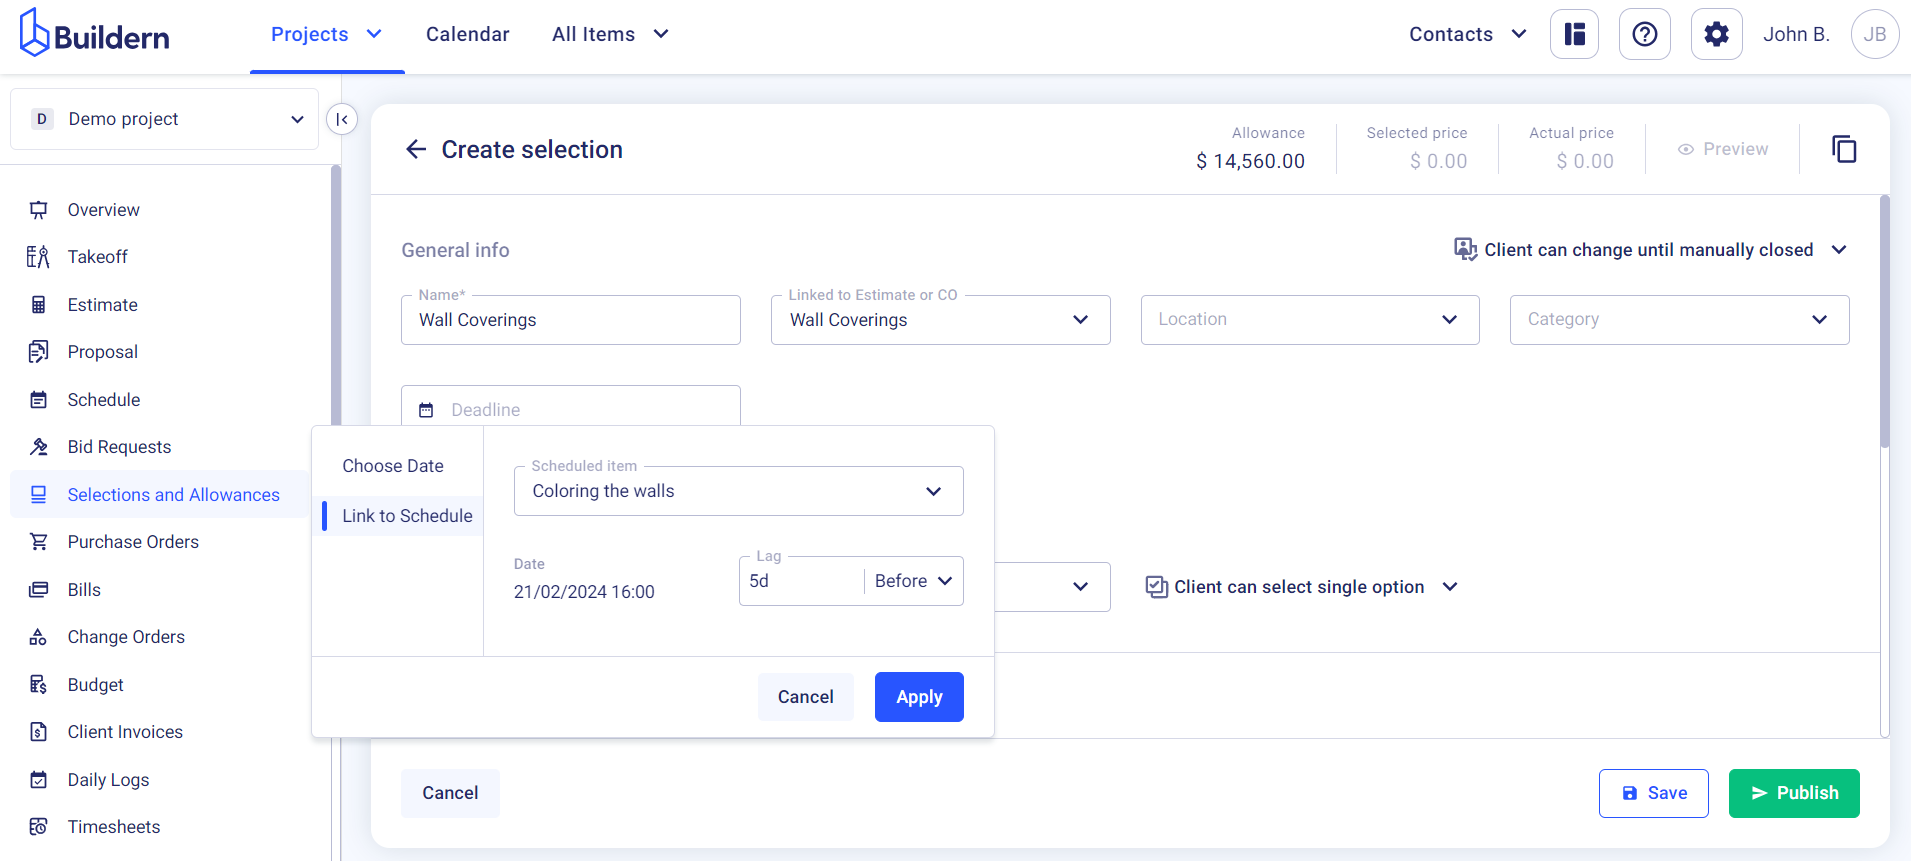
Specify the lag, which determines the number of days or hours before or after the scheduled item that the client needs to make their final choice.
Save your settings to apply the deadline to the selection process.
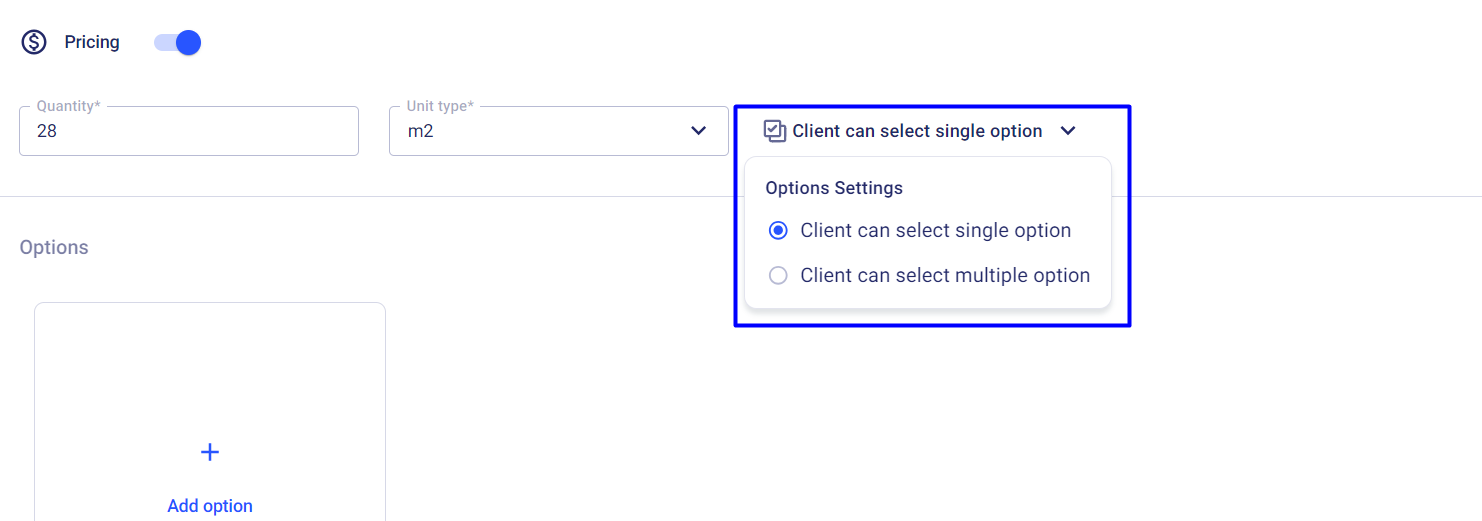
Step 3. Add selection options
Before adding selection items, you can configure the settings and decide whether your clients can choose only one or multiple items.
Now the most important part.
Add selection items either manually or from the price list catalog of preadded items.
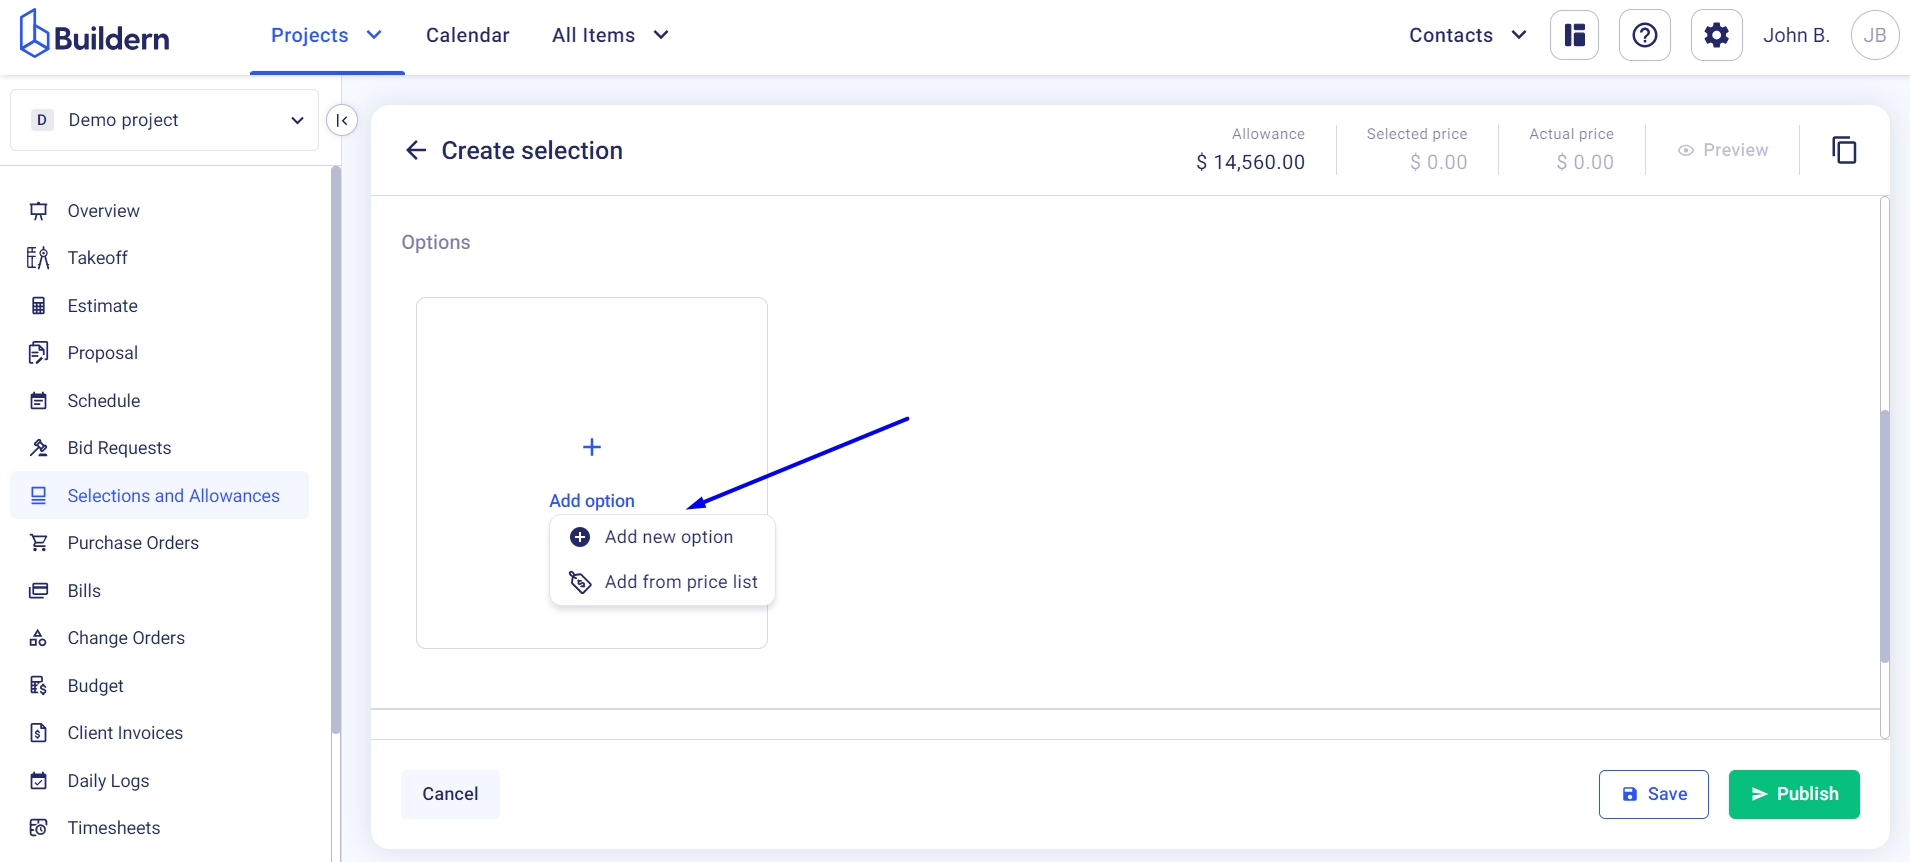
Whichever option you choose, consider adding detailed information about each selection to help your client make the right choice.
Suppose you want to add a new option.
Fill in all the essential data in the allocated fields.
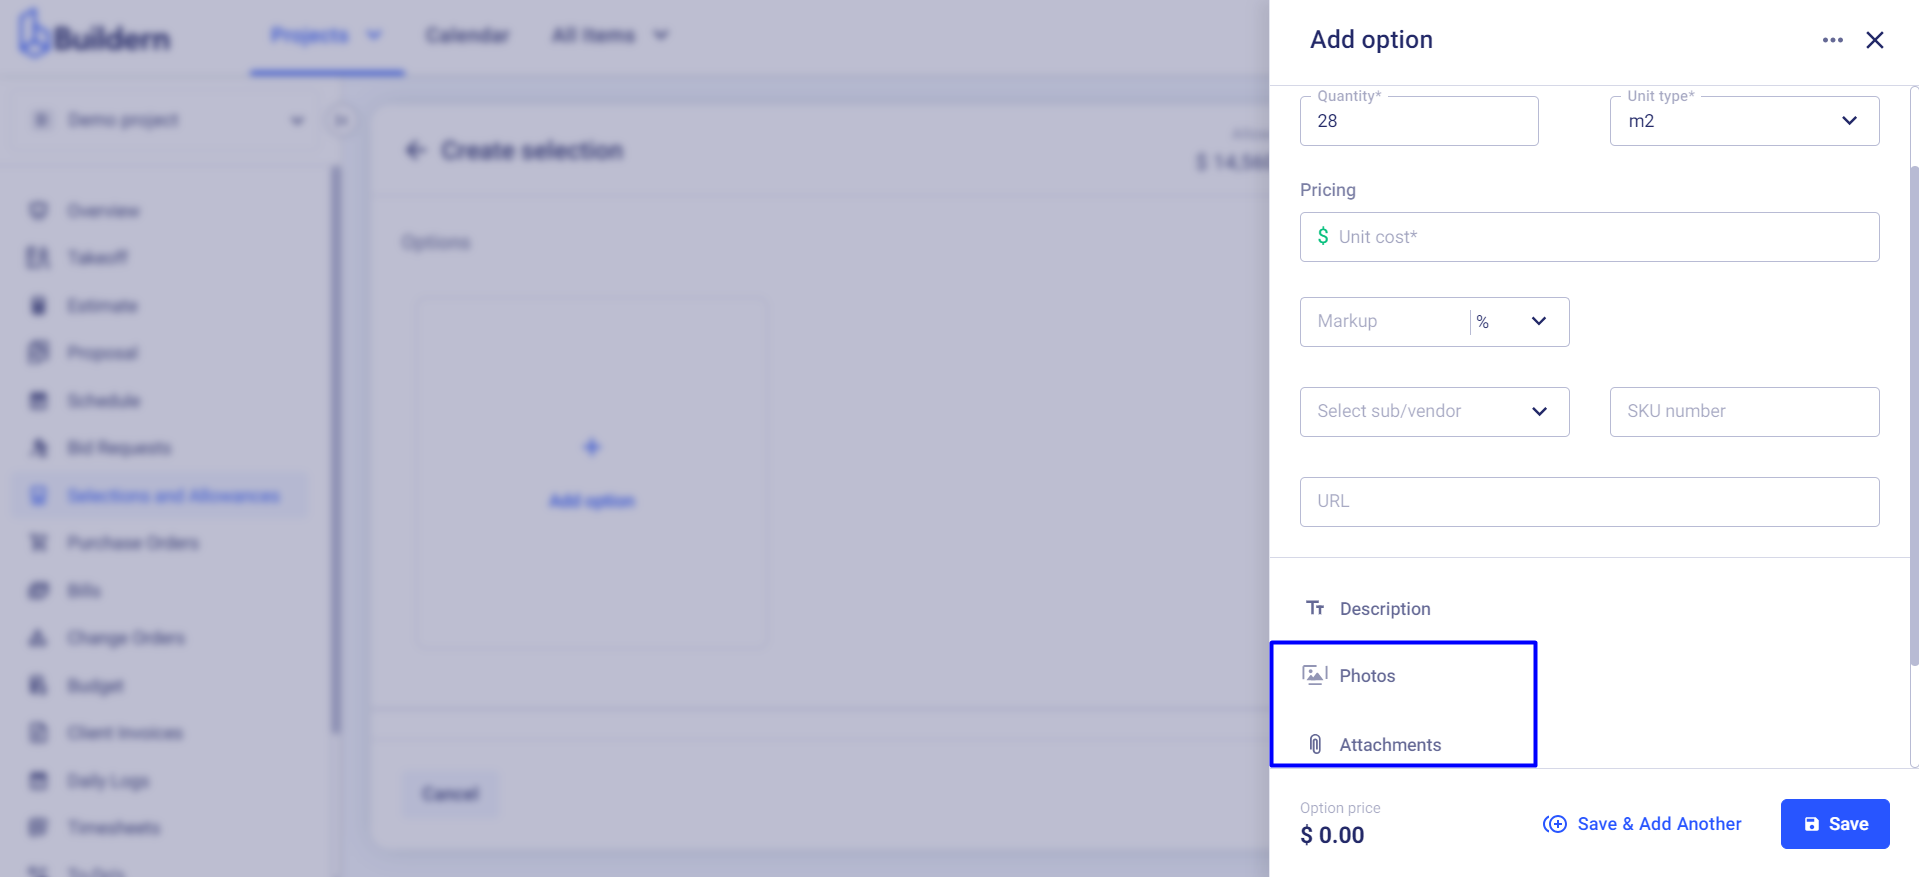
Don’t forget to add photos or attachments, so your clients know what they are choosing.
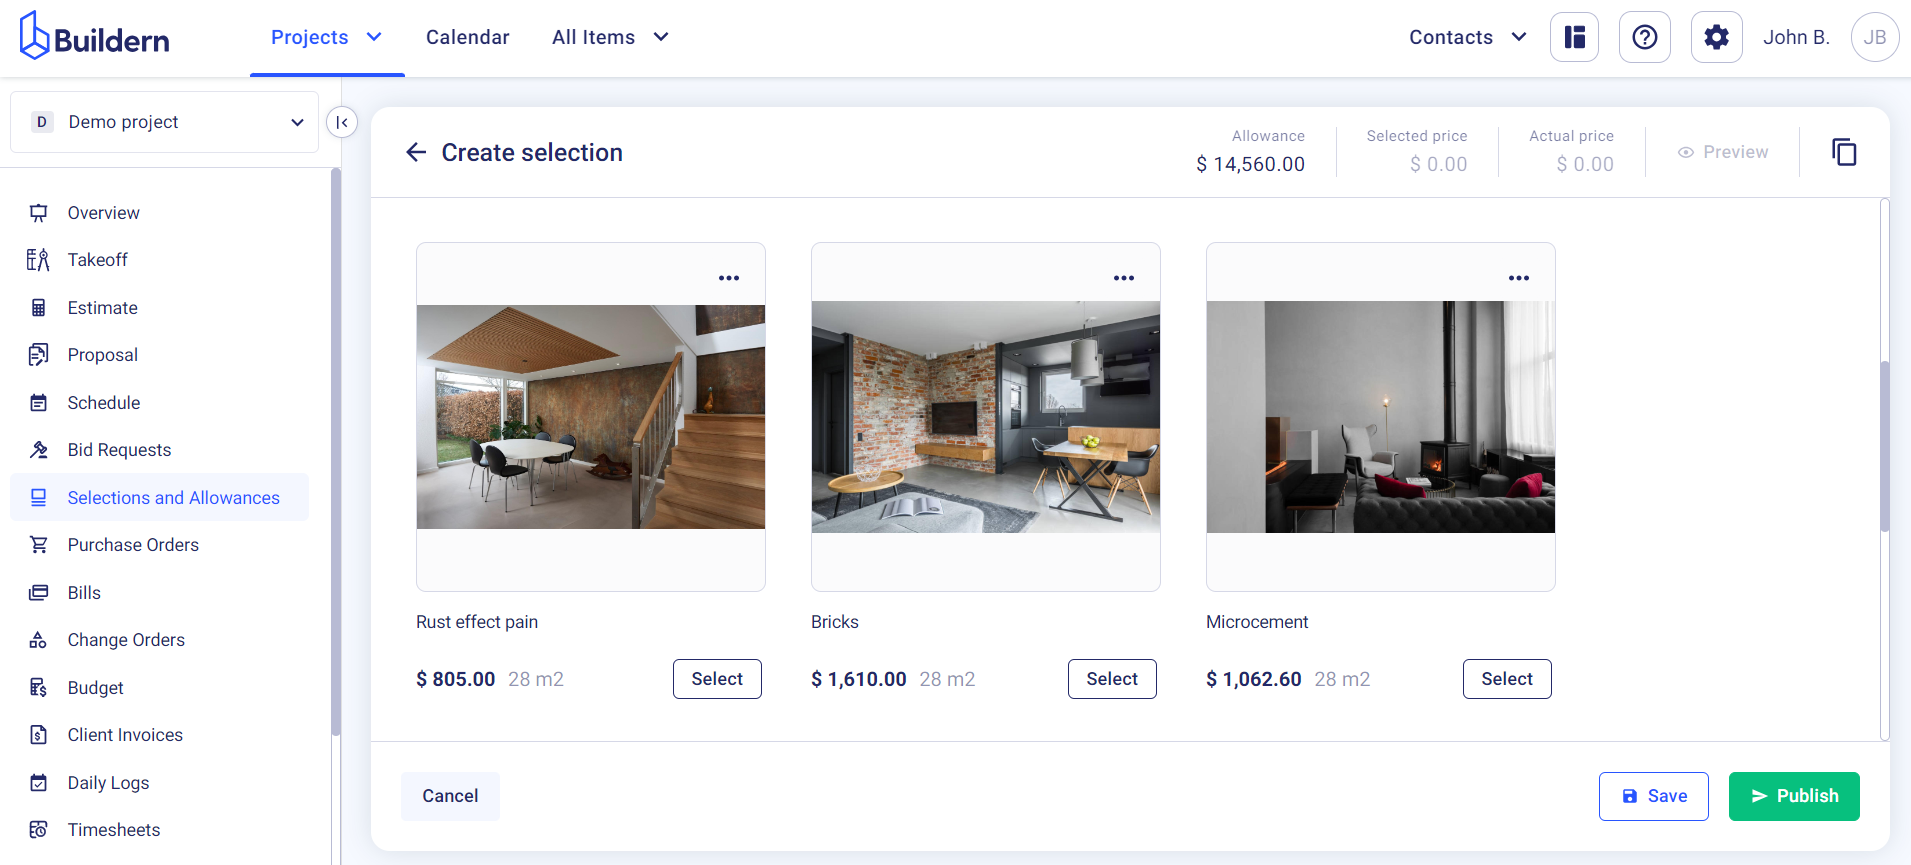
Now, if you Save the selection it will appear in your Selections and Allowances library with the Draft status. If you click the Publish button, the selection will be sent directly to your client.
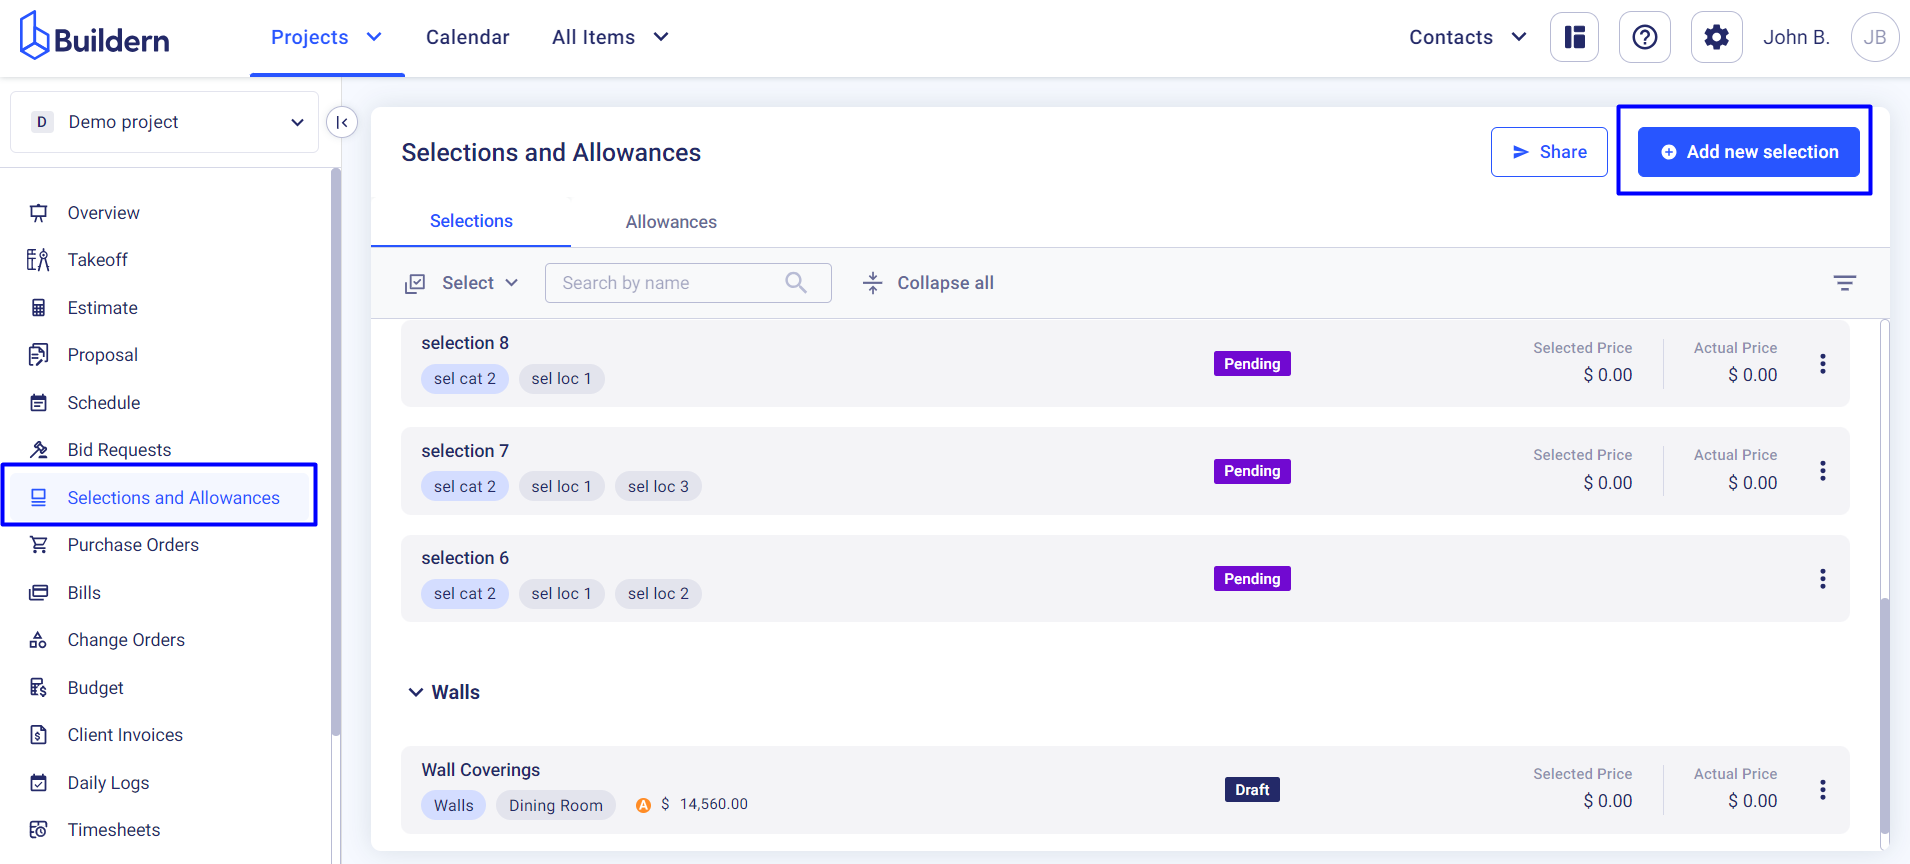
How to Create a Selection from the Selections and Allowances Module?
Another way of creating a selection is heading to the Selections and Allowances module and clicking the Add new selection button.
A new window will open, where you will need to link the selection to a particular estimate or change order item and then add information about it as with the previous option.
Once done, save or publish the selection and you are ready to go.
💡Recommended Reading
How to Add Selection Options With and Without Price?